Snowflake actions setup
The Snowflake action pack contains the following actions:
- Search Snowflake with SQL
- Search Snowflake with Cortex
- Snowflake Cortex agent
Snowflake can be configured for both Glean Agents and Glean Assistant. For Assistant-specific setup and usage, see:
Setup instructions
Use the following instructions for Snowflake action pack setup, including OAuth configuration and permissions.
Update Snowflake network policy
If your Snowflake instance has network policies configured, you will need to update them to allow connections from Glean. Without this configuration, the actions will not work.
If your Snowflake instance uses network policies, you must add Glean to your allowlist to prevent connection failures. Contact your Glean representative to get the required IP addresses.
Set up a role to use
Use least-privilege access when you configure the role.
You can restrict Glean to specific datasets, semantic views, or Cortex Agents by granting access only to those resources and the underlying objects they require.
Use the Snowflake role that matches your rollout. You can restrict Glean to specific datasets, semantic views, or Cortex Agents by granting access only to those resources. If a Cortex Agent depends on additional semantic views, tables, stored procedures, or UDFs, grant only the minimum supporting access that agent needs.
You have three configuration options:
Option 1: Create a new Snowflake role with read-only access
A role is basically a group that grants specific permissions on certain resources. You may grant a role to a user or to another role (nested roles).
First, we will create a new role called GLEAN_QUERY_SNOWFLAKE_ROLE. To do this, run the following queries with the ACCOUNTADMIN role or any role that can create roles and grant access to resources such as tables and Cortex:
CREATE ROLE IF NOT EXISTS GLEAN_QUERY_SNOWFLAKE_ROLE;
Then, Glean will grant permissions to the required tables and access to Cortex. Here are some templated commands that you can use:
-- Grant usage to a database
GRANT USAGE ON DATABASE <SET_DATABASE_NAME> TO ROLE GLEAN_QUERY_SNOWFLAKE_ROLE;

-- Grant usage to a schema
GRANT USAGE ON SCHEMA <SET_DATABASE_NAME>.<SET_SCHEMA_NAME> TO ROLE GLEAN_QUERY_SNOWFLAKE_ROLE;

-- Grant read access for a table
GRANT SELECT ON TABLE <SET_DATABASE_NAME>.<SET_SCHEMA_NAME>.<SET_TABLE_NAME> to ROLE GLEAN_QUERY_SNOWFLAKE_ROLE;

-- Grant read access for all tables in a schema
GRANT SELECT ON ALL TABLES IN SCHEMA <SET_DATABASE_NAME>.<SET_SCHEMA_NAME> TO ROLE GLEAN_QUERY_SNOWFLAKE_ROLE;

-- Grant access to Cortex.
GRANT DATABASE ROLE SNOWFLAKE.CORTEX_USER TO ROLE GLEAN_QUERY_SNOWFLAKE_ROLE;

-- (Cortex Agent only) Grant the Cortex Agent user role.
GRANT DATABASE ROLE SNOWFLAKE.CORTEX_AGENT_USER TO ROLE GLEAN_QUERY_SNOWFLAKE_ROLE;

-- (Cortex Agent only) Grant usage on the database, schema, and agent object.
GRANT USAGE ON DATABASE <AGENT_DATABASE> TO ROLE GLEAN_QUERY_SNOWFLAKE_ROLE;
GRANT USAGE ON SCHEMA <AGENT_DATABASE>.<AGENT_SCHEMA> TO ROLE GLEAN_QUERY_SNOWFLAKE_ROLE;
GRANT USAGE ON CORTEX AGENT <AGENT_DATABASE>.<AGENT_SCHEMA>.<AGENT_NAME> TO ROLE GLEAN_QUERY_SNOWFLAKE_ROLE;
Grant the role to specific users or roles:
-- Grant role access to a user.
GRANT ROLE GLEAN_QUERY_SNOWFLAKE_ROLE TO USER <SET_USER_NAME>;

-- Grant role access to another role. This will apply to all users who have the role.
GRANT ROLE GLEAN_QUERY_SNOWFLAKE_ROLE TO ROLE <SET_ROLE_NAME>;
You should also be able to revoke the roles you just granted. See Snowflake documentation.
Option 2: Use an existing Snowflake role with read-only access
You can also use an existing role in the Scopes field when setting up your Action Pack. The action would use the access that the specified role has on your Snowflake instance. For example, your Scopes field could look like:
refresh_token,session:role:GLEAN_YOUR_EXISTING_ROLE
Option 3: Use default user primary role
To use the default primary Snowflake role assigned to the authenticated user, set the Scopes field to just refresh_token.
Create a Snowflake OAuth application
Use the CREATE SECURITY INTEGRATION command to create the OAuth application. Use the ACCOUNTADMIN or any role that has permission to create a security integration:
-- Create the OAuth application
CREATE SECURITY INTEGRATION GLEAN_QUERY_SNOWFLAKE_INTEGRATION
  TYPE = OAUTH
  ENABLED = TRUE
  OAUTH_CLIENT = CUSTOM
  OAUTH_CLIENT_TYPE = CONFIDENTIAL
  OAUTH_REDIRECT_URI = '<copy from Glean Snowflake actions setup page>' -- Copy the callback/redirect URL from the Glean Snowflake actions setup page
  OAUTH_ISSUE_REFRESH_TOKENS = TRUE;

-- Retrieve the client credentials and secret, use this to create the action pack in the next step.
SELECT SYSTEM$SHOW_OAUTH_CLIENT_SECRETS('GLEAN_QUERY_SNOWFLAKE_INTEGRATION');
Using secondary roles: If you want users to also leverage their default secondary roles, you can configure the security integration with OAUTH_USE_SECONDARY_ROLES = IMPLICIT during setup. This allows the action to utilize multiple roles that have been granted to the user.
Create Snowflake action pack
We will now set up the Snowflake action pack:
- Open Glean Settings page
- Go to Platforms > Actions
- Click on Add button for creating a new action
- Click on the Snowflake Actions box
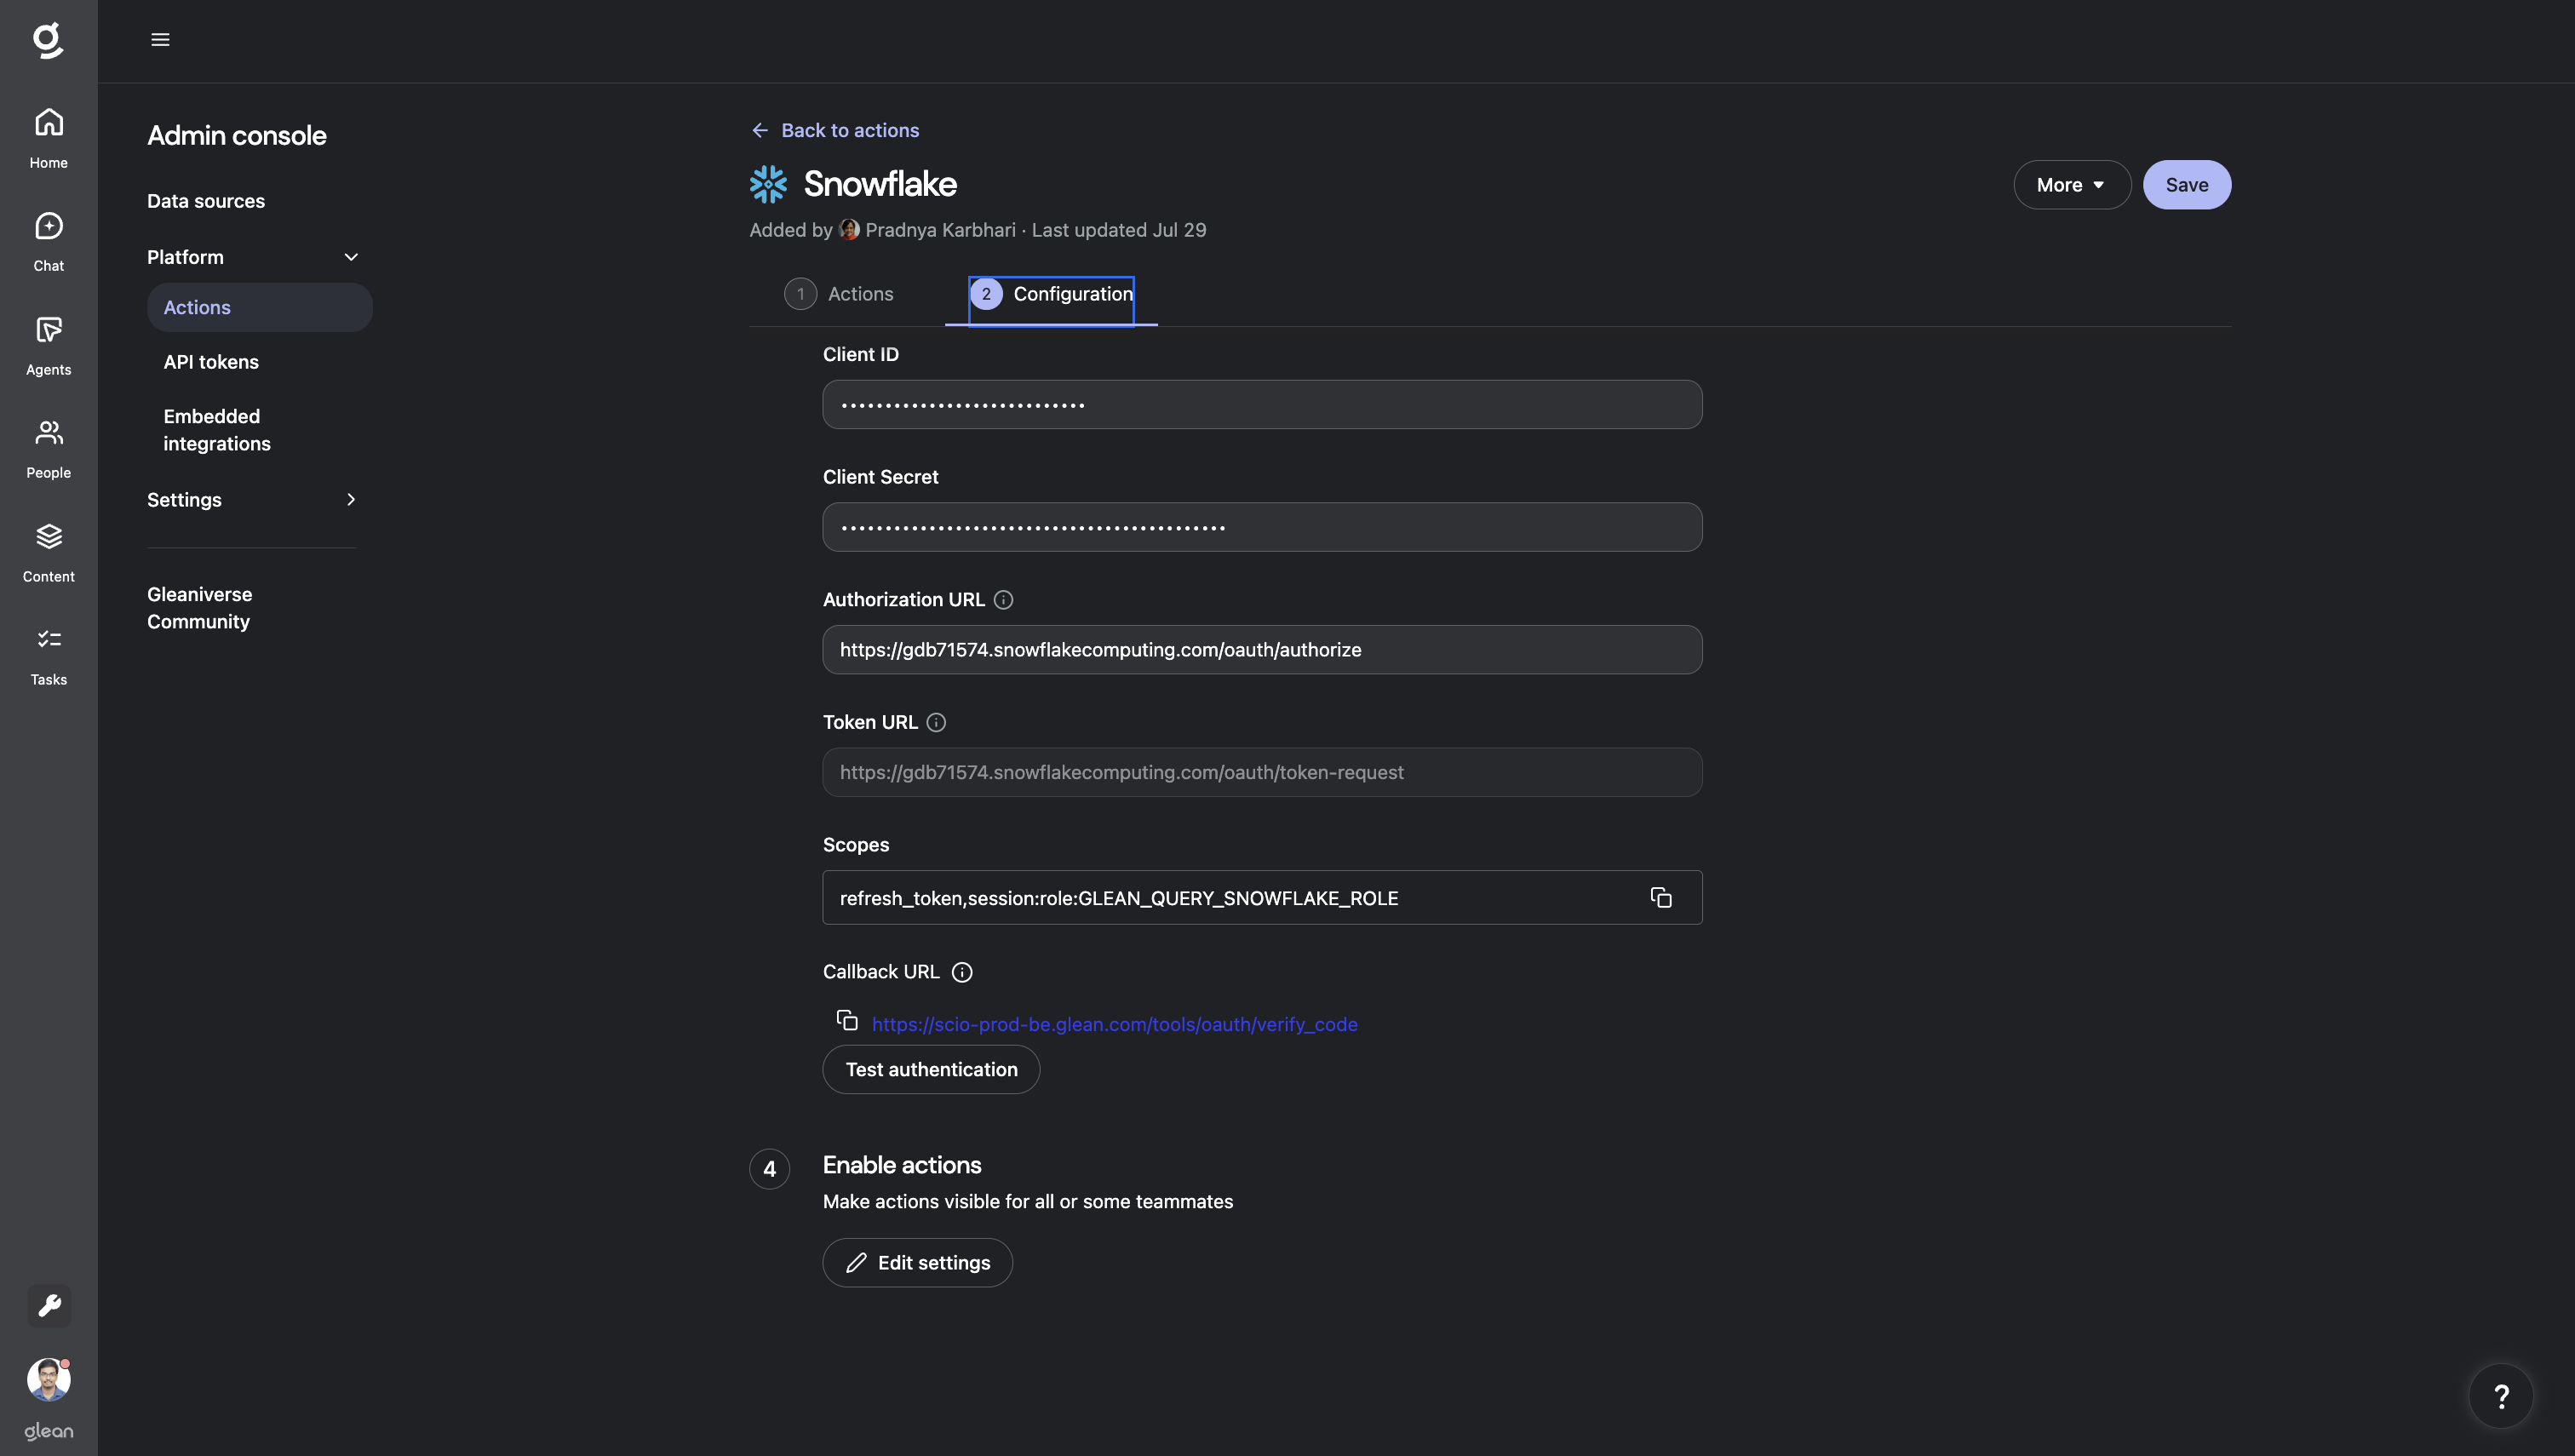
- Populate the Configuration section
-
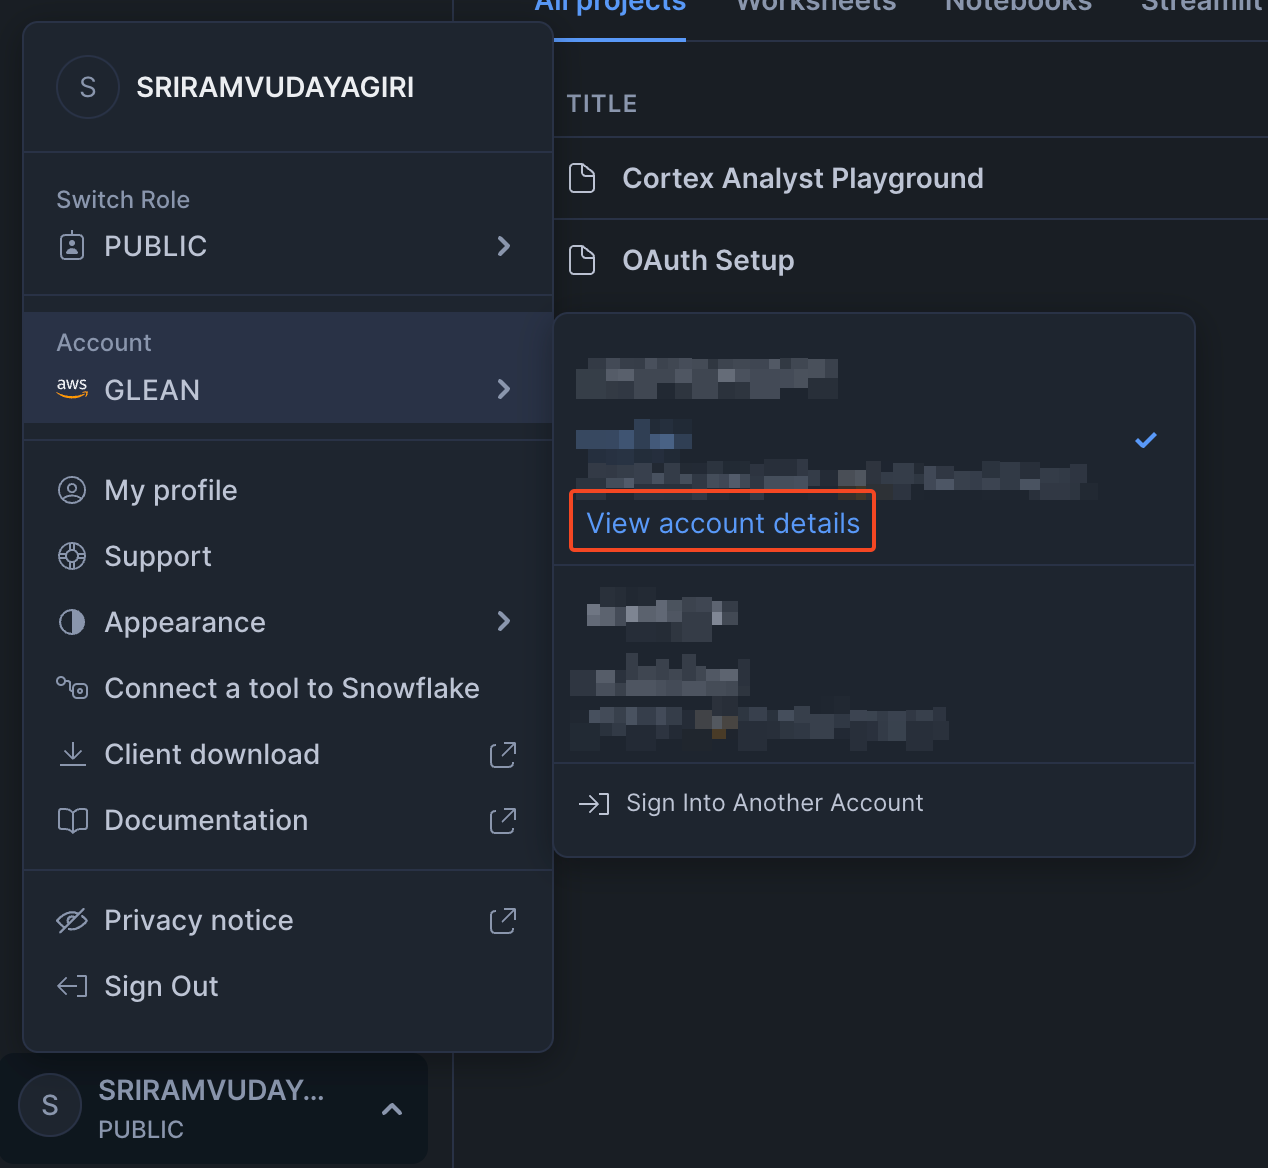
Set the account identifier field in the configuration. You may set it to the account identifier or account locator. This information can be found by navigating to the account details:
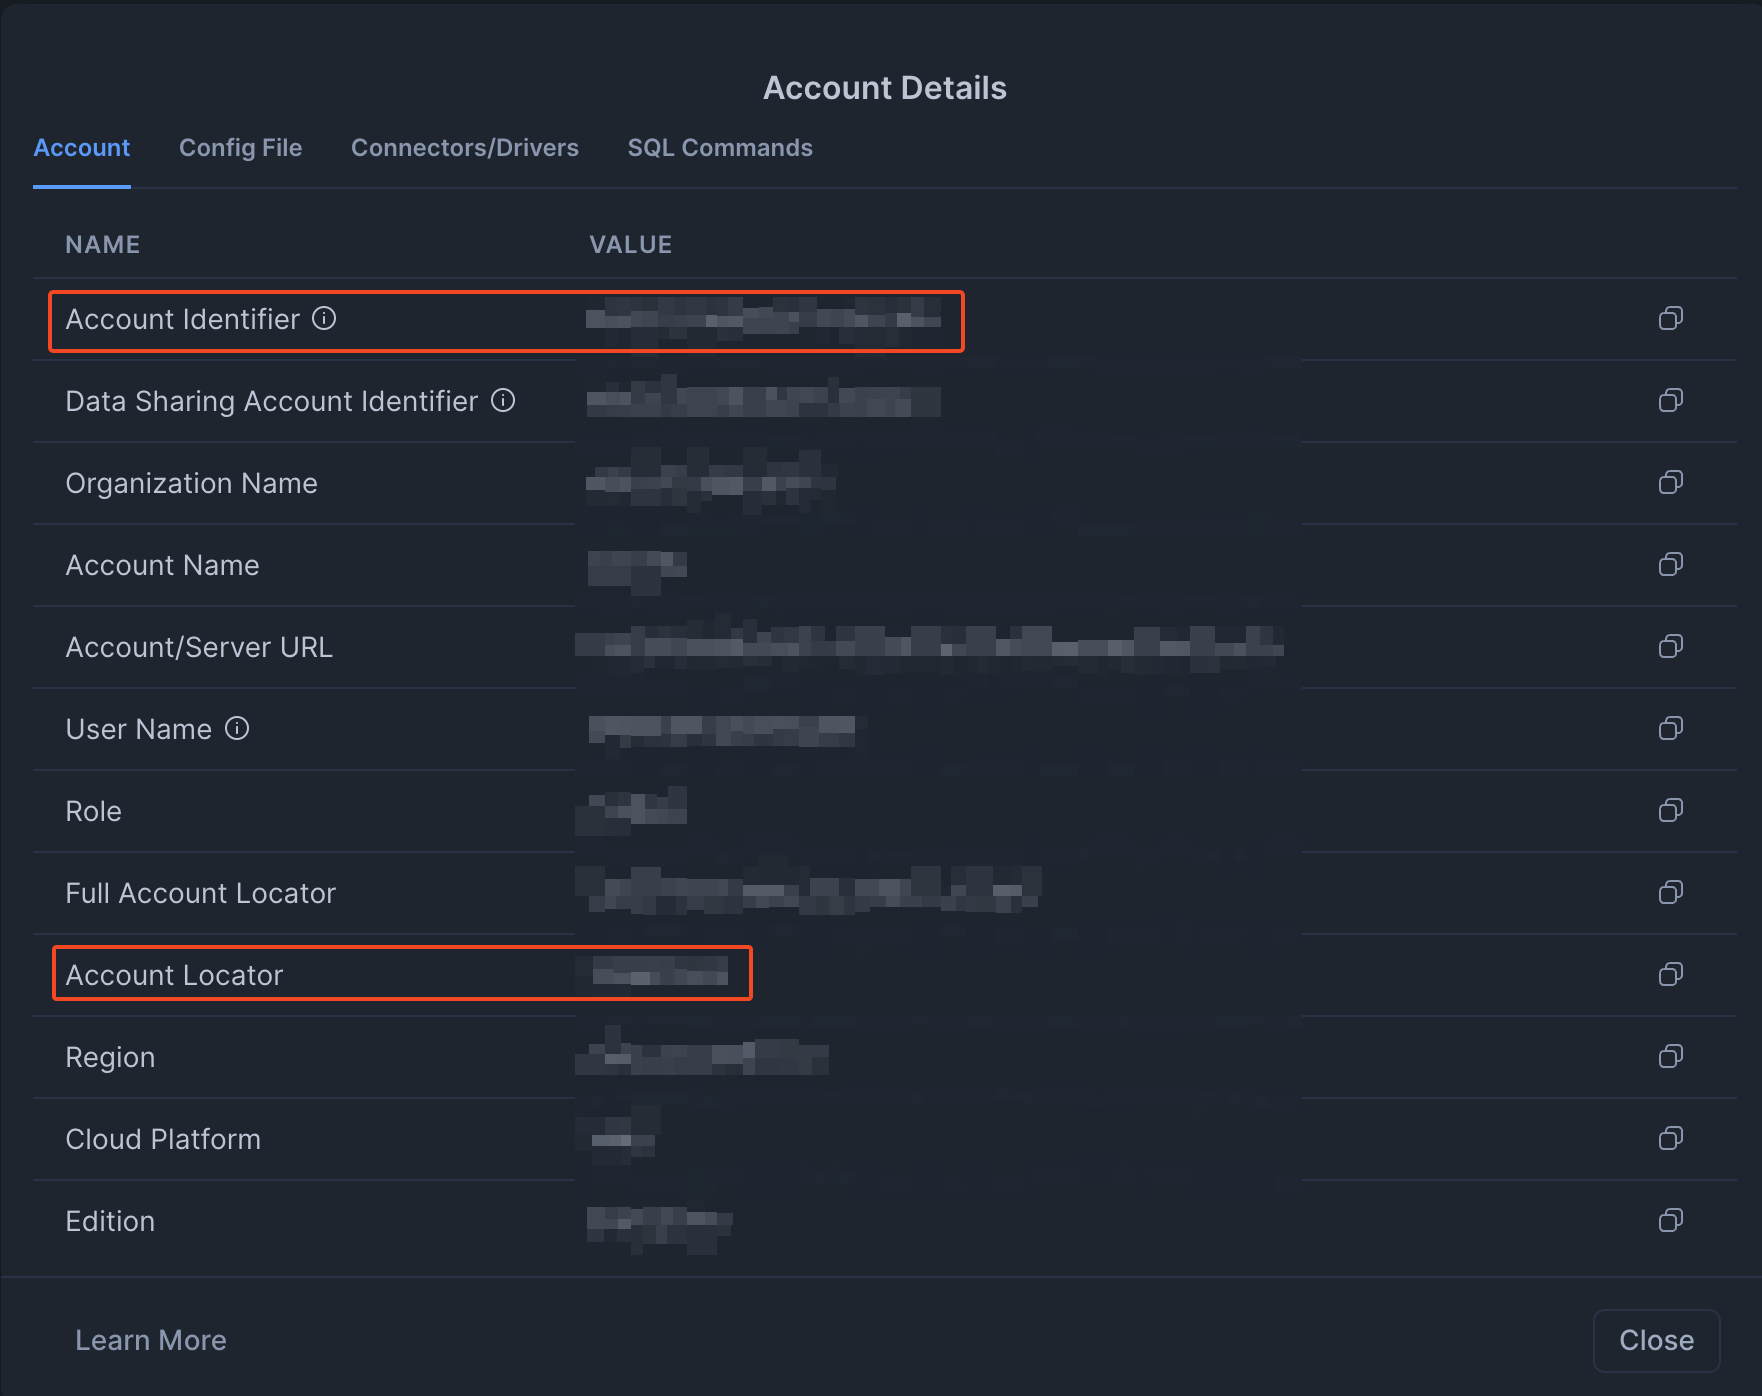
The accountIdentifier is the part before
.snowflakecomputing.comin your Snowflake URL. For example, if your URL ishttps://abc12345.us-east-1.snowflakecomputing.com, the account identifier isabc12345.us-east-1. -
For the Authorization url and Token url, run the following command in Snowflake to retrieve these values:
DESC SECURITY INTEGRATION REPLACE_WITH_YOUR_OAUTH_SECURITY_INTEGRATION_NAME;Look for the
OAUTH_AUTHORIZATION_ENDPOINTandOAUTH_TOKEN_ENDPOINTfields in the response: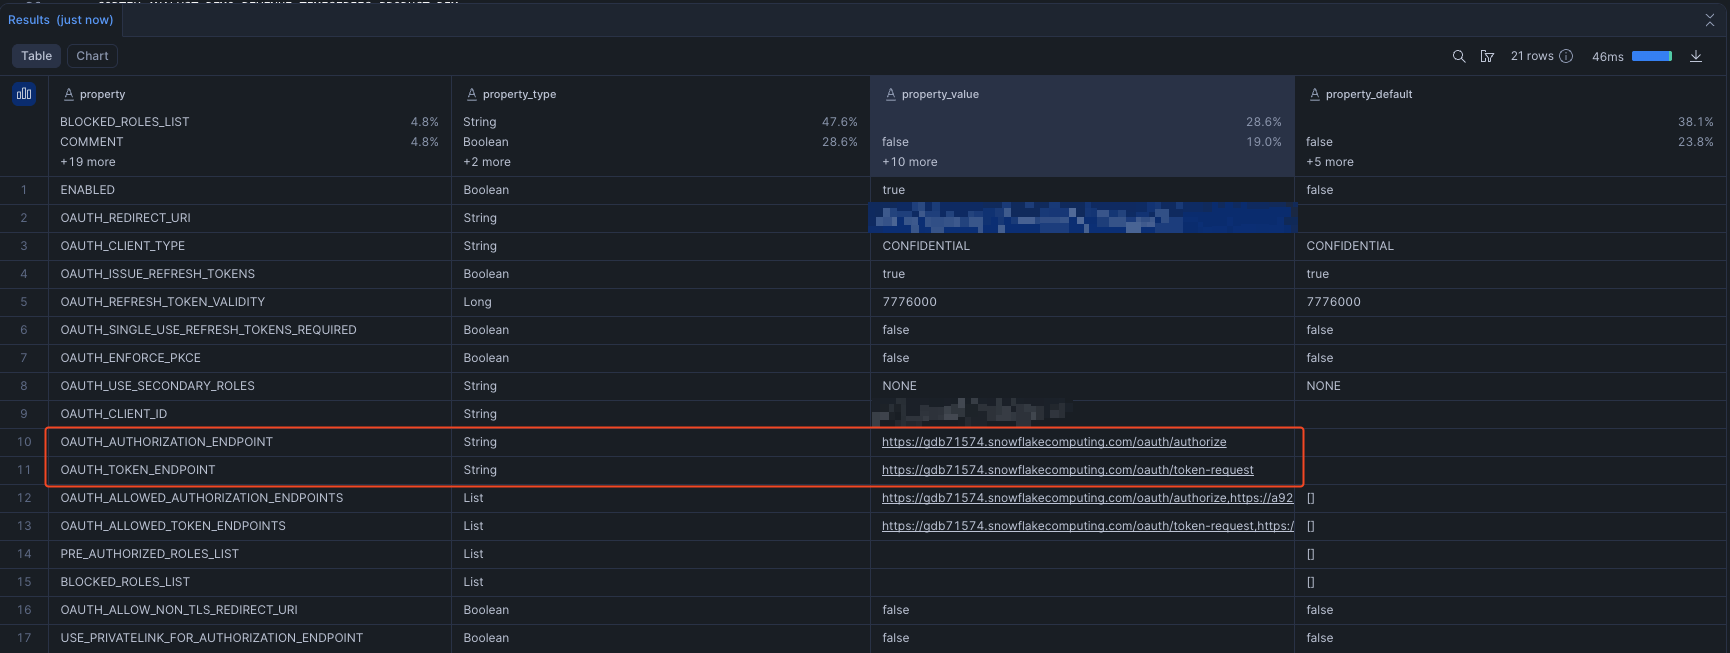
-
Set the OAuth client id and client secret obtained from the previous step.
-
- Save the action.
Setup is now complete. Refer to the end user documentation on how to test this action pack in the agent builder.