Set up Intercom service credential
An Intercom service credential connects Glean to Intercom's hosted MCP server (conversations, contacts, companies, teammates, and Help Center articles) with a single workspace Access Token instead of per-user OAuth. Use it when an agent should act under a shared, non-human identity rather than an individual person's login. Only agent builders can attach it.
Glean adds the Access Token to outbound requests to the Intercom MCP server, so the agent never sees the raw token.
- Authentication: Intercom workspace Access Token (Bearer)
- Scope: Workspace-wide, governed entirely by the app's scopes
- Access: Read and write (governed by the scopes you configure)
An Intercom Access Token is workspace-wide and its data access is governed entirely by the app's scopes — it is not scoped to a teammate's inbox or team the way a human seat is. There is no "add the app to this inbox" step. If you want an agent to read a conversation, you grant the Read conversations scope on the app, and the token can then read any conversation in the workspace.
The trade-off: this token sees everything its scopes allow, workspace-wide. Treat it like a workspace-level credential and grant the fewest scopes your agents need.
Prerequisites
Complete the following prerequisites:
- Have an Intercom workspace with admin access (a workspace admin or IT).
- Have access to the Intercom Developer Hub.
- Work with a Glean administrator who can create service credentials.
- Enable the Intercom MCP (Service Account) template for your deployment. If you don't see it in the MCP server catalog, contact your Glean representative.
Intercom's MCP server is US-hosted workspaces only. EU/AU-region workspaces must use the REST API instead.
Create a private (internal) app
- Sign in to Intercom as a workspace admin and open the Developer Hub → Your apps → New app.
- Give it a clear name (for example, "Glean"), select the workspace the agents should act on, and create it.
This is an internal app for your own workspace — not the OAuth flow used by public apps.
Set the app's scopes
Scopes are how you control what the agent can reach. Open the app → Configure → Authentication and review its scopes.
Intercom auto-grants a read baseline that cannot be deselected:
- Read and list users and companies — contacts/companies
- Read conversations — conversations and conversation parts
- Read admins — teammates (for example, resolving an admin ID to a name)
- Gather App data
For a read-only support or insights agent, that baseline is already enough — you don't need to add anything.
Add scopes only if your agents must take actions or read extra objects (least privilege — every scope applies workspace-wide):
- Write conversations — reply to, snooze, assign, and close conversations. Add this only if the agent should act on conversations, not just read them.
- Read and write users / Write users and companies — create/update contacts and companies.
- Read tags / Write tags — read or manage tags.
- Read events / Write events — read or submit user events.
- Read Tickets — include tickets (optional; the tools skip tickets if not granted).
Select Save. Scopes take effect immediately for the workspace Access Token.
Copy the workspace Access Token
Still under Configure → Authentication (also shown on Test & Publish → Your Workspaces), copy the Access Token.
Store it securely. Intercom Access Tokens don't expire on a schedule and there is no refresh token — the token stays valid until the app is uninstalled or the token is regenerated. Rotate it by regenerating it here if it's ever exposed.
Create the service credential in Glean
- In Glean, go to Admin console → Tools → Add → Vendor Provided Tools (via MCP).
- Search for Intercom MCP (Service Account).
- Enter a short Label, such as
engineering,staging, orproduction, to distinguish this server if you add multiple Intercom service accounts. - Paste the workspace Access Token into the API key field.
- Select Save.
After the tools sync, enable the Intercom tools for the intended agents.
Attach the credential to an agent
-
Go to Agents in Glean.
-
Select the agent to which you want to add the service credentials.
-
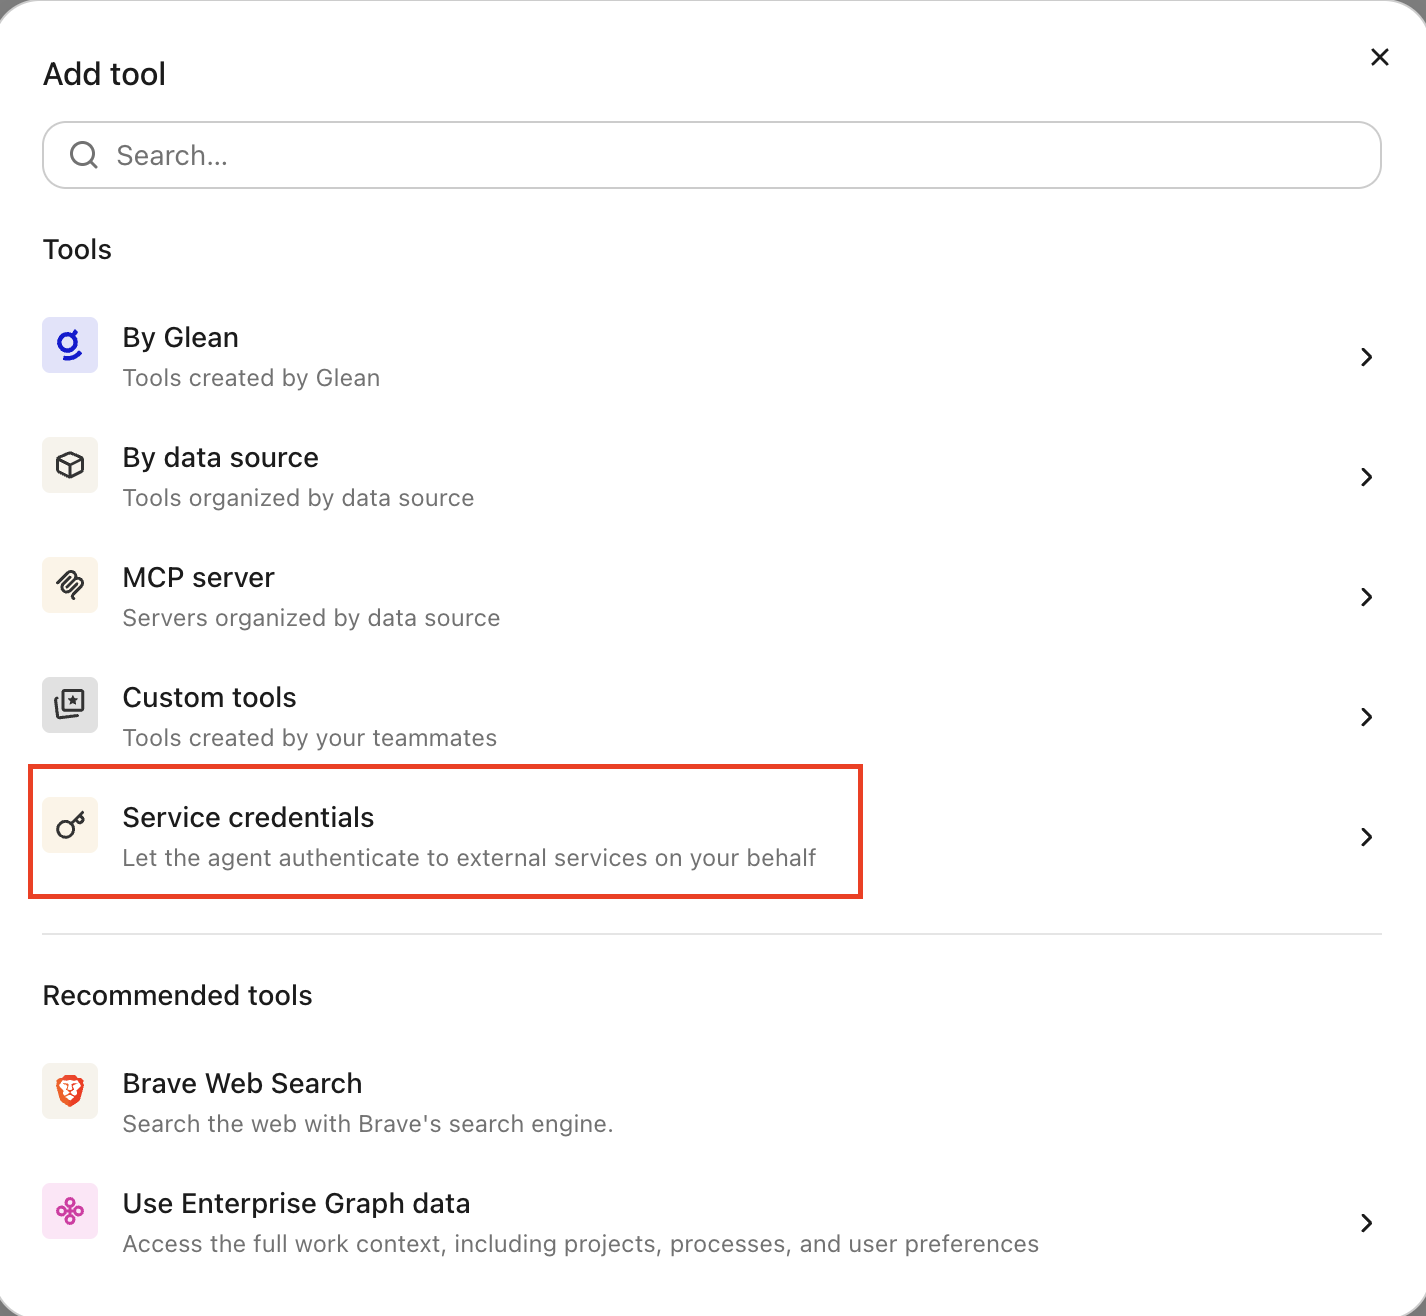
In the Tools tab, select Service credentials and select the Intercom service credential you created.
Verify it works
Ask an agent (or use the tool tester) to fetch a known conversation by ID. If it returns the conversation, read access is working. A 403 or permission error means the app is missing the scope for that object (Set the app's scopes).
What the agent can do
With an Intercom credential attached, the agent can interact with Intercom:
- List and search conversations
- View conversation details and messages
- Reply to, snooze, assign, and close conversations (if Write conversations scope is granted)
- Create, update, and search contacts and companies
- Read and search Help Center articles
- Read and search tickets (if Read Tickets scope is granted)
All actions are performed under the service account identity, not the user who invoked the agent.
Security and operational notes
- Token-based auth: Glean stores the Access Token in the credential broker and injects it as a Bearer header into outbound requests. The agent runtime never receives the raw token.
- Workspace-wide scope: the token sees everything its scopes allow across the entire workspace. Grant the fewest scopes your agents need.
- No scheduled expiry: Intercom Access Tokens don't expire on a schedule. Rotate by regenerating the token in the Developer Hub if it's ever exposed.
- Attributed actions: all Intercom activity is performed under the app's identity, making it easy to audit agent behavior.
- Revocation: to cut off access, uninstall the app in Intercom or remove the Intercom service credential in Glean.