Databricks Tools Setup
The Databricks tools contain the following tools:
With this setup, you can:
Databricks tools can be used in both agents and Glean Assistant. See Connect Databricks Genie to Glean Assistant for setup instructions.
Tools setup instructions
Prerequisites
Before enabling Databricks actions, ensure:
How to Set up Databricks Tools
- Open Glean Settings page
- Go to Platforms → Tools
- Click on Add button for creating a new tool
- Click on the Databricks Tools box
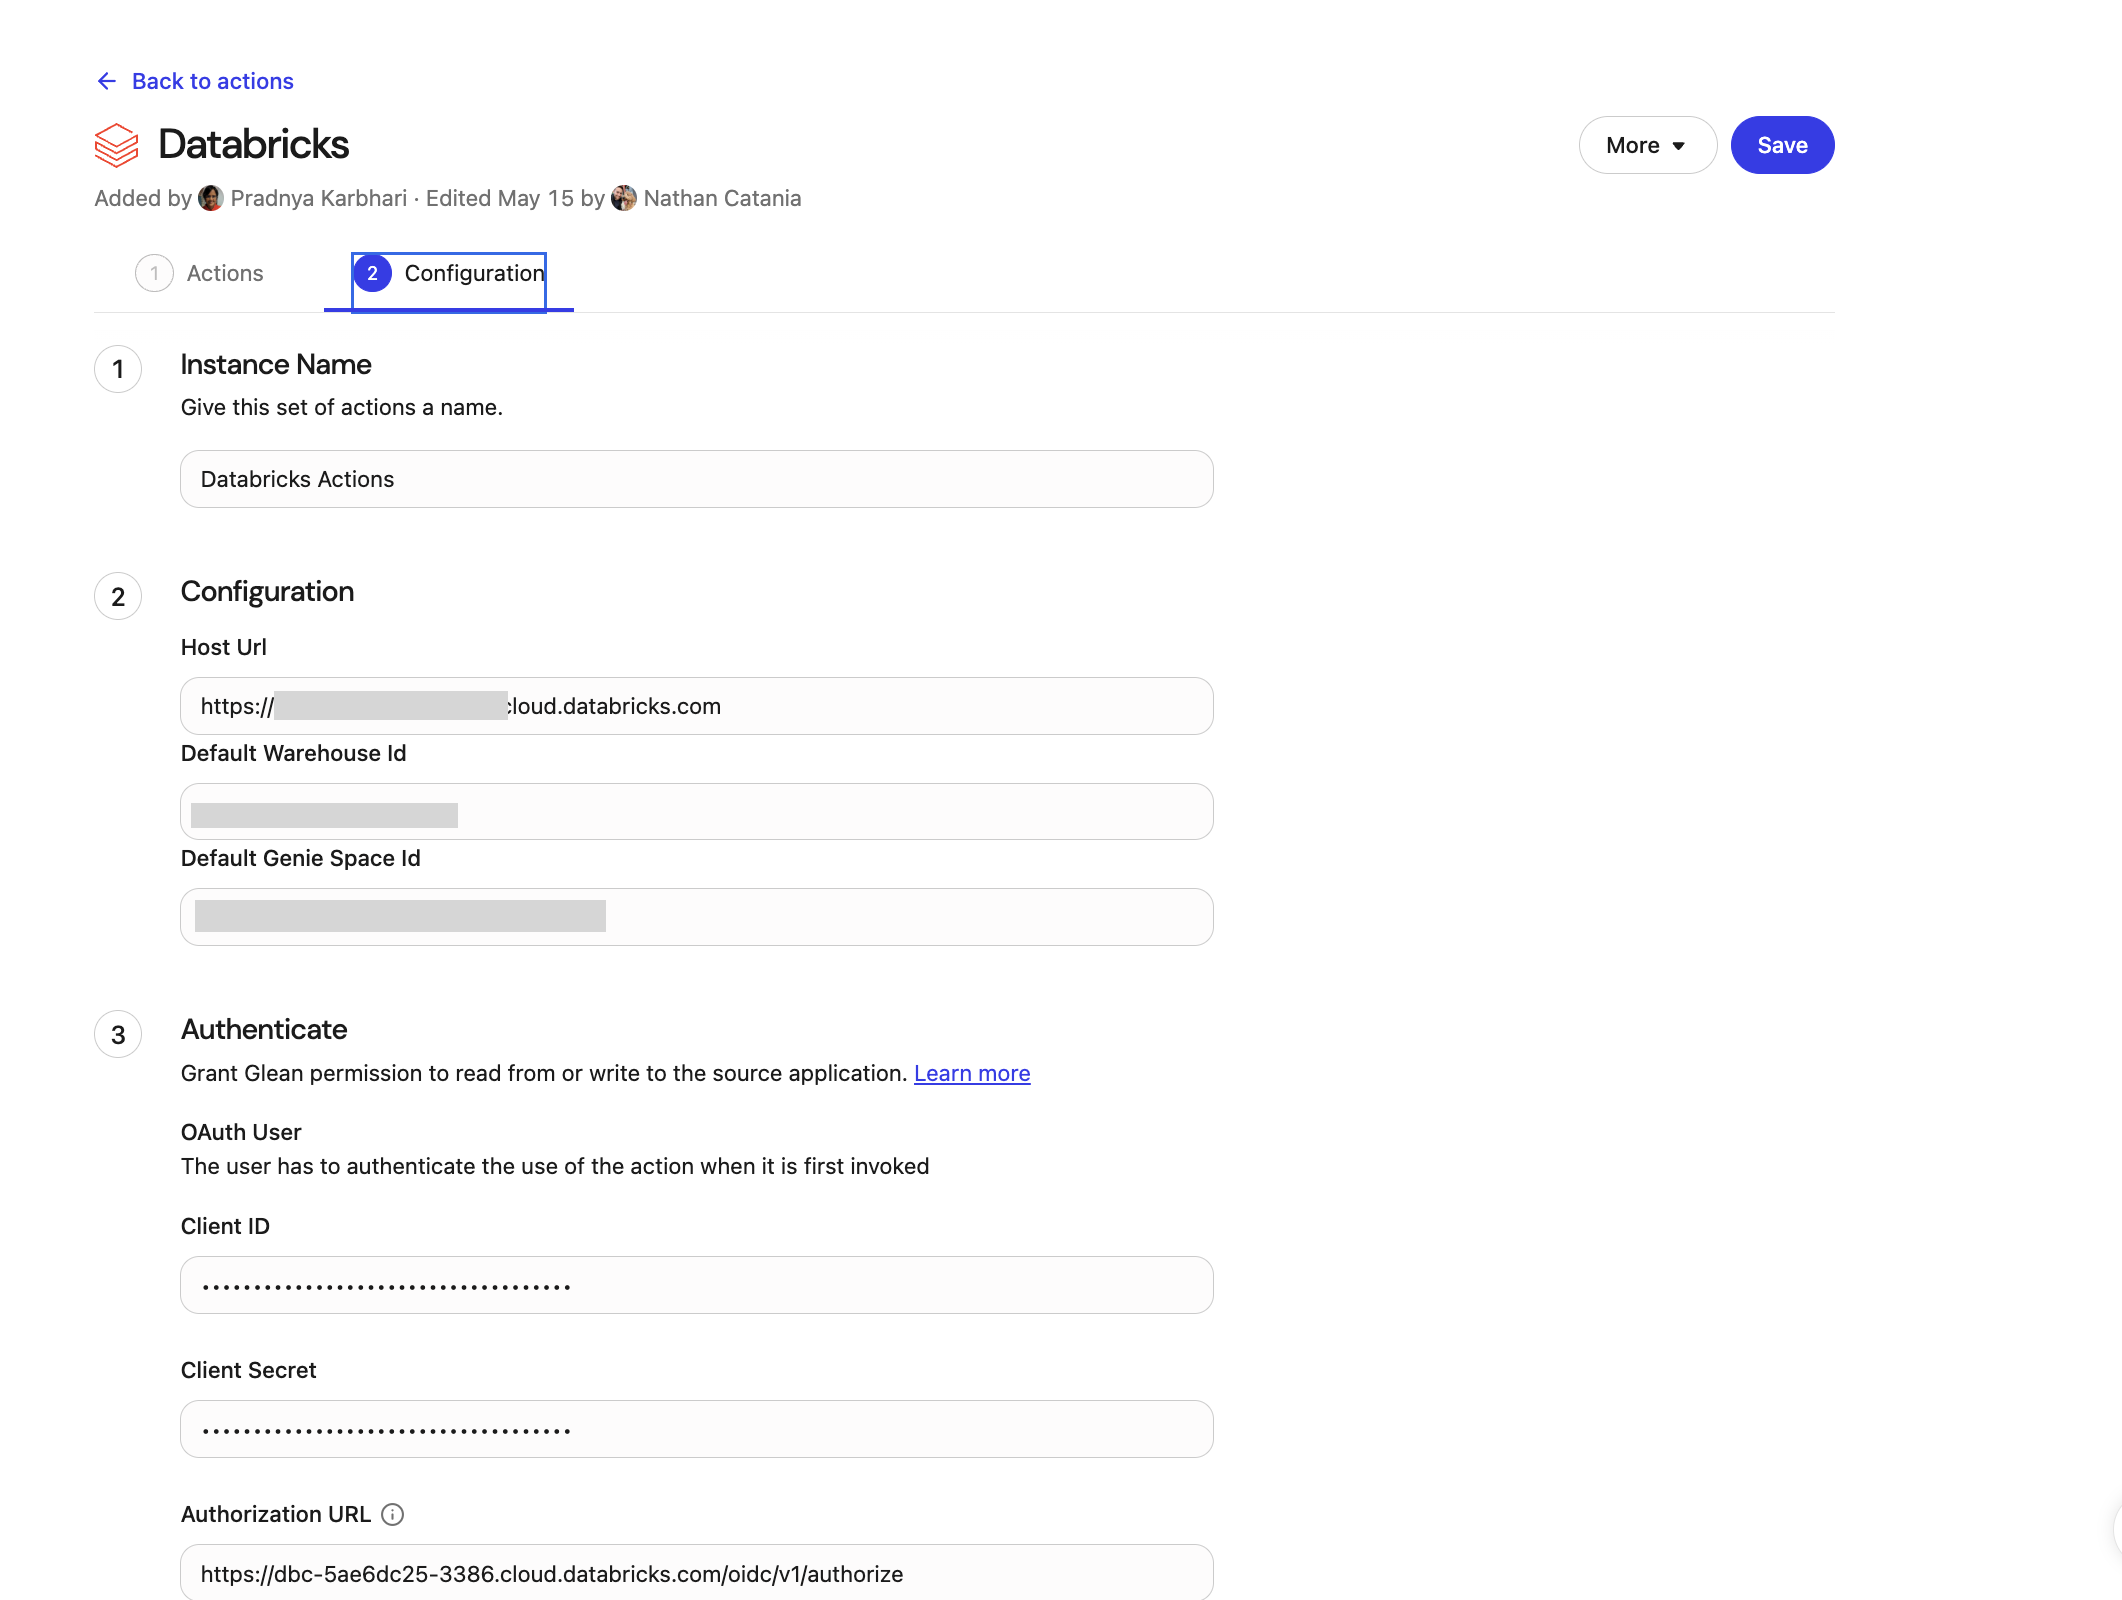
- Populate the Configuration section
- In the Default Genie Space Id text box, add the Databricks Genie space id.
Note: To get the Genie Space Id- when you have the Genie Space open in the Databricks UI, you can get the Genie Space Id from the URL.https://<databricks-instance-id>.cloud.databricks.com/genie?rooms/<genie-space-id>/o=<anothernumber> - In the Default Warehouse Id text box, add the default Databricks Warehouse Id to be used for the tool.
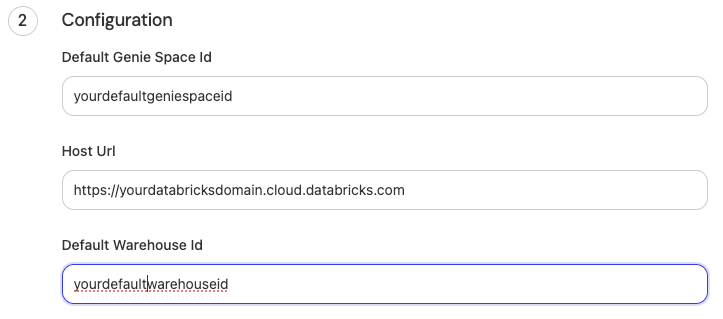
- In the Host Url text box, add the full Databricks Genie host url in the following format. Replace the databricks-instance-id with the correct ID for your Databricks instance.
- In the Default Genie Space Id text box, add the Databricks Genie space id.
- AWS:
https://<databricks-instance-id>.cloud.databricks.com/ - GCP:
https://<databricks-instance-id>.gcp.databricks.com/ - Azure:
https://adb-<databricks-instance-id>.<number>.azuredatabricks.net/
If you are using Genie, get the Genie Space ID from the Databricks UI URL. For example: https://<databricks-instance-id>.cloud.databricks.com/genie?rooms/<genie-space-id>/o=<anothernumber>.
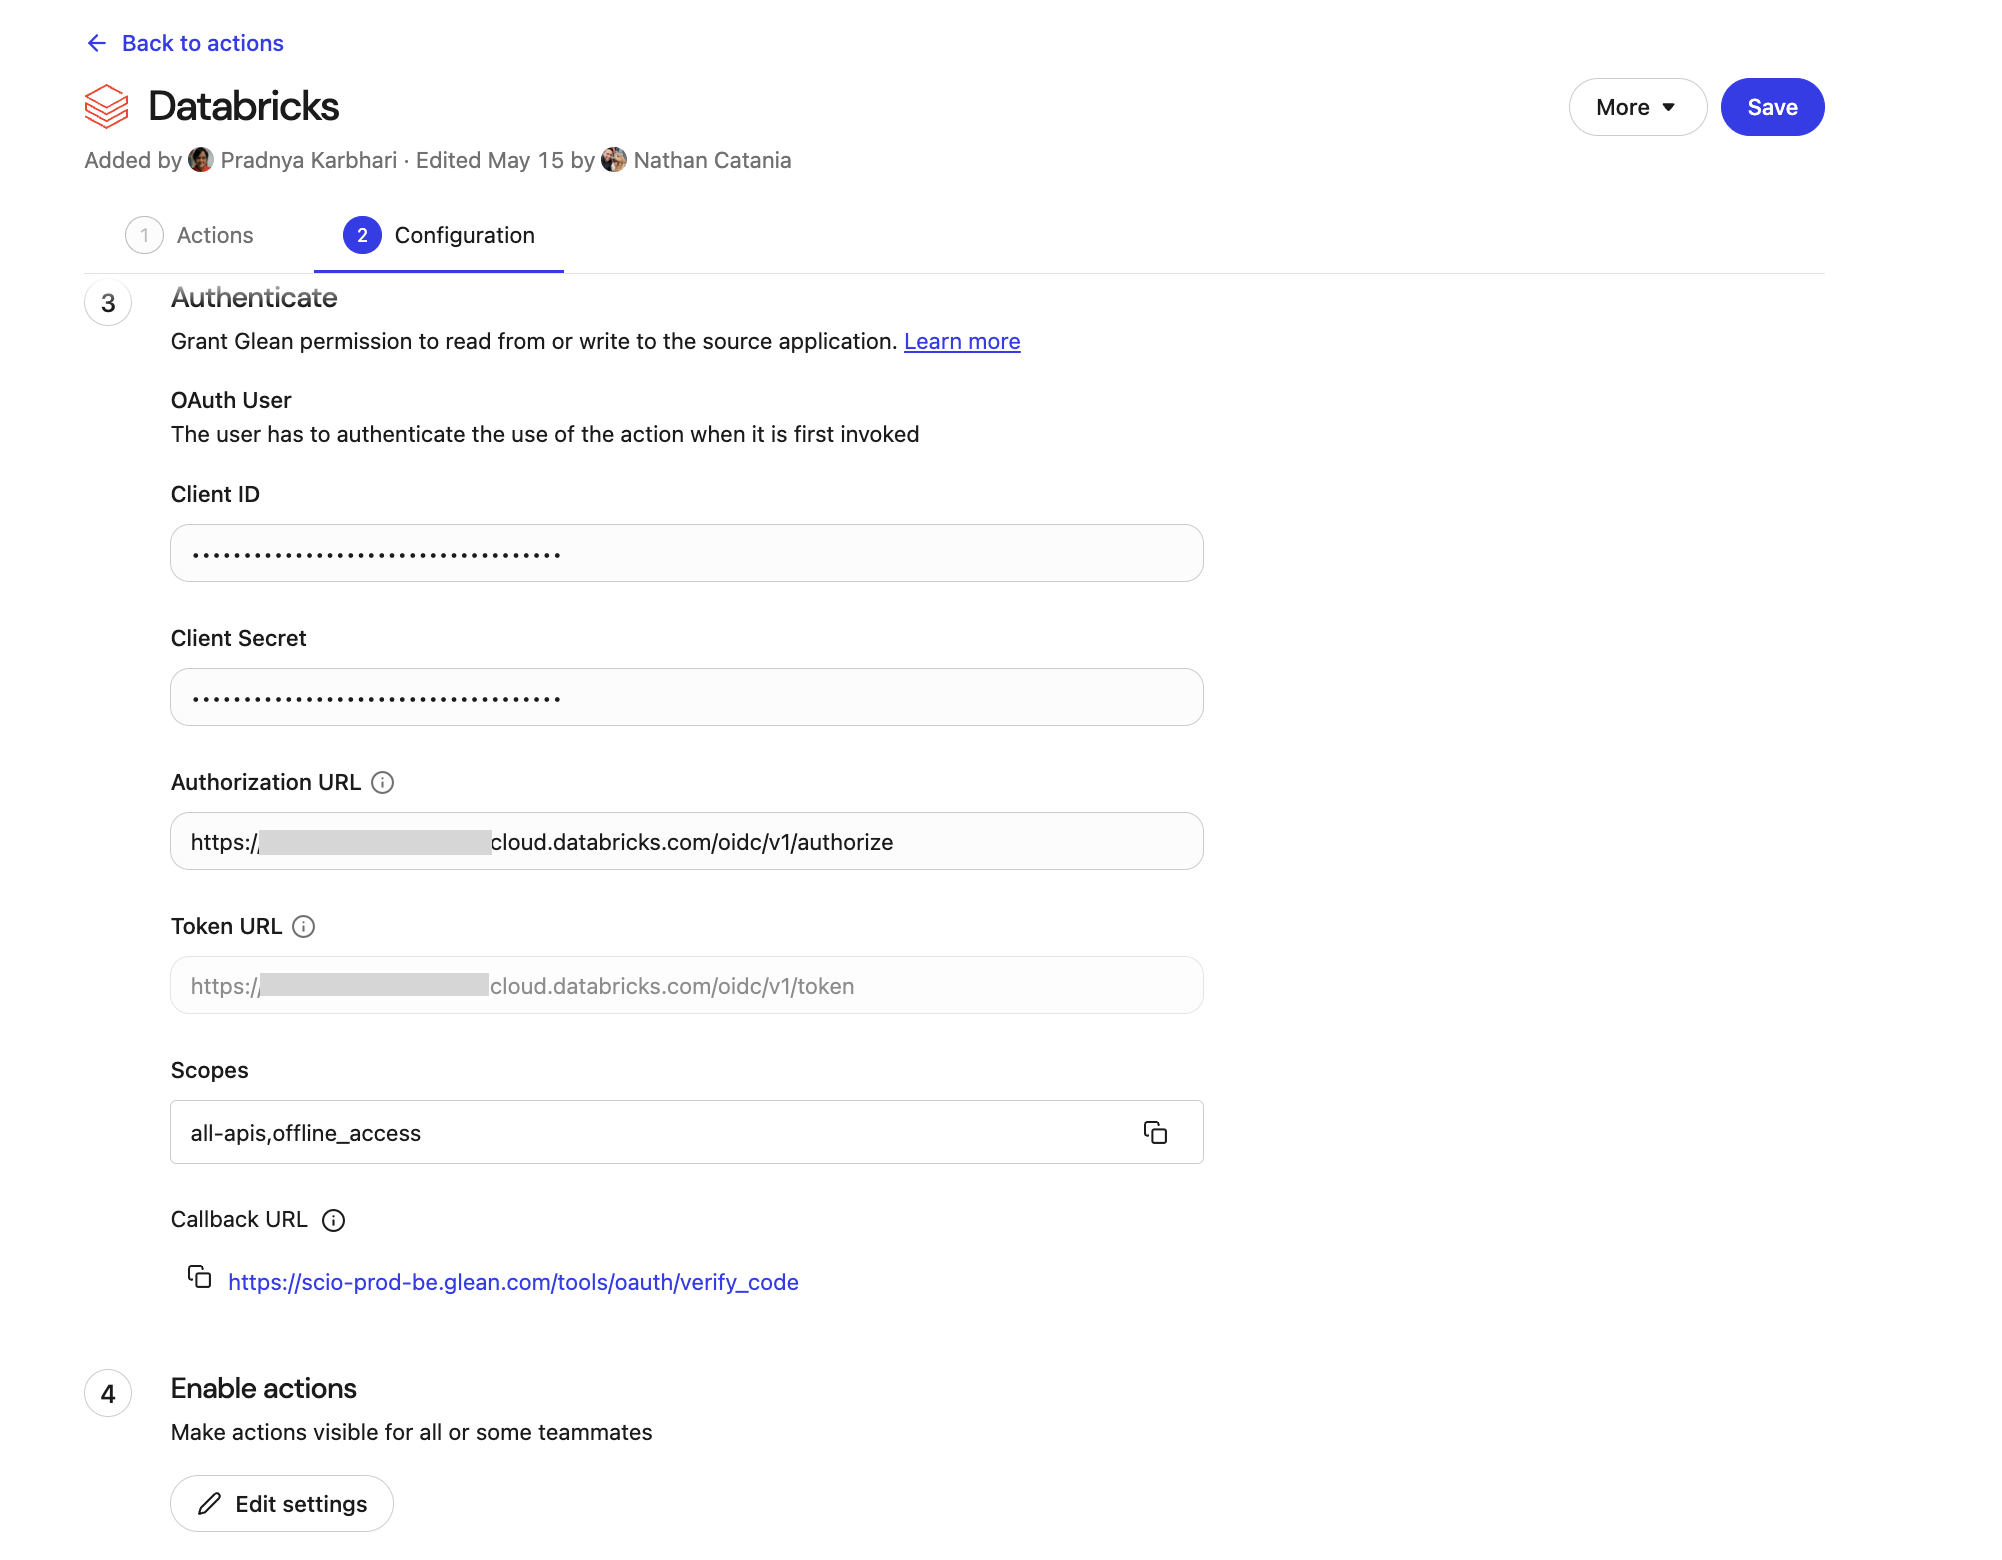
- Populate the Authenticate section
- Create OAuth app on Databricks account as per this section.
- Copy the Client ID and Client Secret from the OAuth app into the Authenticate section of the Tool you are setting up.
- Populate Authorization url as
https://<AWS-or-GCP-or-Azure-Host-URL-from-step-5c>/oidc/v1/authorize - Populate Token url as
https://<AWS-or-GCP-or-Azure-Host-URL-from-step-5c>/oidc/v1/token - Add the Scope as all-apis,offline_access
- Final Authenticate section should look like this:
- Save the Tool.
- A callback URL is generated after saving the Tool. Copy that over into the Databricks OAuth app on the Databricks account console.
- The Tool is now set up, and can be added to any app/prompt.
- Final Tool Setup should look like this–
Create a Databricks OAuth app
Create a Databricks OAuth app and copy the Client ID and Client Secret into the Authenticate section of the tool in Glean.
The following steps for creating OAuth application in Databricks is applicable for both AWS Databricks and Azure Databricks:
- Sign in to your Databricks cloud account.
- After you log in, go to Settings → App Connections.
- Click Add Connection.
- Enter Application Name, for example,
Glean Databricks Genie OAuth. - Add a dummy URL in the Redirect URL field.
- Set Access Scopes to All APIs.
- Select Generate a Client Secret.
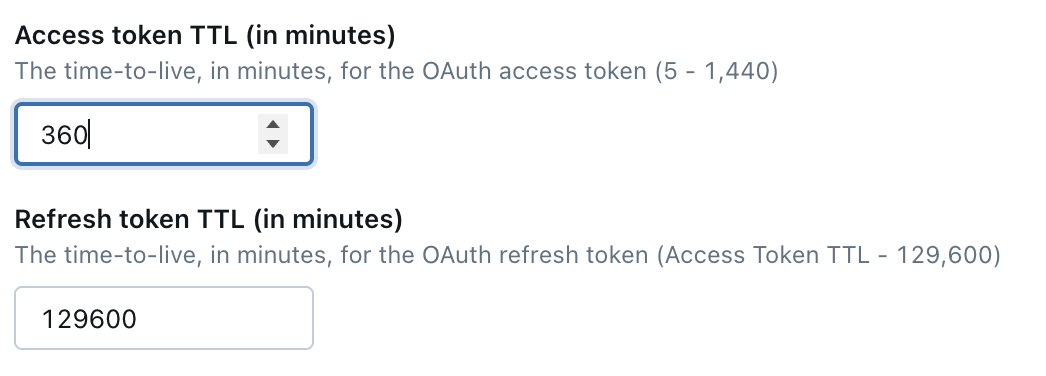
- Adjust the access token and refresh token TTLs as needed. The current guidance recommends 6 hours for access tokens and 3 months for refresh tokens so background agents do not need to reauthenticate frequently.
- Save the application.
- Copy the Client ID and Client Secret.
- Save the application.
- Copy the Client Id and Client Secret into the Authentication section of the Tool you are setting up in this section.
- After the Tool is saved in this section, a Callback URL will be generated in the Authentication section of the Tool. Copy that URL.
- Edit the OAuth application on the Databricks account, and update it with the Callback URL from the previous step.
- Final OAuth app setup should look like this
-
Enter the Client ID and Client Secret from the Databricks OAuth app.
-
Set Authorization url to
https://<AWS-or-GCP-or-Azure-Host-URL>/oidc/v1/authorize. -
Set Token url to
https://<AWS-or-GCP-or-Azure-Host-URL>/oidc/v1/token. -
Set Scope to
all-apis,offline_access. -
Save the action.
-
Login to Databricks account
-
Go to “Manage Account” —> “Settings” —> “App Connections”
-
Click “Add Connection
-
Populate an appropriate Application Name like “Glean Databricks Genie OAuth”
-
Add a dummy URL in the Redirect URL box.
-
Set “Access Scopes” to “All APIs”
-
Ensure “Generate a Client Secret” is checked
-
Adjust the TTLs if required. Default is fine as well.
-
Save the application.
-
Copy the Client Id and Client Secret into the Authentication section of the Tool you are setting up in this section.
-
After the Tool is saved in this section, a Callback URL will be generated in the Authentication section of the Tool. Copy that URL.
-
Edit the OAuth application on the Databricks account, and update it with the Callback URL from the previous step.
Setup is now complete. Refer to the Databricks end user documentation for information on testing this tools in the agent builder.