Jira Tools Setup
Configure Glean to automatically draft Jira Service Management tickets for users, enabling them to submit requests with a single click.
This feature allows organizations to use Glean to automate level 1 IT support. When users post queries in designated IT channels (e.g., in Slack), Glean responds based on the knowledge base and offers an option to create a ticket if the provided answer does not resolve their query.
Enable Jira tools
Admins can enable tools by going to Glean and navigating to Platform → Tools.
- Click Tool → Add tools → Add pre-set tools.
- Select Jira Tools from the list of pre-set tools. By default, the following Jira tools are included:
- Create Jira Service Management Request
- Jira Search
- Create Jira Comment
- Create Jira Issue
To remove a tool, go to the Setup → Publish Settings step, and click Edit. Expand the Agents and uncheck the tools that you want to remove.
The first time Jira tools are used at your organization, a Jira site admin must authorize the OAuth app for your Atlassian site. Until this is done, other teammates will see authorization errors when they click Connect. If you manage multiple Jira sites, create a separate tools per site so each can be bound to its own connector instance. For more details, see Troubleshooting tools authentication.
- In the Setup, select Connector Instance to link these tools to, this is the instance where the JSM requests would get created.
- Set up authentication.
- Option 1: Select Central — this uses the default OAuth app already set up for you. This is the quickest way to start using Jira Tools
- Option 2: Select Custom - this requires you to create a new custom OAuth App. Please follow the steps below to setup a new custom OAuth app.
- Click Save. The Jira Tools are now ready to use.
Creating a custom OAuth app
Follow these steps to set up OAuth for your Jira Tool:
Step 1: Create a new OAuth app
- Navigate to the Atlassian Developer Console at this link and create a new app of type: OAuth2.0 Integration.
- Follow the prompts to set up the app. Make note of details like the app name, description, and logo.
Step 2: Set permissions
- Go to the Permissions tab of your app configuration.
- Click Add next to Jira API.
- On the Jira API scopes page, under Classic scopes, select the following scopes:
- Under Jira platform REST API:
read:jira-userandwrite:jira-work - Under Jira Service Management API:
read:servicedesk-request,write:servicedesk-request, andread:servicemanagement-insight-objects
- Under Jira platform REST API:
Step 3: Update distribution settings
- Go to the Distribution tab of your app configuration in the Atlassian Developer Console.
- Click on Edit.
- Change the Distribution Status to 'Sharing'
- Add a Privacy policy, you could use this one - https://www.glean.com/privacy-policy
- Click on Save Changes.
Step 4: Go to the Jira tools setup page on Glean
-
Fill the following fields:Client ID: Retrieve this from the Settings tab of your app configuration in the Atlassian Developer Console.Client secret: Retrieve this from the Settings tab of your app configuration in the Atlassian Developer Console.
-
Save the Tools
-
Navigate to the Authenticate section in the Tool setup again, at the bottom you should see a Callback URL has been generated.
-
Copy the Callback URL.
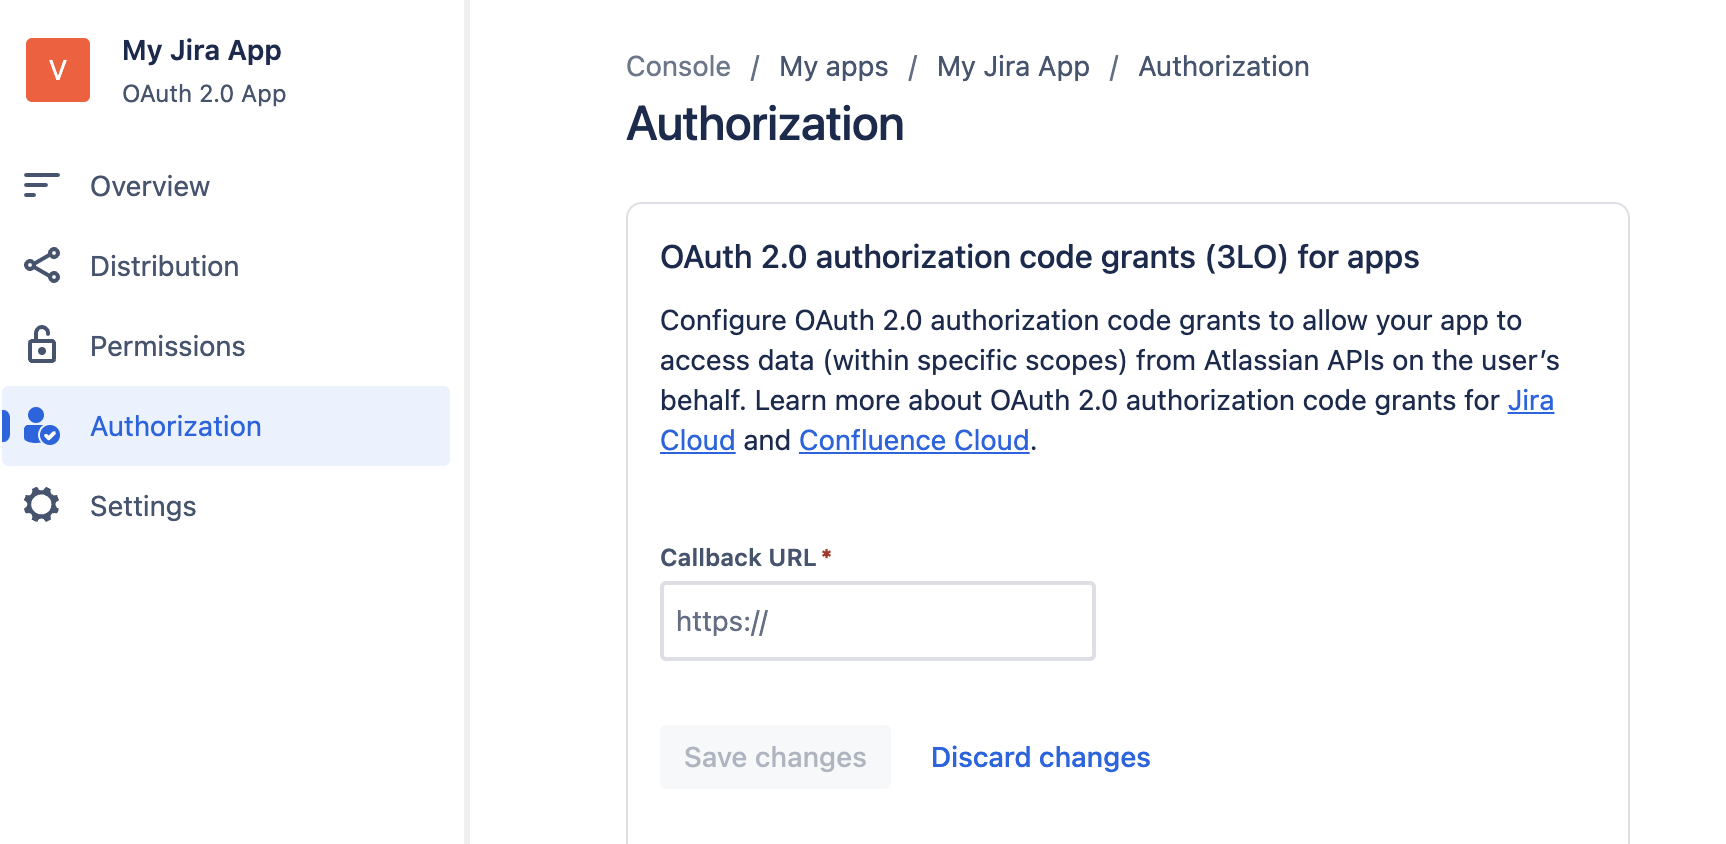
Step 5: Configure the callback URL in your OAuth app
- Go to the Authorization tab of your app configuration.
- Paste the callback URL from the previous step into the Callback URL section here.
- Save your OAuth App
That's it! You should now be able to use Jira Tools using the custom OAuth setup.
(Optional) Enable sharing to Slack
- Go to Admin → Chat → Agents.
- Open your existing agent or create a new one.
- Open the Agent builder and ensure the agent is using a Chat message trigger.
- Click on the Share button in the header.
- Select the set of users who the agent will respond to in Slack. We recommend setting the General access setting to Everyone else at
<Your Company>can view. - In the Publishing options, select Slack.
- Select the Slack channels that the agent should respond to (note that each Slack channel can have only agent at a time).
- Choose who can see the agent’s responses in Slack. For more information, see Publishing to Slack.
- Tick the checkbox for Make this agent available in Slack.
- Save the agent.
After publishing, you can configure Glean's response behavior in Slack by using the /glean configure command.
If your Admin Console shows Apps (legacy tenants)
If your Admin Console displays Apps instead of Agents, follow these alternative steps.
Navigate to an existing Glean App or create a new one by going to Admin -> Platform -> Apps.
- Go to the Tools section in the App setup.
- Add the “Jira Service Management - Create Request” Tool to the App.
- Configure the Service Desks you want this Tool to create Requests in. Requests will always created in one of these Service Desks.
- Deploy this App to a Slack Channel by going to Publish -> Slack, and Search for your slack channel to add it or Click on ‘Can’t find a channel’. and add the Slack channel ID.
Note
- This tool only auto-populates Service Desk, Request Type, Summary and Description fields (as these are usually the only fields that can be reliably filled by the LLM based on the user's query). Any other fields required to submit this request will be shown to the user in the slack modal, so they can fill it out and submit.
- The Service Desk and Request type are filled based on descriptions for these present in Jira Service Management.
- Glean maps the user query to the description of the request types in JSM, to find the most relevant request type to select.
- If you find cases where service desk/request type is not getting mapped correctly, please try tweaking the descriptions of these in JSM to improve the quality of these.
- This tool is meant to be used directly and not in prompts.
- This only creates tickets in Jira Service Management, not regular Jira
- This only works for Jira Cloud and not Jira Data-Center (on-prem)
Jira tools setup
The Jira tools contain the following tools:
- Search Jira with JQL
- Add comment on JSM ticket
- Create Request in Jira Service Management
- Create a Jira issue
- In the Admin Console, enable the Jira Tools in the Admin Console under Platform → Tools → Jira Tools.
- Pick a tool name (e.g. Jira Tools).
- Choose Connector Instance.
- If you have multiple Jira instances, you need to set up a tool per instance.
- In that case, add the instance name to the tools to easily distinguish them (e.g. Jira Tools - Acme, Jira Tools - Sales)
- Choose Authentication method.
- Central: use the authentication app developed by Glean (recommended)
- Custom: use your custom OAuth app
- Confirm visibility of the Jira atools in your organization’s tools list.
Setup is now complete. Refer to the Jira agent article to test this tools in the agent builder.