Content triggers
Content triggers let you build agents that run automatically when something changes in your connected connectors, no manual prompting required. Instead of you pasting a Gong transcript or Jira ticket into an agent, the system detects the event and kicks off the agent for you, passing the relevant content along as context.
Consider it as When X happens in my tools, automatically do Y.
Example use cases customers are running today:
- When a Gong call is transcribed: extract key deal information, update the Salesforce opportunity, and draft a follow-up email
- When a new Jira production or P0 ticket is created: summarize the issue, pull similar incidents and runbooks, and propose next steps
- When a Salesforce opportunity is created or moves to a key stage: summarize the deal, assess health, and recommend next tools
- Before a customer meeting: gather recent CRM, call, email, and support context into a concise meeting brief
- When a new email arrives in a monitored mailbox: draft a response
Supported sources
Content triggers work with a range of connected sources. Sources are grouped by reliability and latency:
- Recommended sources have stable trigger behavior and low latency. Use these for your most critical automations.
- Experimental sources are better suited for early testing and lower-risk workflows. Latency and reliability may vary.
The agent runs in the context of the activating user's data and permissions. Each user who activates a content-triggered agent creates their own trigger. The trigger fires only for that user, based on the content they can access.
Recommended sources
| Source | Available events | Common filters (examples) |
|---|---|---|
| Gong | New call | Account, Owner, Participants |
| Jira | New ticket created, Ticket updated, Ticket meets condition | Issue type (for example, task, bug, epic, or story), Project, Status, Priority, Assignee, Reporter, Label, Component, Sprint |
| Salesforce (Sales Cloud) | New record created, Record updated, Record meets condition | Object type (for example, opportunity, lead, or contact), and object fields such as Account, Owner, Stage, or Status |
| Gmail | New email | Subject, From, Sender domain, Recipient, Label |
| Google Calendar | New event created, Before the event starts | Title, Time before the event starts |
| Outlook | New email | Subject, From, Sender domain, Recipient, Importance, Folder, Category |
| Slack | New message, New private channel, New public channel | Channel, Author, Owner, Visibility, Message type |
For Jira and Salesforce, choose the event type based on when you want the trigger to fire:
- Meets condition: Fires when a document reaches a specific state, either on creation or after an update. Use this when you care about the resulting state rather than the change itself. For example, fire when an issue's status becomes Resolved.
- Updated: Fires whenever a selected field changes, regardless of its new value. Use this when you want to react to any change to that field. For example, fire whenever an issue's status changes.
Updated triggers fire more frequently than Meets condition triggers because they run on every field change, not just when a document reaches a specific state.
Start with one of the featured examples. They cover the most common use cases and are the fastest way to get started.
Experimental sources
| Source | Available events |
|---|---|
| Google Drive | New document, New presentation, New spreadsheet |
| GitHub | When a file is added, When an issue is created, When a PR is created, When a PR is assigned, When a review is requested, When a PR is labeled, When a PR is ready for review, When a ticket is created, When a commit is created |
| Microsoft OneDrive | New document, New presentation, New PDF, New spreadsheet, Spreadsheet updated |
| Microsoft SharePoint | New document, New presentation, New page, New PDF, New spreadsheet, Spreadsheet updated |
| ServiceNow | New incident, New request, New ticket, New knowledge article, New request item, Incident updated, Request updated, Ticket updated, Knowledge article updated |
| Zendesk | New ticket created, New article created, New post created, Ticket updated, Ticket meets condition, Ticket updated in real time |
| Zoom | New meeting scheduled, New recording completed |
| Outlook Calendar | Before the event starts |
Glean hasn't evaluated latency for each experimental source in detail. Expect latency on the order of a couple of hours, and always less than a day.
Filters and conditions
You can narrow when a trigger fires by adding filters. Filters are source-specific. For example, you can filter Gong calls by account or owner, Jira tickets by project or priority, and Gmail messages by sender or label.
At least one filter is recommended for every trigger. Unscoped triggers, for example, trigger on any Gong call can consume your hourly quota quickly and produce noisy results. See Execution limits for details on rate limits and quotas.
Slack limitations
For Slack, you can configure triggers for:
- New messages in direct messages, public channels, and private channels
- Newly created public channels and private channels
Triggers for new messages in external public channels and external private channels are not currently supported.
Access controls
Content triggers respect the same access controls as the rest of Glean:
- The agent runs with the permissions of the user who activated it. If a user can't see a document in Glean, a content trigger won't fire for that document.
- Admins control who can build and run content-triggered agents from Admin console → Agents → Content triggers (On for everyone, On for some teammates, or Off).
- Agent creators must have both content trigger access and agent creator permission to build with content triggers. Users must have content trigger access and agent access to activate and run them.
Latency
Trigger latency depends on how frequently Glean crawls the source. For recommended sources, latency is typically a few minutes. For experimental sources, latency typically runs on the order of a couple of hours, and is always less than a day. See Connector crawl frequency for more information.
If a connector or event type isn't available in the UI, Glean may have determined it's too noisy or not yet reliably indexed. Contact your Glean account team to request support for additional sources or events.
Enable content triggers
Admin can enable the content trigger feature using the following steps:
-
In Glean, navigate to Agents in the Admin console.
-
Under Setup, go to Content triggers and select one of the following options available:
- On for everyone
- On for some teammates
- Off
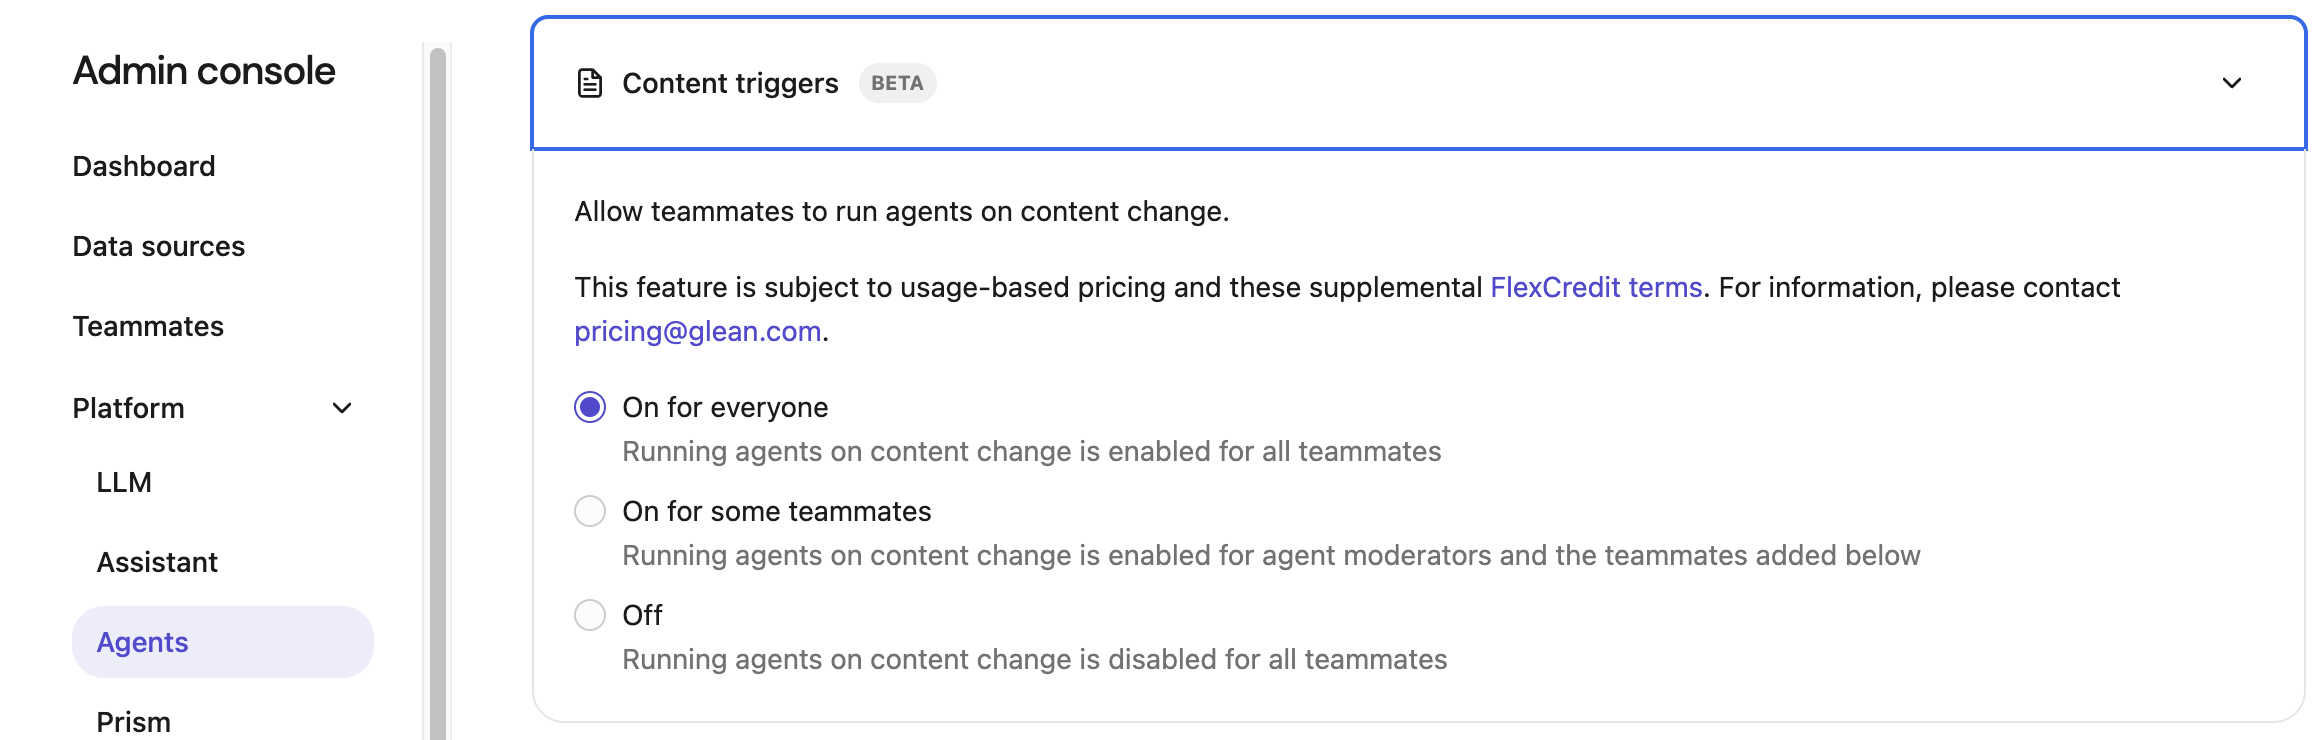
You can change the access setting at any time; changes take a few minutes to deploy. It is recommended to start with a limited audience and expand after the team is comfortable.
Setup content trigger
Setup content trigger for workflow mode agents
Admins can setup content triggers using the following steps:
-
Create an agent in the Glean Agent builder using the workflow mode.
-
Select Content as the trigger type in the zero step. This tells the agent to activate based on a connector event rather than a manual chat message.
-
Click Add trigger and select the trigger as per your requirement.
-
After selecting trigger, choose the event type and add conditions.
-
After you add the trigger, add the Fields as needed.
-
Reference the trigger content in your agent. The data from the triggering event like the transcript, ticket body, email, and so on is automatically passed into the agent as content. You can reference it directly in your instructions and downstream tools by using double brackets: [[Trigger input]].
-
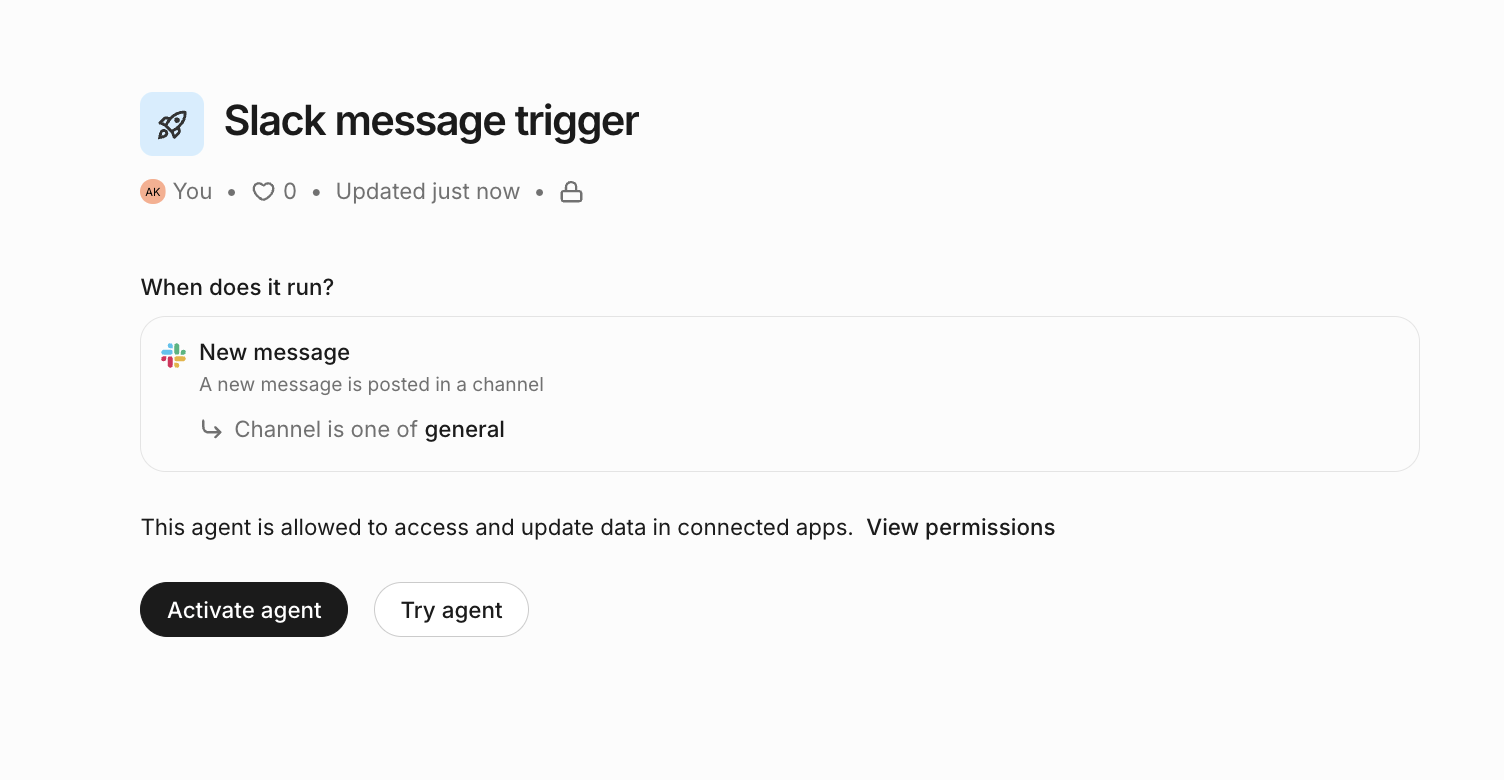
Save and publish the agent. After you publish the agent, Glean automatically opens the agent in the agent library.

-
Under When does it run?, review the trigger summary and click Activate agent to turn it on.
Activation is per user. Each user with access to the agent must manually activate it before the trigger runs for them.
Setup content trigger for Auto mode Agents
Admins can setup content triggers using the following steps:
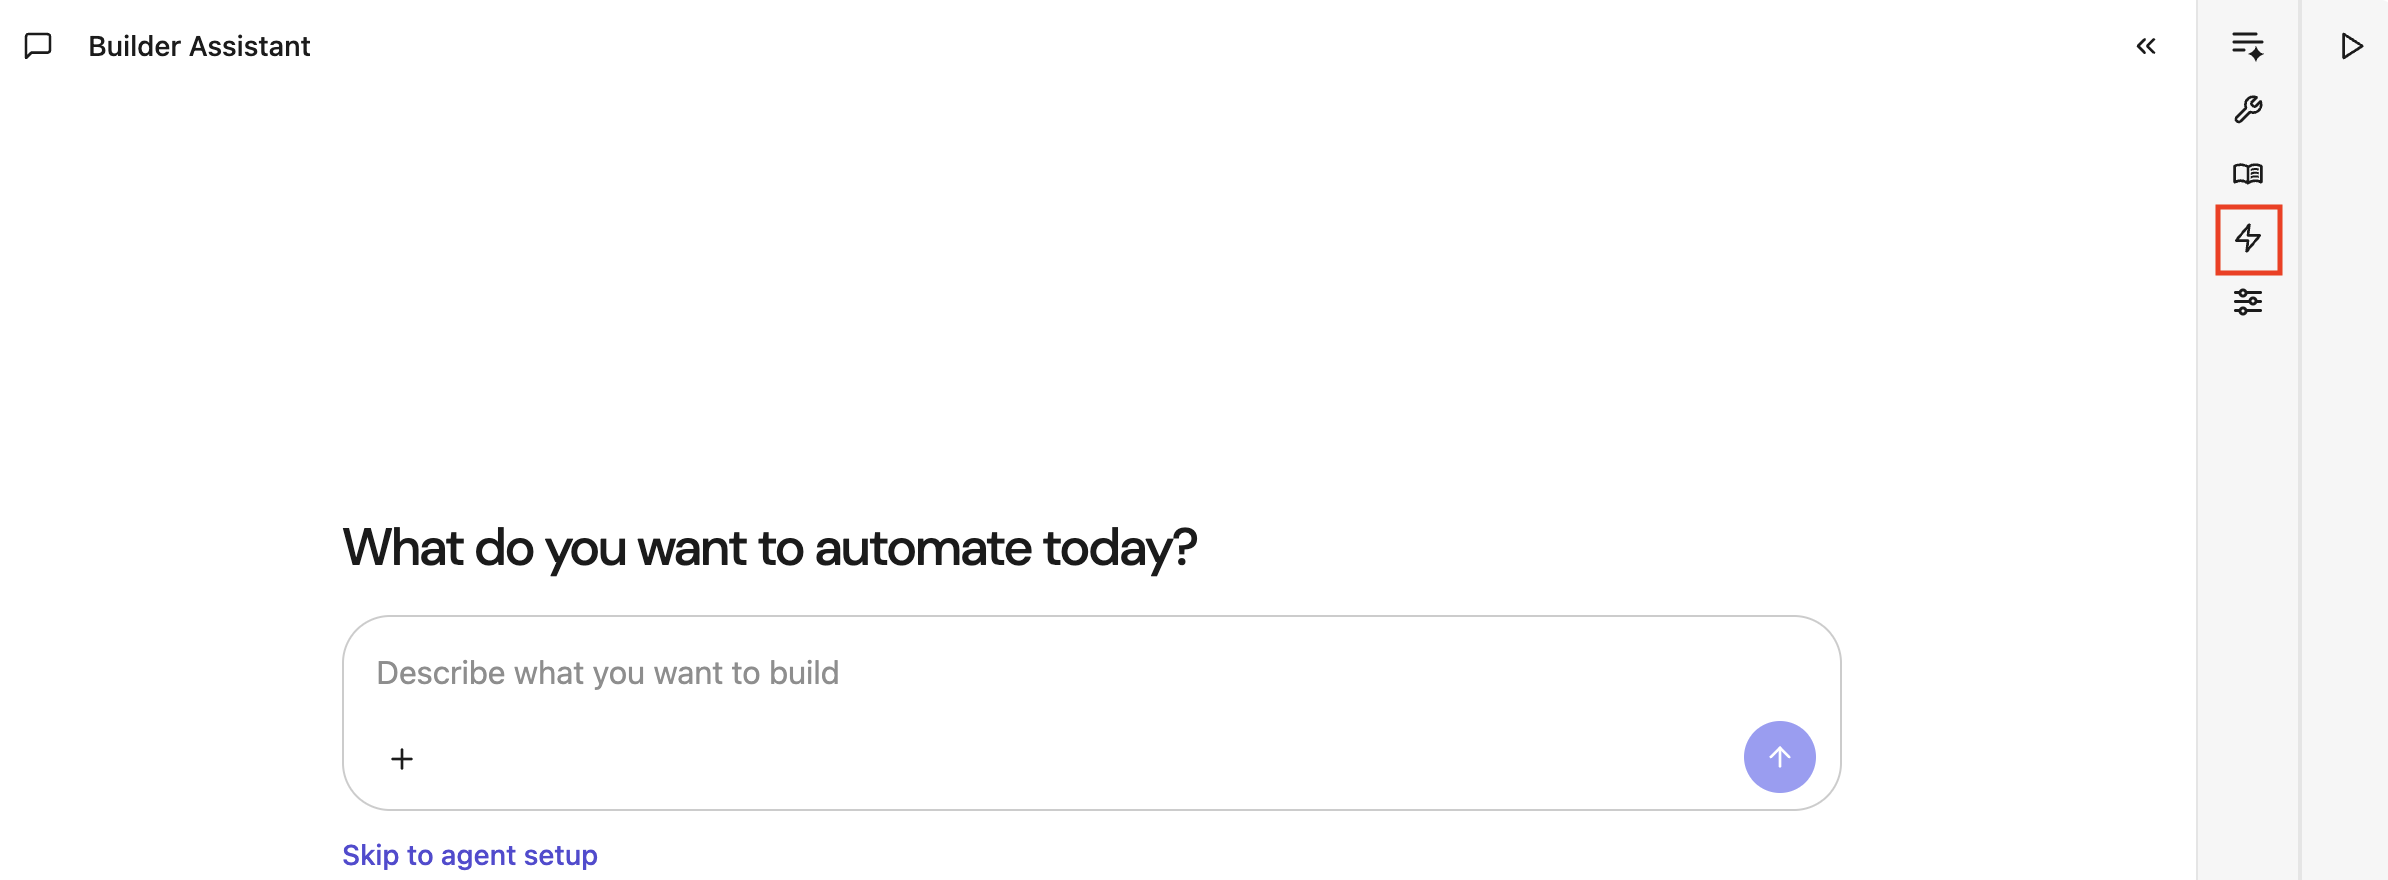
- Create an agent in the Glean Agent builder using the Auto mode.
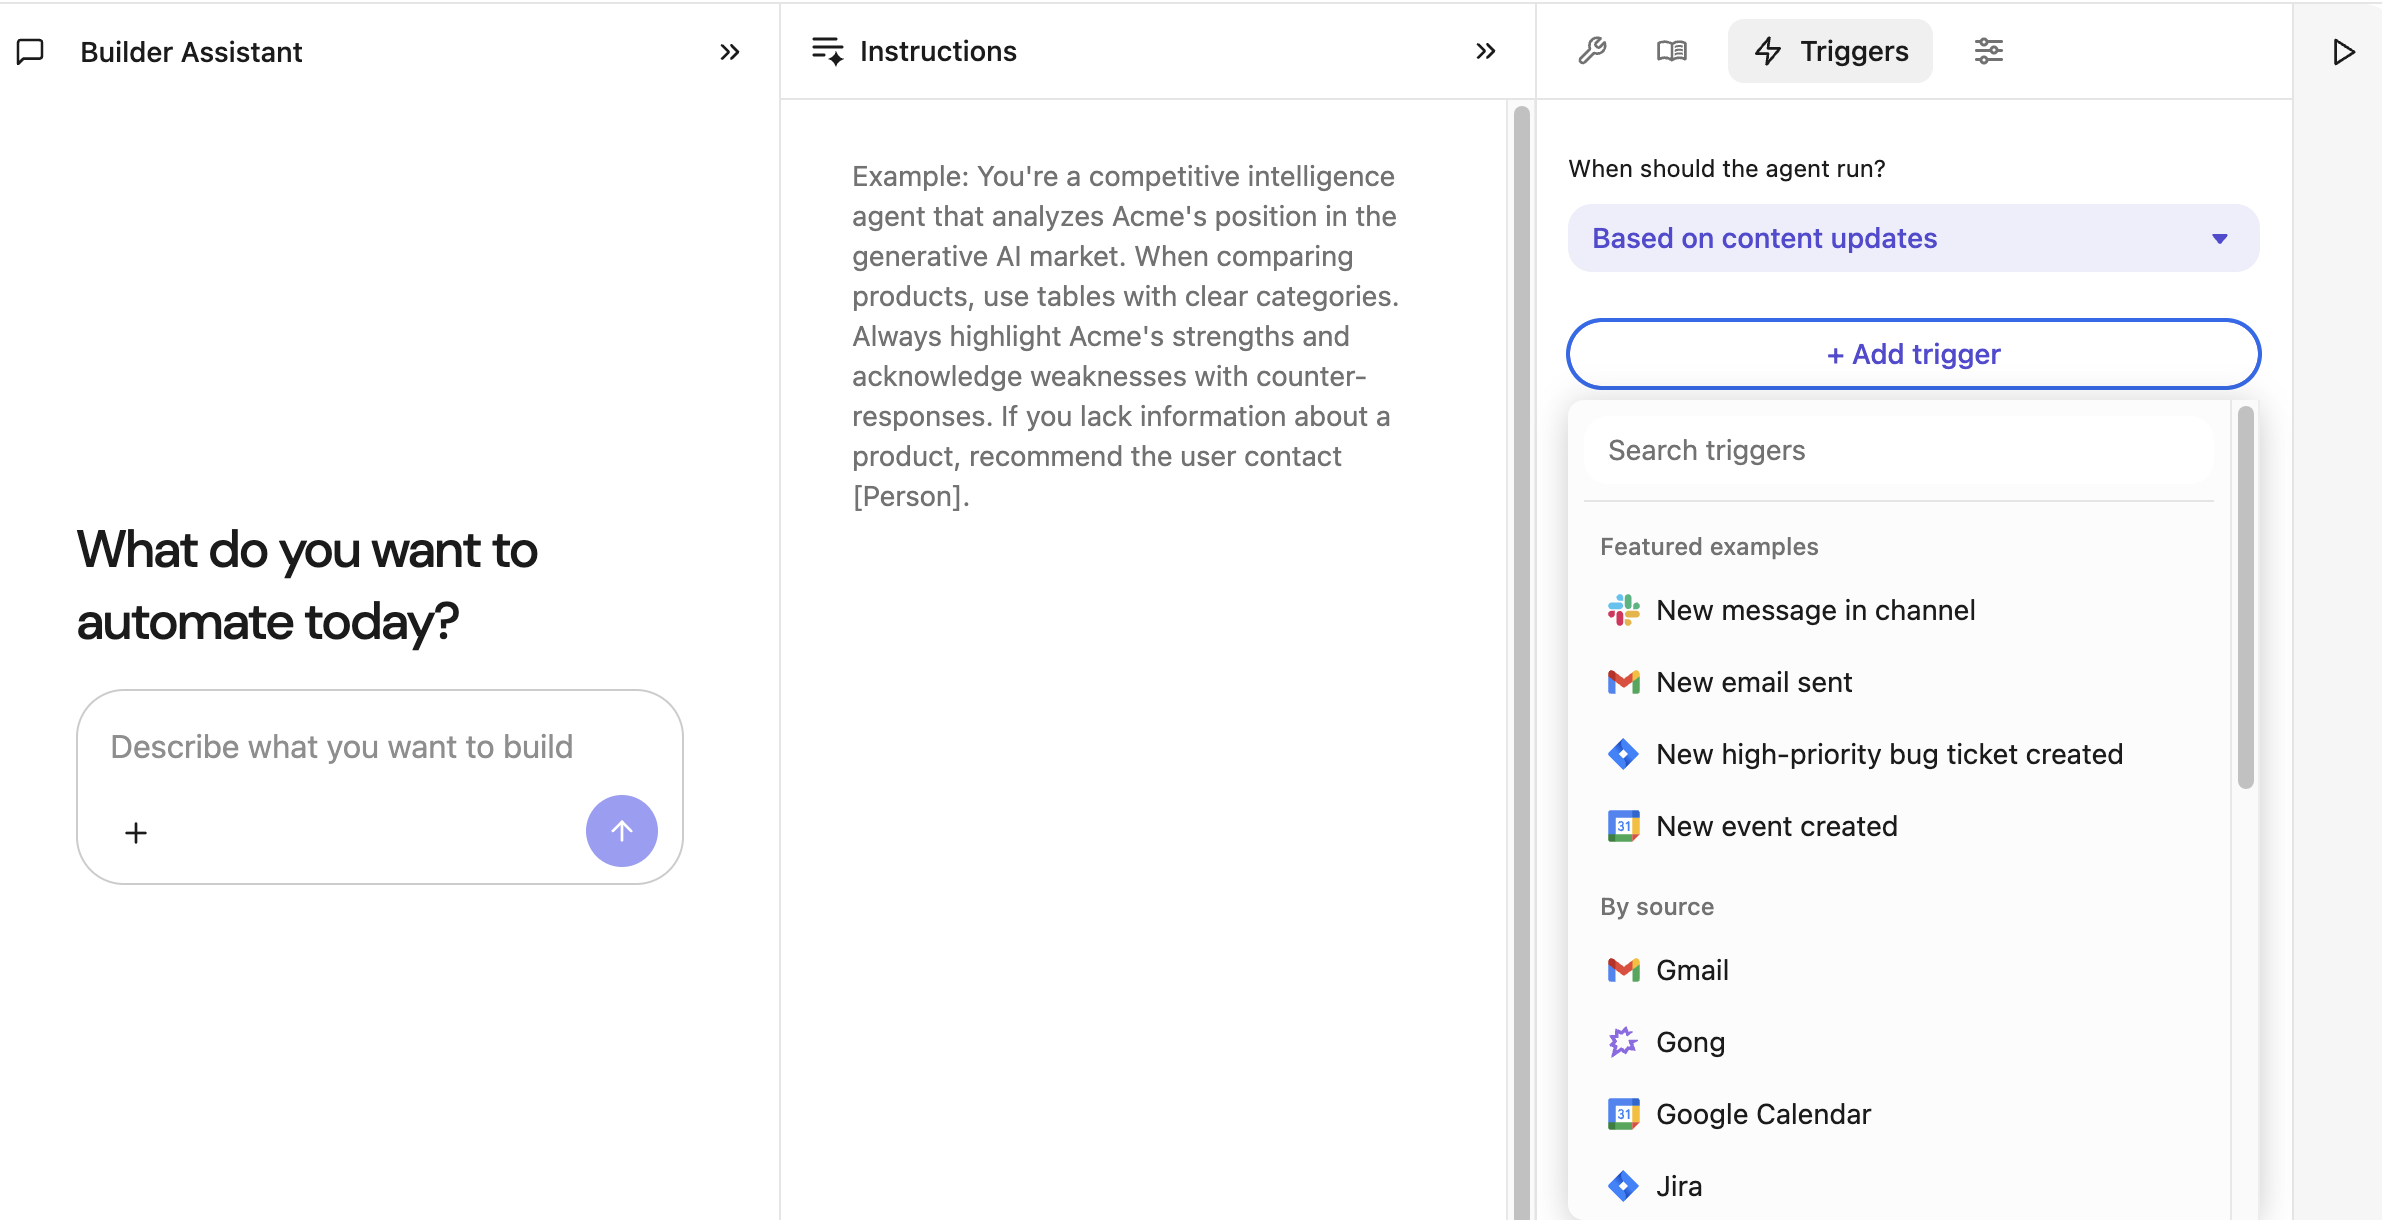
- Select Triggers.
- Select Based on content updates for the field When should the agent run?.
- Click Add trigger and select the trigger as per your requirement.
- After selecting trigger, add condition.
- Save and publish the agent. After you publish the agent, Glean automatically opens the agent in the Agent Library.
- Under When does it run?, review the trigger summary and click Activate agent to turn it on.
Activation is per user. Each user with access to the agent must manually activate it before the trigger runs for them.
Test your trigger
Before you save and deploy the agent, use sample events to verify you selected the right event type and conditions.
You can also run the agent against a sample event by clicking the play button in the event list. This helps you confirm that the trigger passes the expected input into the agent.
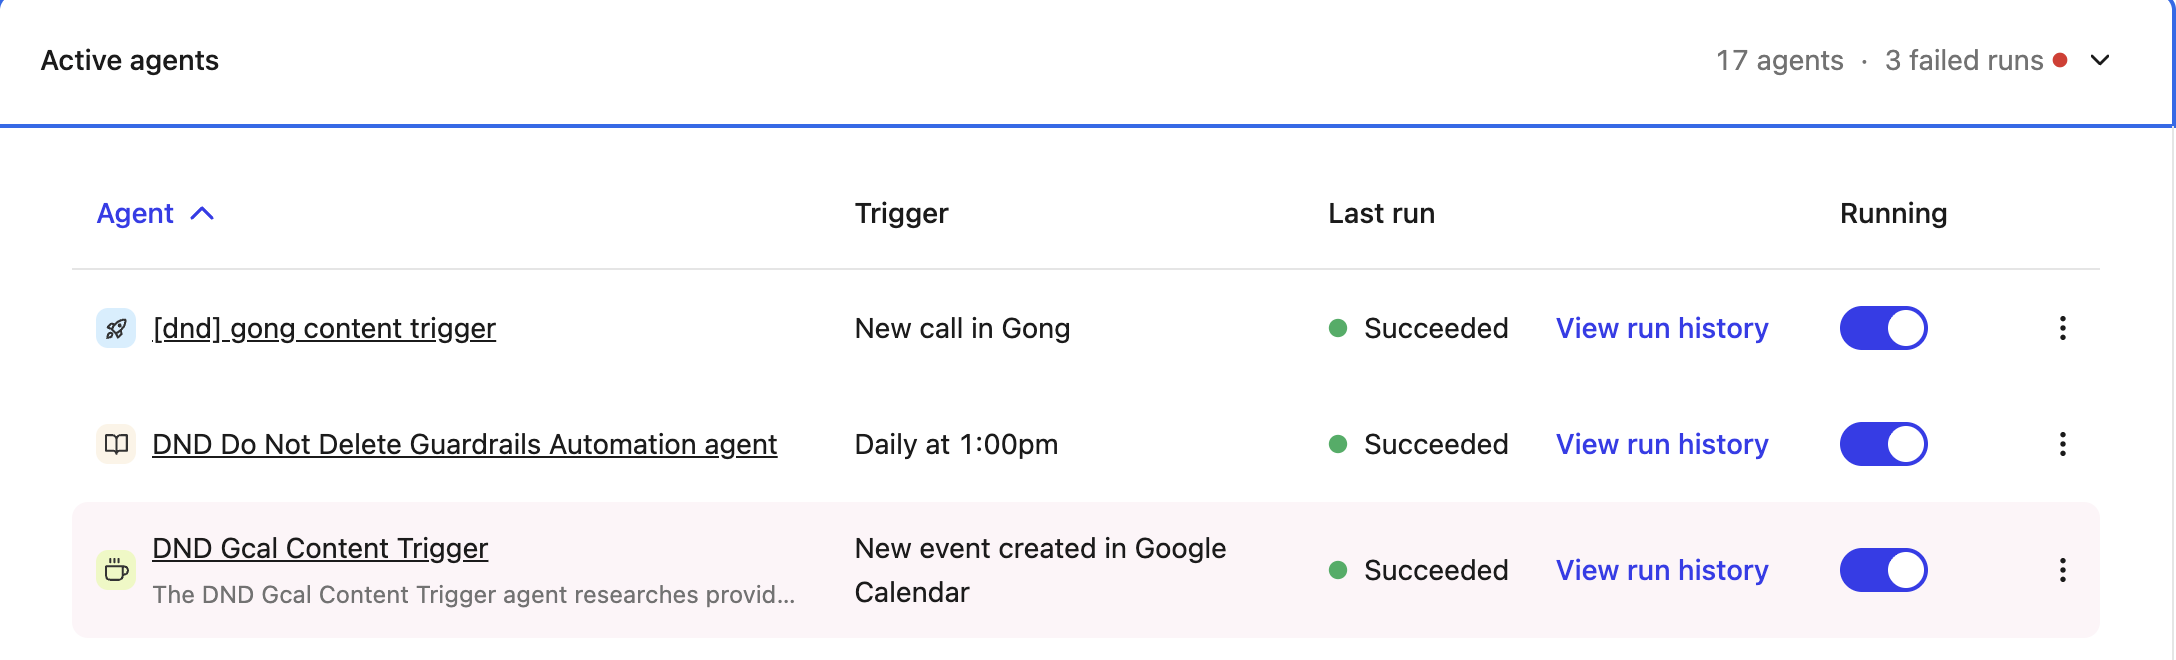
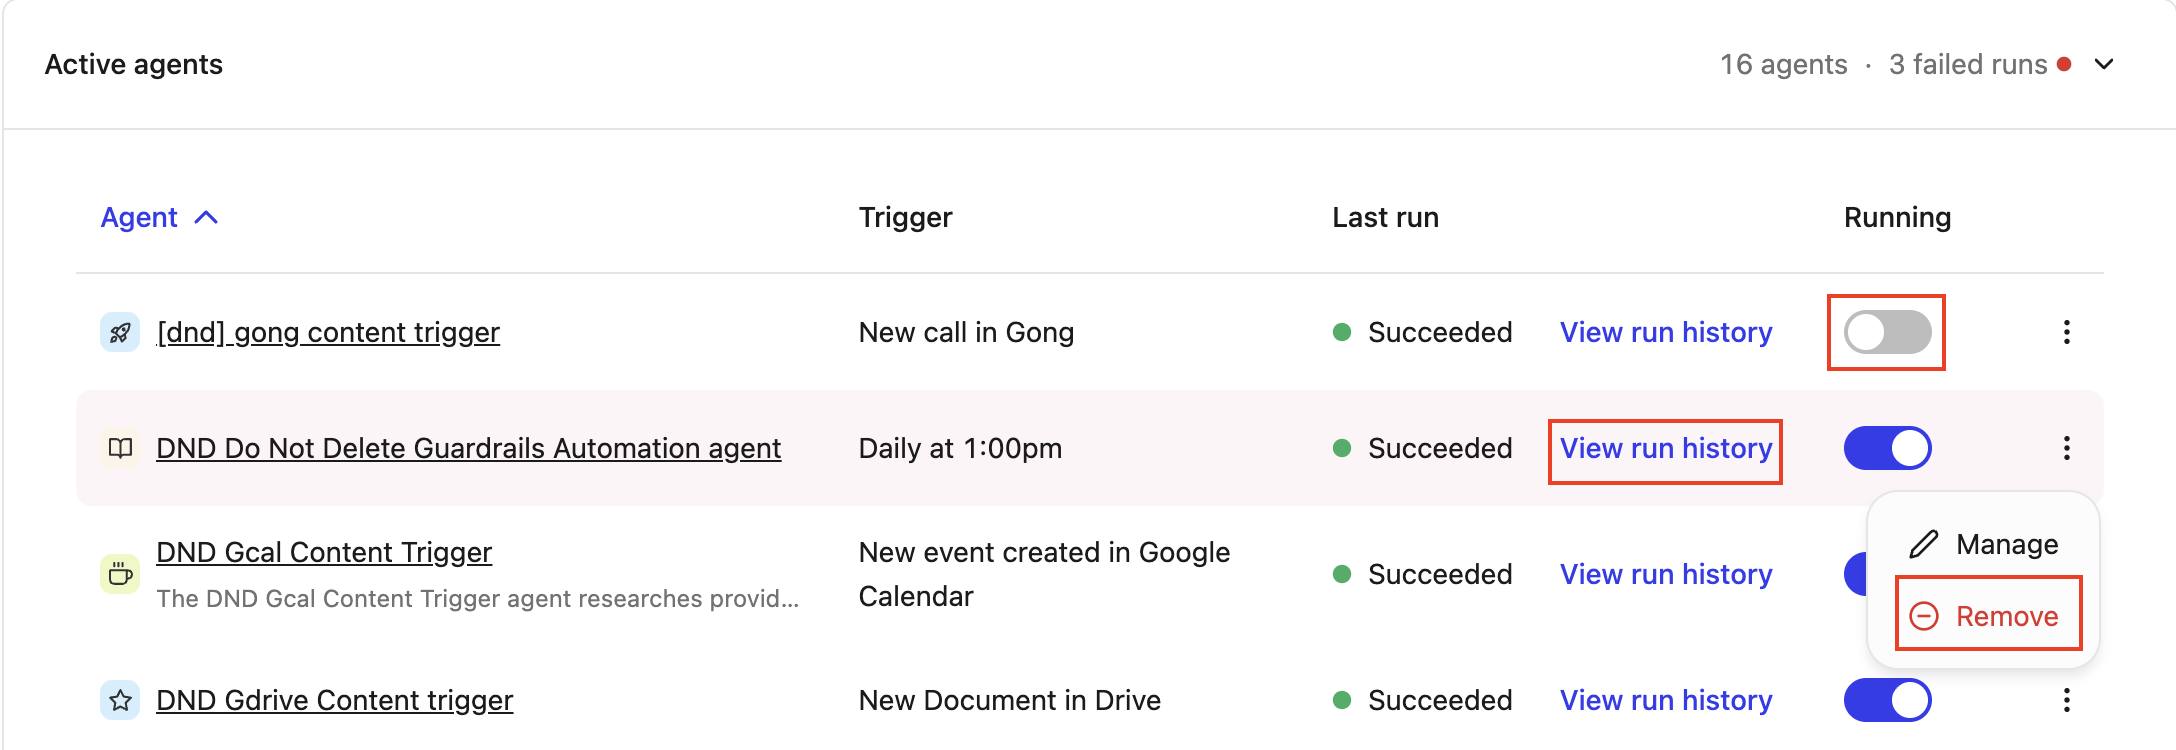
Manage a content-triggered agent
After you activate a content-triggered agent, you can manage it from the Active agents table in the agent library. From this view, you can:
-
Review the configured trigger and the last run status.
-
Pause or resume the agent with the Running toggle.
-
Click View run history to see past runs.
-
Open the overflow menu to Manage or Remove the agent.
How conditions work for new-item events
For New events, all configured conditions must be met at the time the event happens. If the record is created first and only later updated to match the conditions, the trigger does not run.
For example, if you configure a New Jira ticket created trigger with conditions such as component = mobile and owner = me, the trigger runs only if both conditions are already true when the ticket is created.
In many cases, it is better to use a meets condition event instead of a new item event. Use a meets condition event when the fields you care about may be populated or updated after the item is created.
Use trigger data in downstream steps
By default, metadata associated with the triggering event is passed into downstream steps. This includes the event details that the agent can use in instructions and tools.
Use [[Trigger input]] in downstream step instructions to reference the triggering event's content (for example, a transcript, ticket body, or email). To use specific fields from the event, add them as Fields and reference each by its field name.
For Slack, you can configure triggers for new messages in direct messages, public channels, and private channels. You can also configure triggers for newly created public channels and private channels.
Triggers for new messages in external public channels and external private channels are not currently supported.