Slack Custom App Upgrade Guide
This upgrade impacts how Glean accesses Slack data. Review the Limitations and functionality differences and Gleanbot impacts and FAQ before proceeding.
This upgrade path applies to Slack Custom App configurations that use a single Slack workspace. For more information, see Identify connector type.
If your existing connector is configured as Slack Enterprise Grid (Discovery API) using an Enterprise ID and domain, follow the Slack Enterprise Grid (Discovery API) App Upgrade Guide instead.
Current vs new configuration
This table compares how your Slack integration works today with a custom app, and how it will work after you complete the upgrade.
| Feature | Current State (Legacy) | New State (Upgraded) |
|---|---|---|
| App Type | Custom Slack App (Workspace-specific). | Custom Slack app with an updated manifest, plus the Slack RTS app. |
| Connector | Single "Slack" connector. | Combined "Slack" and "Slack Real Time Search" connectors. |
| Message Access | Legacy indexing-only pattern. | Query-time retrieval via Slack’s Real-Time Search API. |
| Reliability | Susceptible to Slack rate-limit changes. | Aligned with Slack’s current API and rate-limit model. |
If you do not complete this upgrade, your existing Slack connector may be affected by Slack’s API and rate-limit changes. Make sure you finish both the custom app update and the RTS setup.
Upgrade window and temporary downtime
When you upgrade from the legacy Custom App to Slack RTS, there is a short window where Glean in Slack may be partially unavailable:
- Backend processing: Internal configuration syncs typically take around 10 minutes.
- Channel invitations: Because Slack rate-limits how quickly bots can be invited to channels, upgrading a large number of channels takes longer.
- For most customers, the channel invitation process typically completes within an additional 20 minutes.
During this window, admins and users may notice:
- Inconsistent responses: Gleanbot may temporarily fail to respond or show intermittent behavior.
- Dual-app activity: You may see both the legacy app and the new RTS app responding to messages briefly as the transition completes.
- Broken Slack Tools: Interactive components from Glean or Agents may fail or show "broken" options in Slack share settings.
Note: This behavior is expected during the upgrade window and does not affect your data or long-term search functionality.
Important: Once you start the RTS upgrade, do not modify or uninstall your legacy Slack app. The legacy app is responsible for inviting the new RTS bot into your channels—a process that is rate-limited by Slack. Removing or changing the legacy app too early will interrupt this sync and may leave the new bot missing from your channels. Wait until Glean confirms the upgrade is complete before making any changes to the old app.
Before upgrading to Slack Real Time Search (RTS)
-
Confirm your current Slack connector type (Central App, Custom App, or Enterprise Grid) and follow the specific upgrade guide for that version. If your current setup is a single-workspace Slack custom app, ensure you select the Slack Real Time Search (single workspace) connector, not the Enterprise version. Using the incorrect guide or connector type will result in setup failures.
-
Choose a low-traffic window (typically 30–60 minutes) for the upgrade. Notify your Slack admins that Gleanbot and Slack search results may be intermittently unavailable or show "dual-app" responses during this time.
-
Decide on a test group strategy (for example, IT/support or Slack-heavy teams) to validate performance before a full org-level rollout.
-
Ensure you have the necessary Slack Workspace Admin or Org Owner permissions. You will need the permissions to authorize the new RTS app and manage manifest changes.
Upgrade steps
1. Confirm your current configuration
-
In Glean, go to Admin Console → Platform → Connectors.
-
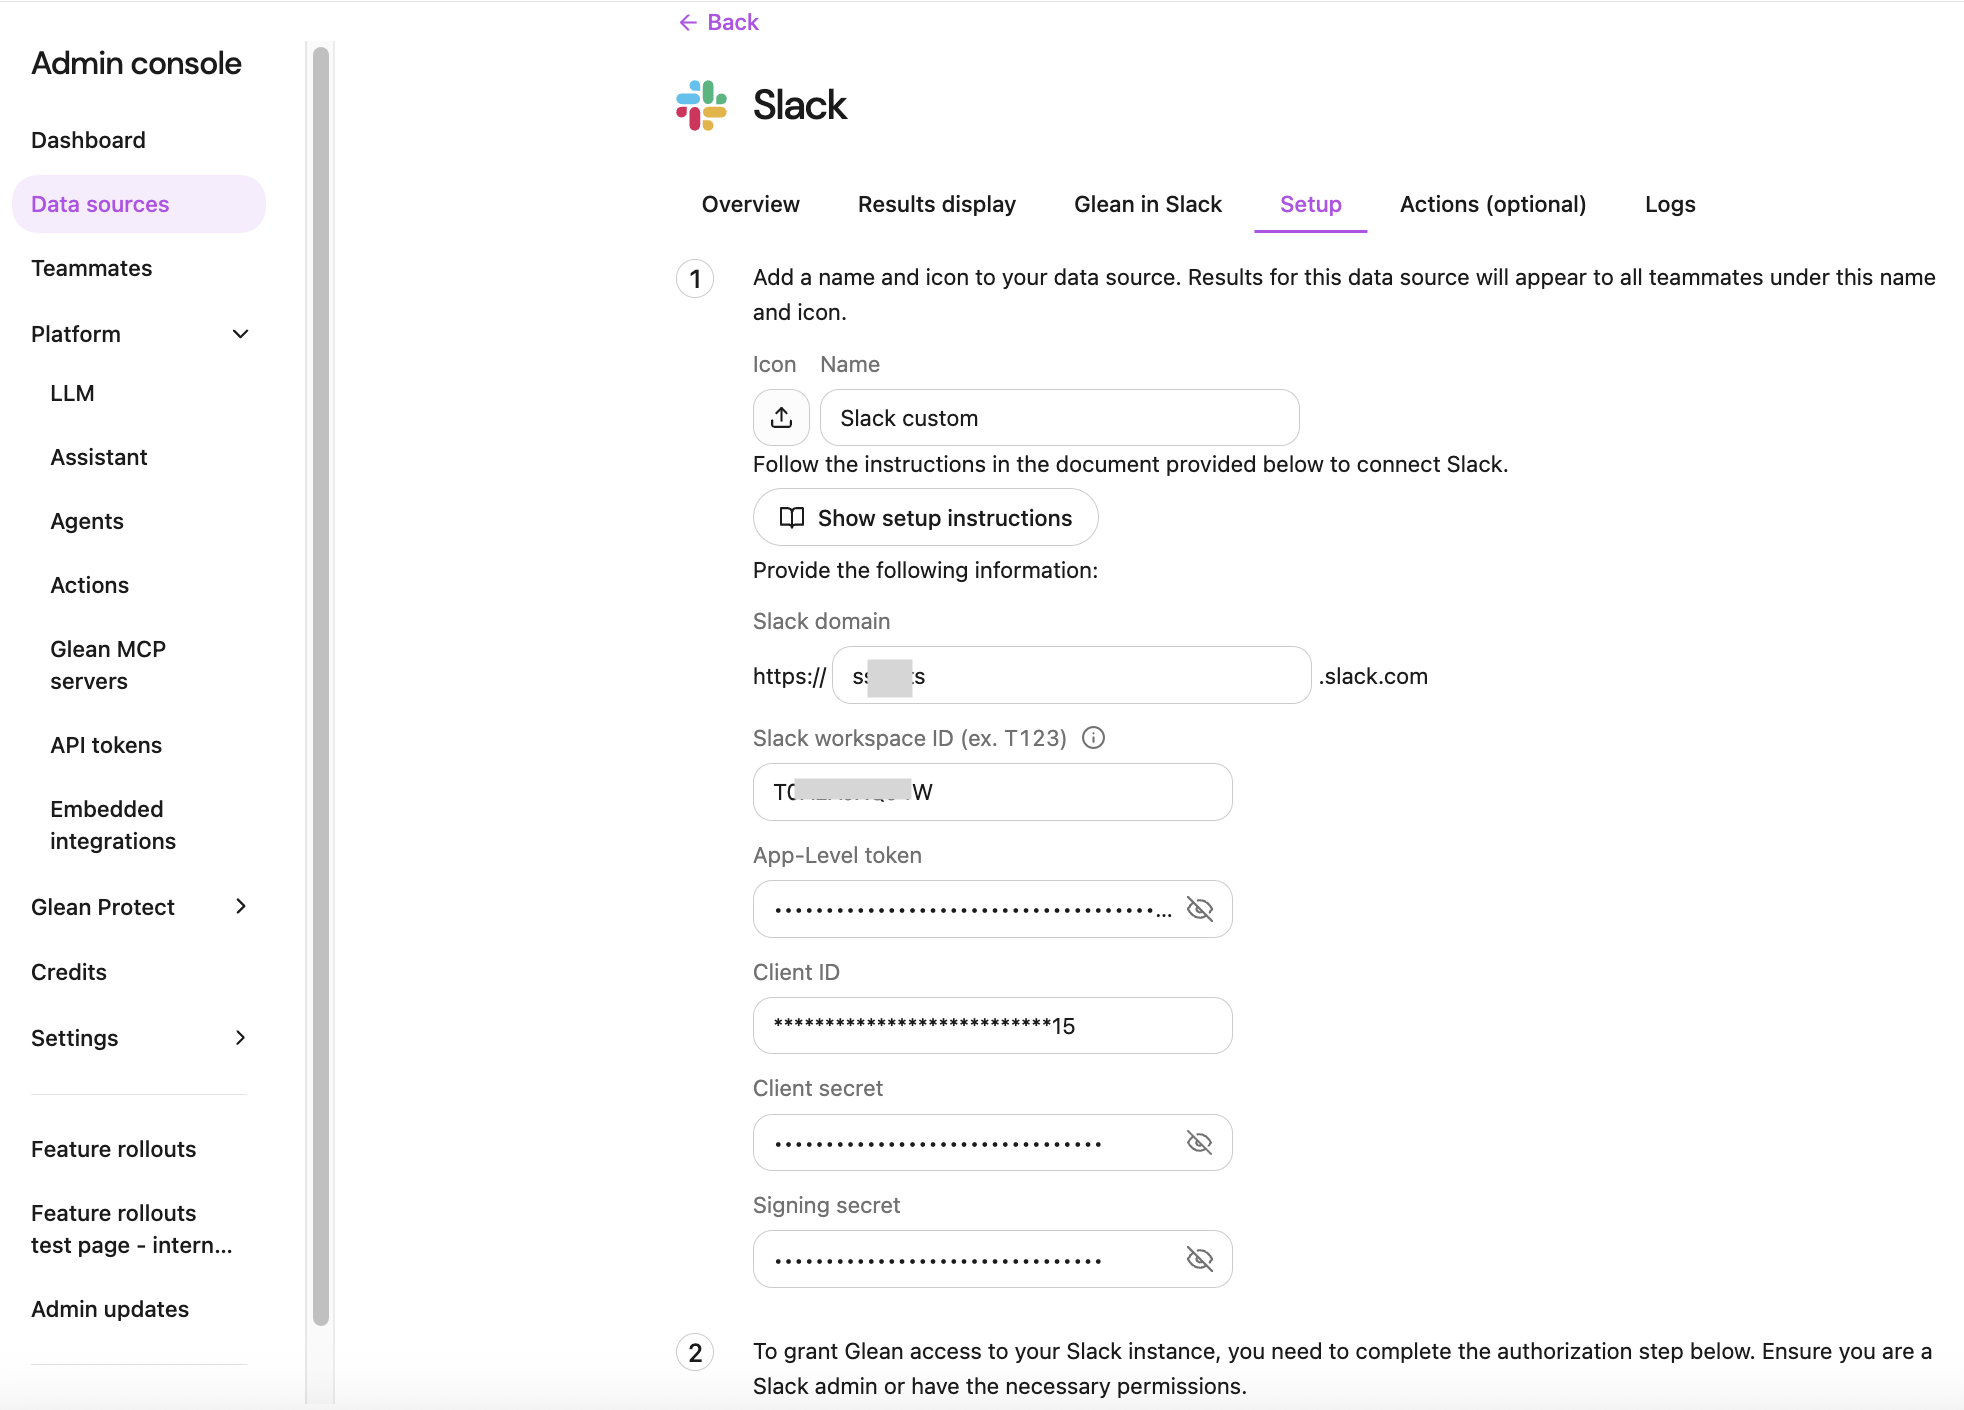
Search for your existing Slack connector and open the Setup tab.
-
Verify that the App-level token, Client ID, Client Secret, and Signing Secret fields are populated. This confirms you are using a custom Slack app.
-
If these fields are missing and you only see Slack domain and Slack ID, you are likely using the Central App and should follow the Slack Central App Upgrade Guide instead.
-
If you instead see fields such as Slack Enterprise Domain and Slack Enterprise ID (starts with
E), you are using Slack Enterprise Grid (Discovery API) and should follow the Slack Enterprise Grid (Discovery API) App Upgrade Guide.
-
2. Set up Slack Real-Time Search (RTS)
-
In Glean, go to Admin Console → Platform → Connectors → Add connector.
-
Select Slack Real Time Search (for single-workspace setups).
-
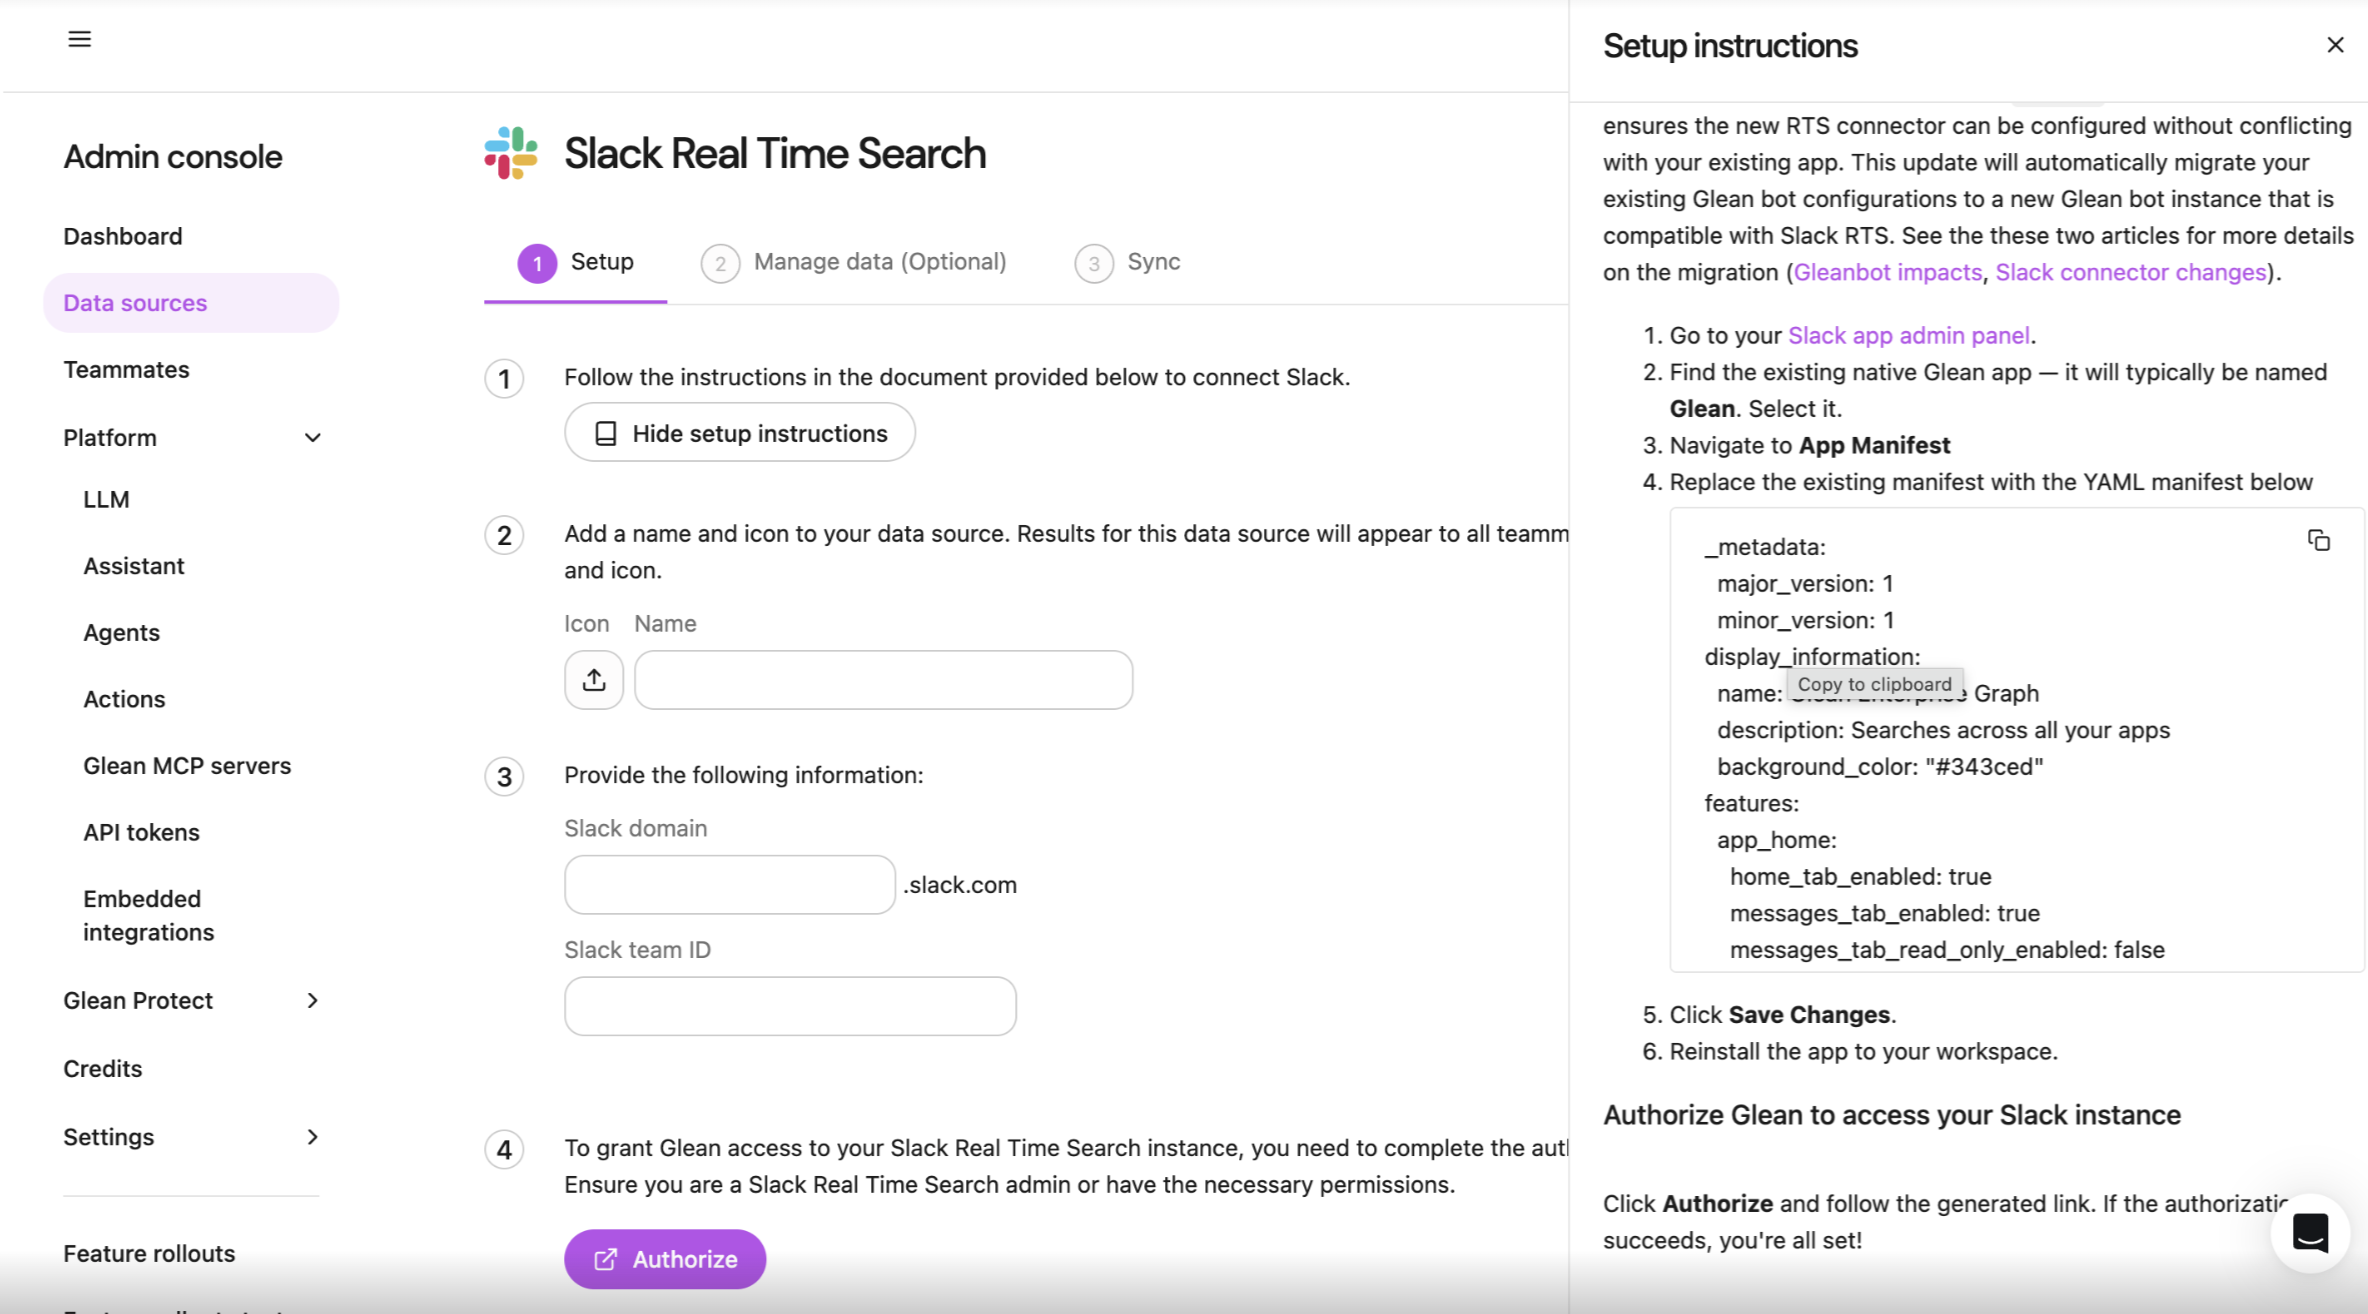
On the Setup tab, enter your Slack domain and Slack team ID.
- Slack Domain: Click your workspace name (top-left). The domain is the text before
.slack.com(e.g., if the URL isacme.slack.com,acmeis your domain.) You need to enter this value in the Slack domain field in Glean. - Slack Team ID: Look at your browser’s address bar. The page URL should look like
https://app.slack.com/client/T12345678/.... The ID starting with T immediately following/client/is your Slack Team ID (e.g.,T12345678). You need to enter this value into the Slack team ID field in Glean.
note - Slack Domain: Click your workspace name (top-left). The domain is the text before
These must exactly match the values in your primary custom Slack connector.
:::
3. Update your existing custom Slack app manifest
Before you authorize the Slack RTS connector in Glean (step 4), you must finish updating the manifest of your existing custom Slack app. If you run the RTS authorization flow before this manifest update is complete, Slack can create an extra app instance or surface confusing app not enabled or permission errors. Always complete this step and confirm it succeeds before you click Authorize in step 4.
-
In Glean, on the same Slack RTS setup page click Show setup instructions.
-
Locate the section providing the Slack app manifest and copy the code block.
-
In a new browser tab, go to the Slack app admin panel and open the existing custom Slack app that your Slack connector is currently using.
tip
Can't find the Slack app? If the app was created by a different user, it won't appear under your own apps at api.slack.com/apps. Instead, go to your Slack Workspace Settings → Integrations → Installed Apps, locate Glean, and click App Details to access the app and its manifest. See Slack's documentation for more information. :::
- In the left sidebar, navigate to App Manifest.
- Paste the new manifest that you copied from Glean, overwriting the old one.
- Click Save Changes.
- Remove any existing
/gleanslash commands and disable Interactivity for the existing custom app. - Reinstall the app to your workspace if prompted by Slack to apply the new permissions.
- Click Allow to confirm the updated permission scopes.
- Once successful, go back to Glean Admin console, then continue with Step 4: Authorize and validate the Slack RTS connector.
4. Authorize and validate the Slack RTS connector
- In Glean, return to the Admin Console → Platform → Connectors and open the Slack RTS connector you just added.
- On the Setup tab, click Authorize. This performs the OAuth flow using the updated manifest permissions from your custom app.
- After the authorization completes successfully, click Sync now on the Slack RTS connector to start the initial message mapping.
- Click Save to store the configuration.
You can expect to see the Slack RTS connector show only a small number of records being "synced." For more information, see Expected Admin crawl status for RTS.
5. (Optional) Configure a test group
Roll out RTS safely by starting with a subset of users before expanding to the entire organization. After setting up the Slack RTS connector:
-
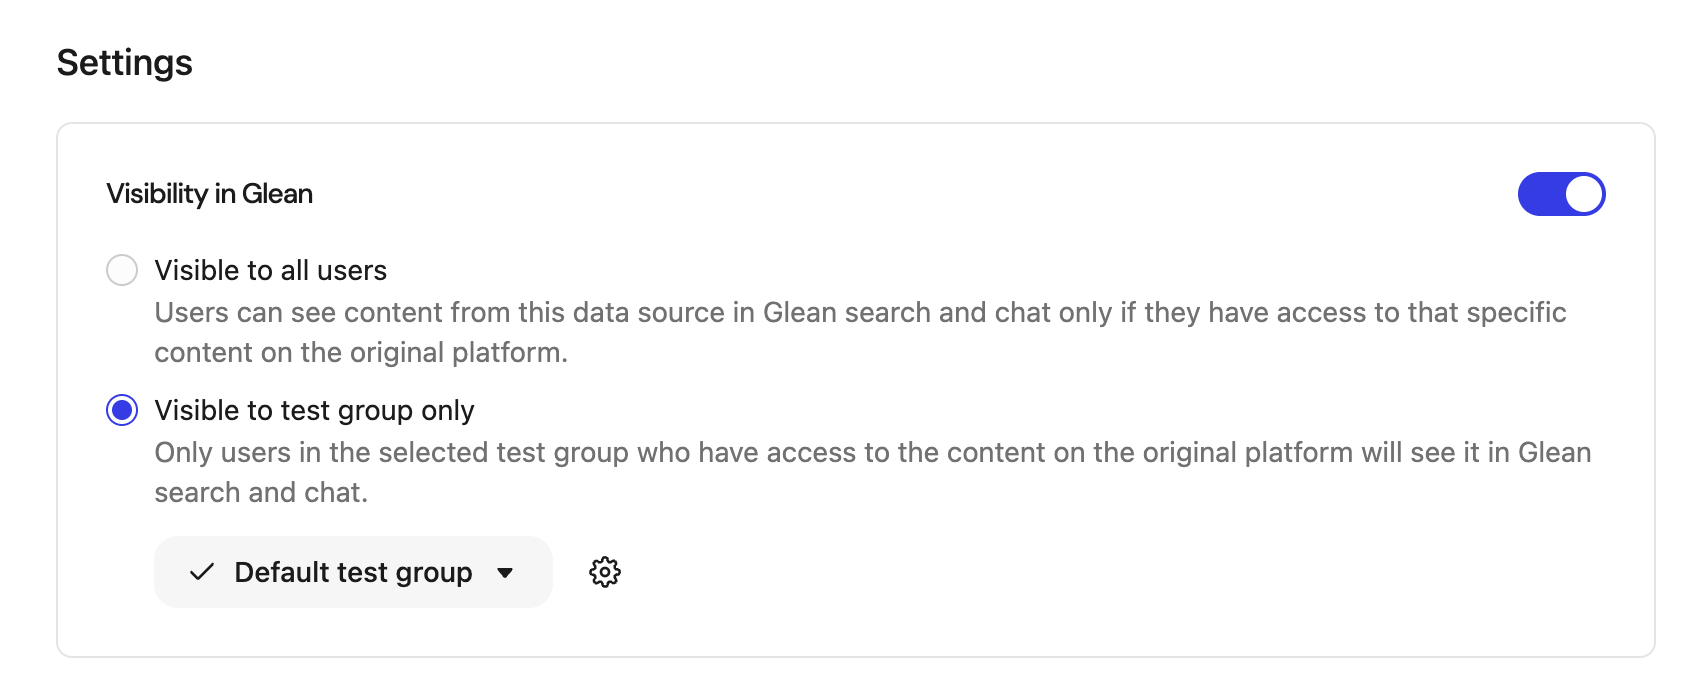
In Admin Console → Platform → Connectors → Slack Real Time Search → Overview navigate to the Settings section.
-
Under Visibility in Glean, select Visible to test group only.
-
Choose an existing test group or create a new test group. For more information, see Test groups for connectors.
Common strategies include:
- Pilot cohort: IT, Support, or identified power users.
- Slack-heavy teams: Engineering or Customer Success.
Note on Visibility: Only users within the selected test group will see Slack RTS results.
- Each user must still perform a one-time Slack authorization (see end-user section).
- Once validated, you can switch visibility to Visible to all users.
Guidelines for test users
Ask your pilot users to:
- Use Glean for your normal Slack‑related searches and questions for 1–2 weeks.
- When something looks off, capture:
- The exact query you ran
- What you expected to see
- What you actually saw (screenshot if possible)
- Whether you were in Search, Assistant, or Gleanbot
6. End-user authorization
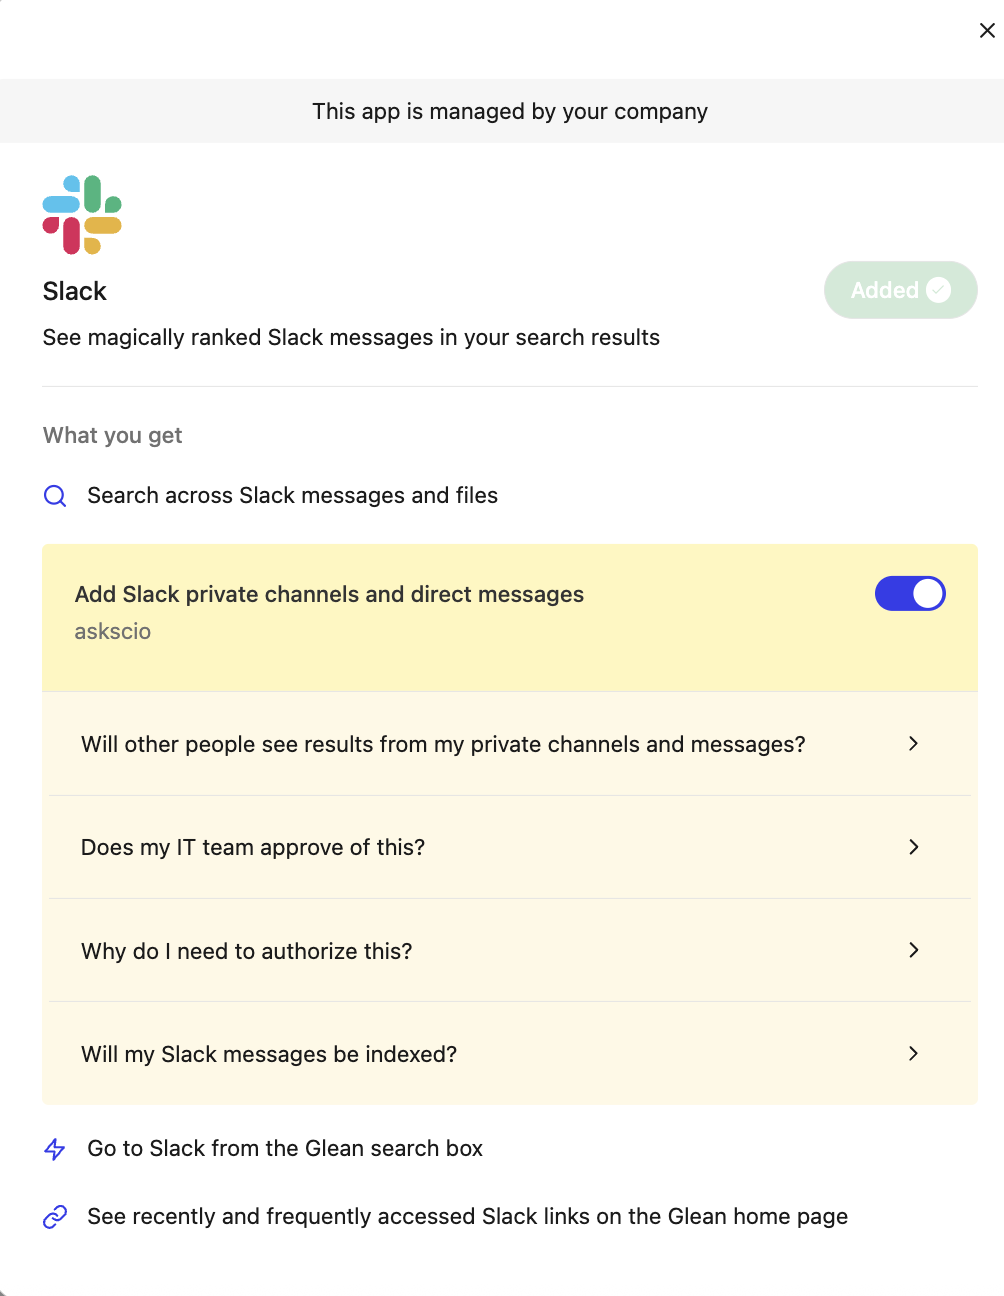
After you complete the steps above, each end-user must authorize the Slack app once to see permission‑aware Slack results (including private channels, DMs, and group DMs). Until a user authorizes, Slack Real Time Search is not used for that user’s Slack results.
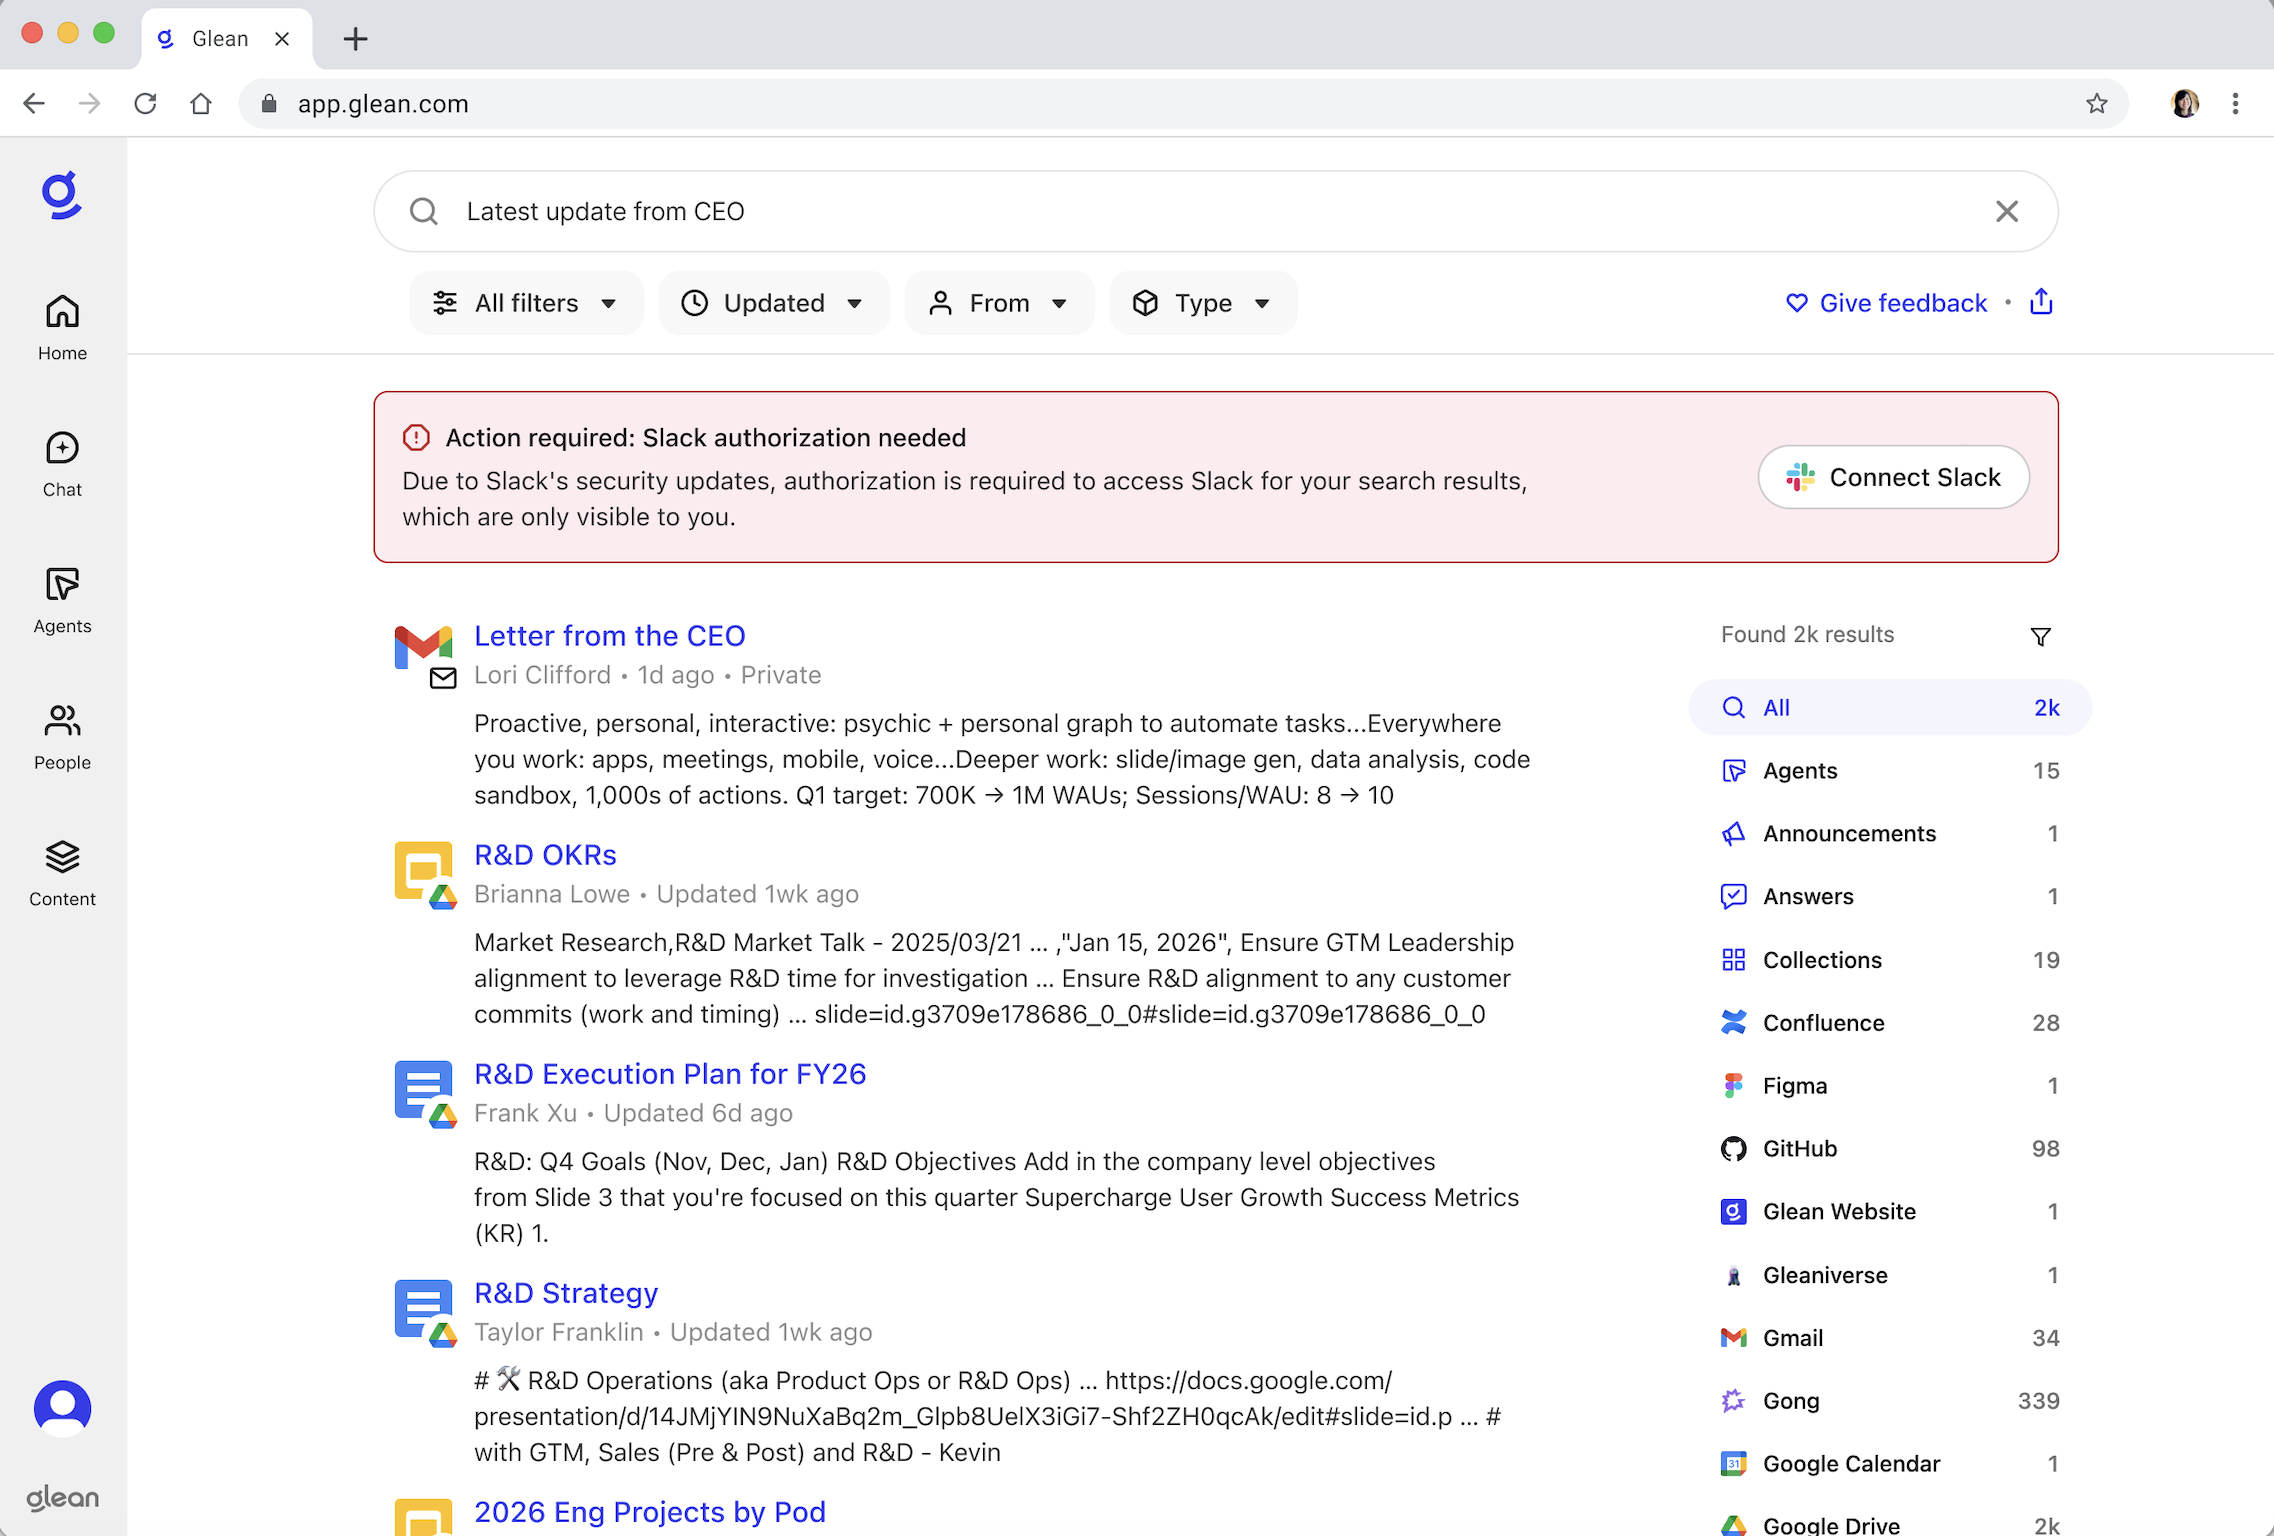
End users will see a Slack authorization banner on the Search, Home pages, and Slack channels to connect Slack Real Time Search.
Slack Admin App Approval
If your Slack workspace has Admin App Approval enabled, end users who attempt to authorize the Glean app may be blocked by a pending‑request gate instead of completing the OAuth flow directly. A Slack workspace admin must approve the Glean Marketplace app before end users can complete authorization:
- As a Slack admin, go to the Slack Admin → Manage Apps page and view the list of pending app requests. For more information, see Manage app approval for your workspace.
- Locate the pending request for the Glean Marketplace app.
- Approve at least one user’s request. Once approved, access typically propagates to other users in the workspace.
When do users see the Slack RTS authorization prompt?
You will be prompted to authorize when:
- Use Glean in Slack (for example, run
/gleanor mention@Glean) for the first time after RTS is enabled. - Run a search in Glean where Slack results would be shown (from the Home or Search page).
- Connect Slack Real Time Search from Your settings → Connectors → Slack Real Time Search.
- Home page experience
- Search experience
- Slack channel

After you authorize Slack Real Time Search, you can confirm the connection in your Glean settings (Your settings → Connectors → Slack Real Time Search).
If you dismiss or miss this banner, you can authorize Slack later from your Glean settings:
- In Glean, go to Your settings → Connectors.
- Locate Slack Real Time Search.
- Click Connect or Re-authorize and complete the Slack sign-in flow.
After authorization, users will:
- See a dedicated Slack section in search results containing messages and threads.
- Receive Slack-sourced content within Assistant and Gleanbot responses.
- Note: Users can re-trigger authorization at any time via their Glean Settings page.
Minimizing channel noise from bot joins
To reduce visible channel-join noise during migration, you can temporarily turn off Slack’s join/leave messages. For details, see Slack connector changes: Gleanbot impacts and FAQ and Slack’s help article on managing join and leave messages.
Limitations and functionality differences
- After this change, your Slack integration will include both the existing Slack connector (using your custom app) and the Slack Real Time Search (RTS) connector.
- The Slack Real Time Search (RTS) connector fetches messages at query time rather than relying only on the legacy indexing behavior.
Glean in Slack (Gleanbot)
As part of this migration, your existing Glean in Slack (Gleanbot) experience is migrated to a new Glean in Slack Real-Time Search (RTS) experience powered by the Slack RTS marketplace app (white icon).
- The responding bot in Slack changes from the legacy custom app (blue icon) to the new RTS app (white icon).
- This change applies to all users in your Slack workspace or org once Gleanbot migration completes; it is not limited to the RTS test group.
- Channel-level Gleanbot configuration (which channels Gleanbot responds in, how often it responds, and which agents/tools are mapped to channels) is migrated from your custom Slack app to the RTS-powered app.
- There is no way to partially upgrade Glean in Slack. Once you complete the Slack RTS setup, the Gleanbot migration job runs for your entire workspace, even if Slack RTS search is only visible to a test group.
To learn more about these Glean in Slack changes and limitations, see:
Note: If you stay on the legacy custom-app-only setup without enabling RTS, Slack’s API and rate-limit changes may cause Slack search results to become stale or incomplete over time, and Glean in Slack and Slack-based agents may stop working for some configurations. RTS is required to keep Slack results reliable over time.