Create a more powerful agent
Planning
Before you attempt to build a complex agent, it can be helpful to build a plan for what the agent will do, what data (if any) is required, and the logic of how the agent should accomplish its task. You should account for both high-level logic that informs the sequencing of steps the agent will take as well as the behavior you want the agent to follow for specific tools.
Note that it’s helpful to start by defining the overall functionality, as this can inform which connectors you will need to build your agent successfully.
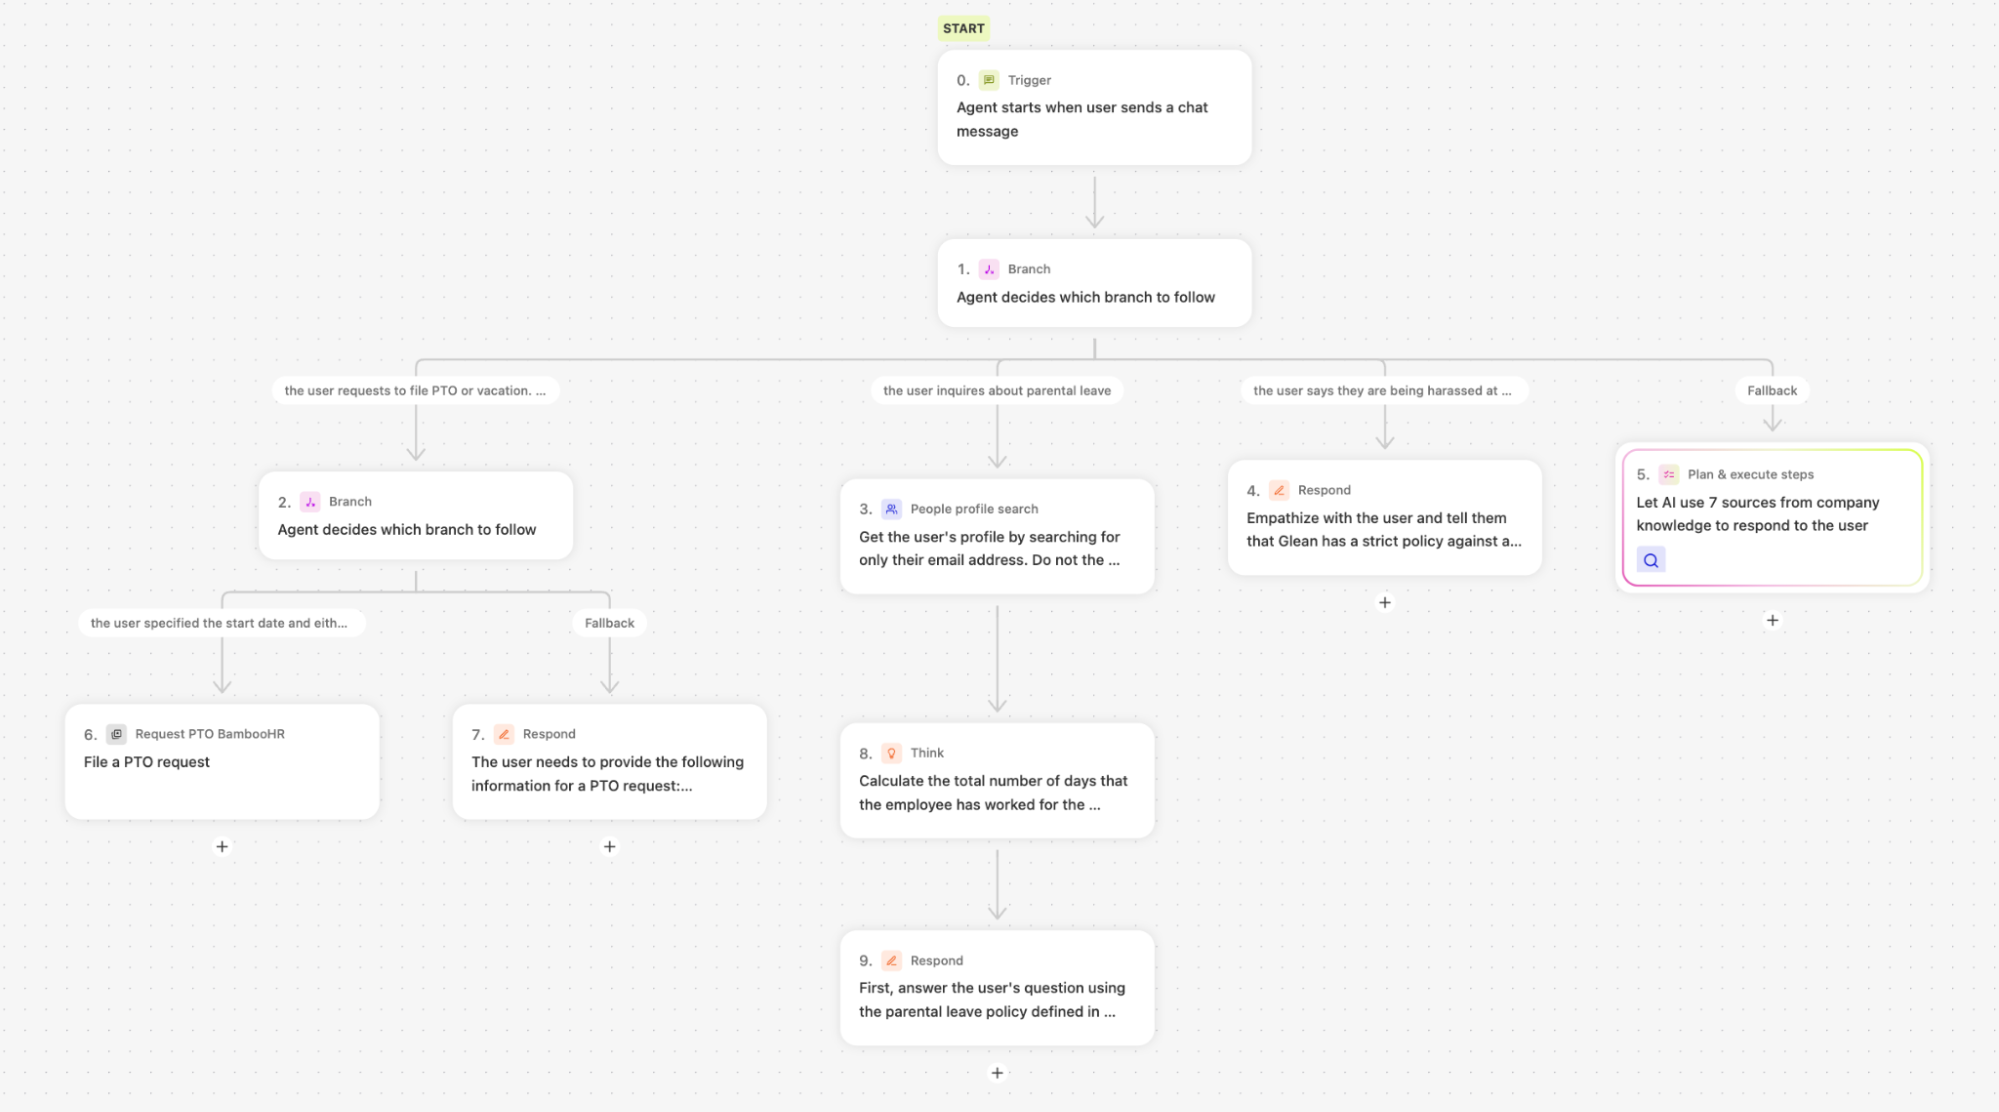
Your plan does not need to be overly detailed - here’s an example of a plan we used to construct a demo HR chatbot that can handle a wide variety of inquiries.
- What the agent does: answers questions from Glean employees about HR policy. General questions should be answered based on our HR documents, but employees asking about parental leave should be personalized based on the employee’s tenure. Similarly, when asked about workplace harassment, the agent should direct employees to a human HR representative. The agent should also be able to file PTO requests using our custom tool for BambooHR.
- Required connectors: for general HR questions, we’ll need to point the agent to our Glean collection which contains our official company policy documents. To check eligibility for parental leave, we will need to get employee profiles to check tenure. Finally, to successfully make a PTO request, we will need to make sure that the user provides a start and end date to their PTO.
- Agent logic: This agent needs to be conversational, so we will give it a chat message trigger. Since we want to handle different categories of questions in entirely different ways, we will need to add branch steps. Based on what we want the agent to do, we will need to add one branch for PTO requests, one for messages about workplace harassment, another for parental leave, and finally a fallback branch for all other inquiries. One final detail: for the PTO branch, we need to add a sub-branch, since we have an additional condition we need to check: whether the user has given the agent the dates it needs to file the PTO request.
Having this plan in place will speed up the process of building a complex Glean Agent. Here’s what our completed HR Agent looks like:
Building your agent
Once you have a rough plan for how your agent should work, what data you need, and the high-level logic to be followed, you should start creating your agent.
Using your plan as a reference, start constructing your agent based on where the required data comes from. This data will come from one of three places: a) it is provided by the user, b) it is deterministically read into memory every time the agent executes, or c) the necessary data is determined by the LLM when the agent runs.
- Data that comes from the agent user: For a task-based agent, anything that you need the user to provide should become an input field (in conversational agents, any documents in the user message are automatically read into memory).
- Data that is read every time the agent runs: Some documents will need to be read every time an agent runs. These documents should be directly linked in Think, Respond, or Read content steps.
- Data that depends on the agent user input: some documents needed by your agent may not be known at the time you build the agent. For example, if you want to read the Jira tickets mentioned in a support ticket, you will not know what those Jira URLs are when you create the agent. In this case, assuming the support ticket is taken as an input field, you will need to use natural language instructions in a Read document step to read the Jiras.
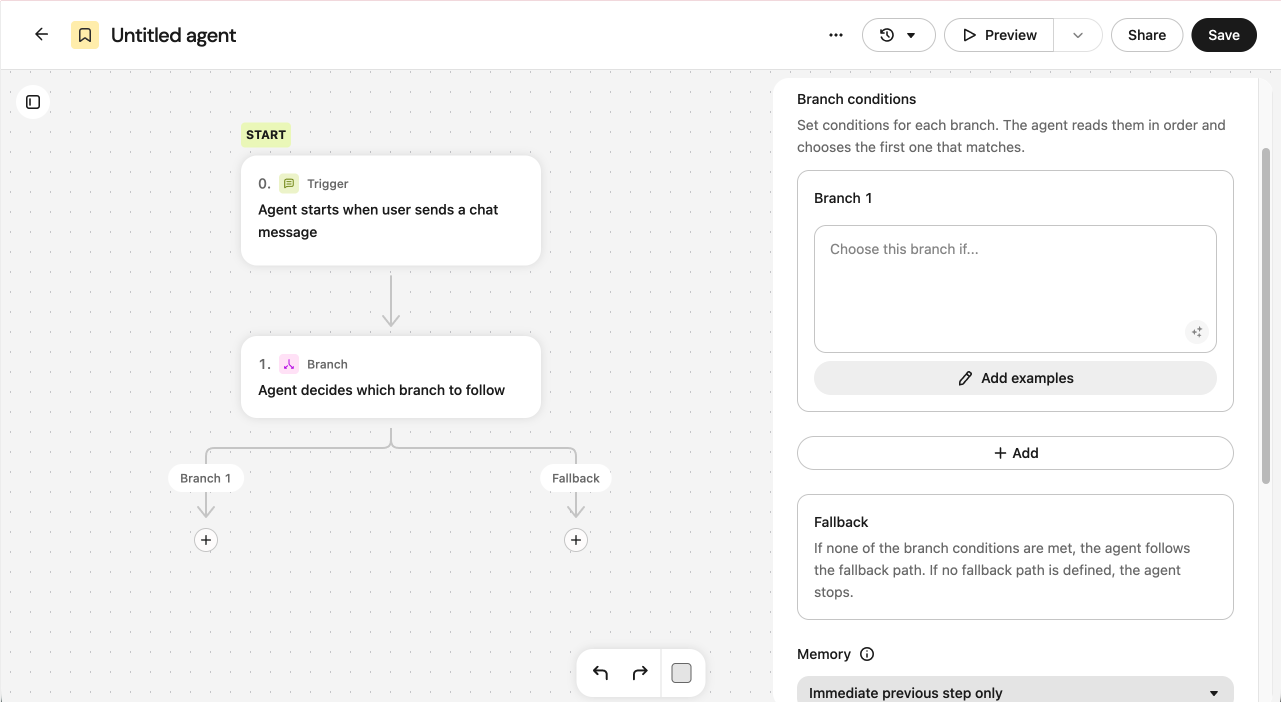
Once you have the initial data gathering steps completed, you can move onto control flow. If the steps your agent should take never change, you do not need to worry about adding any branches. Otherwise, if certain conditions alter the behavior of your agent, you should consider adding a branch, which allows you to specify a natural language condition for each branch. The branch will be executed if the condition is met; conditions are executed sequentially from 1 onwards, and only one branch will execute.
If the condition you want to check in your branch is either complicated or requires company-specific knowledge, providing the branch step with examples of when the condition is met can improve the performance of your agent.
After writing or refining step prompts, consider using the Enhance prompt feature to improve reliability and reduce trial‑and‑error. This tool automatically applies best practices to your step instructions, helping ensure consistent quality across your agent.
Managing memory
Each step adds its output to the agent’s “memory” - this is what each step has access to by default. This means that the memory grows larger as more steps execute. Reading large documents or including a large number of search results will fill up the memory faster.
You have a few tools at your disposal to manage the memory of agents:
- Memory inclusion per step: Glean Agents allow you to specify whether that step should have access to the memory of all previous step outputs, only the immediately previous step output, or no memory. When you have a lot of content in the memory, changing the memory inclusion for a certain step can help focus it on a particular task.
- Sub-agents: sub-agents have their own memory. Only the output of respond steps in a sub-agent are added to the overall agent’s memory. This makes sub-agents an effective way to process a large amount of content and add only a focused summary to the main agent.
Choosing the right LLM
Glean Agents allow you to customize the model used at the agent level as well as at the step level. If your task involves complex reasoning or requires generating a large amount of tokens, it may be worth selecting a more advanced model, such as reasoning models including o3 and Gemini Pro 2.5.
To configure the LLM for the entire agent, click the gear icon in the top right of the screen and click on the “Select Model” dropdown.
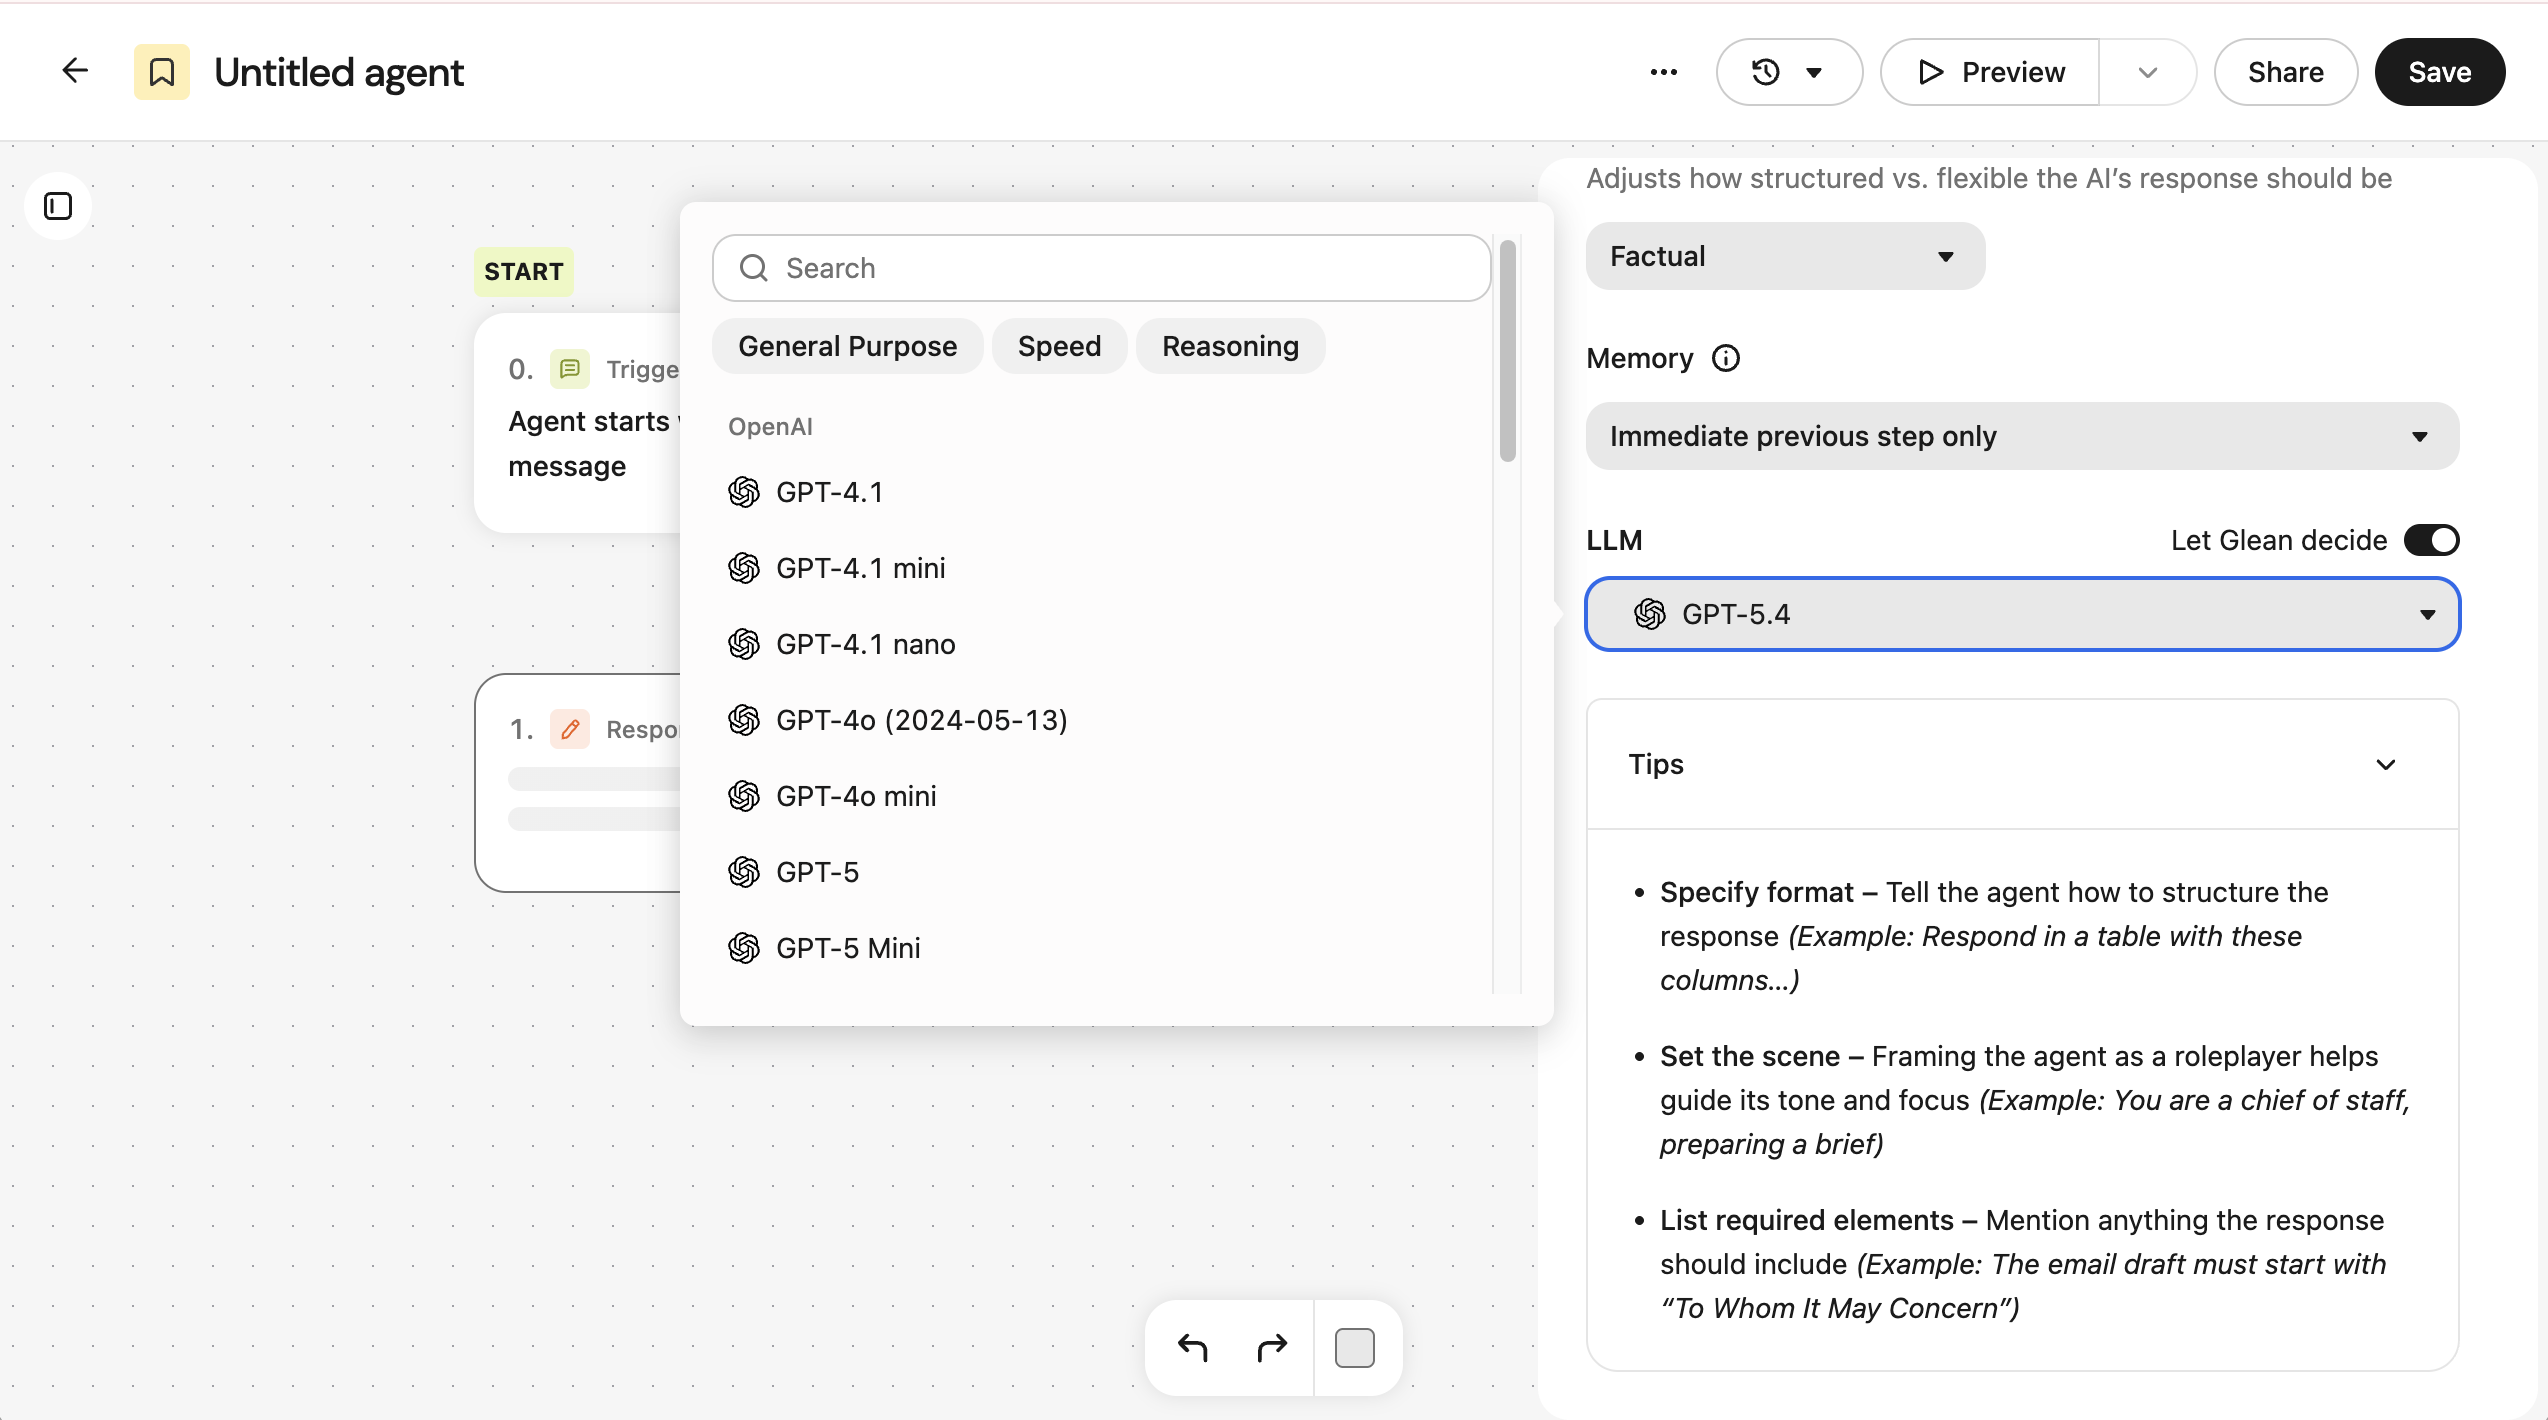
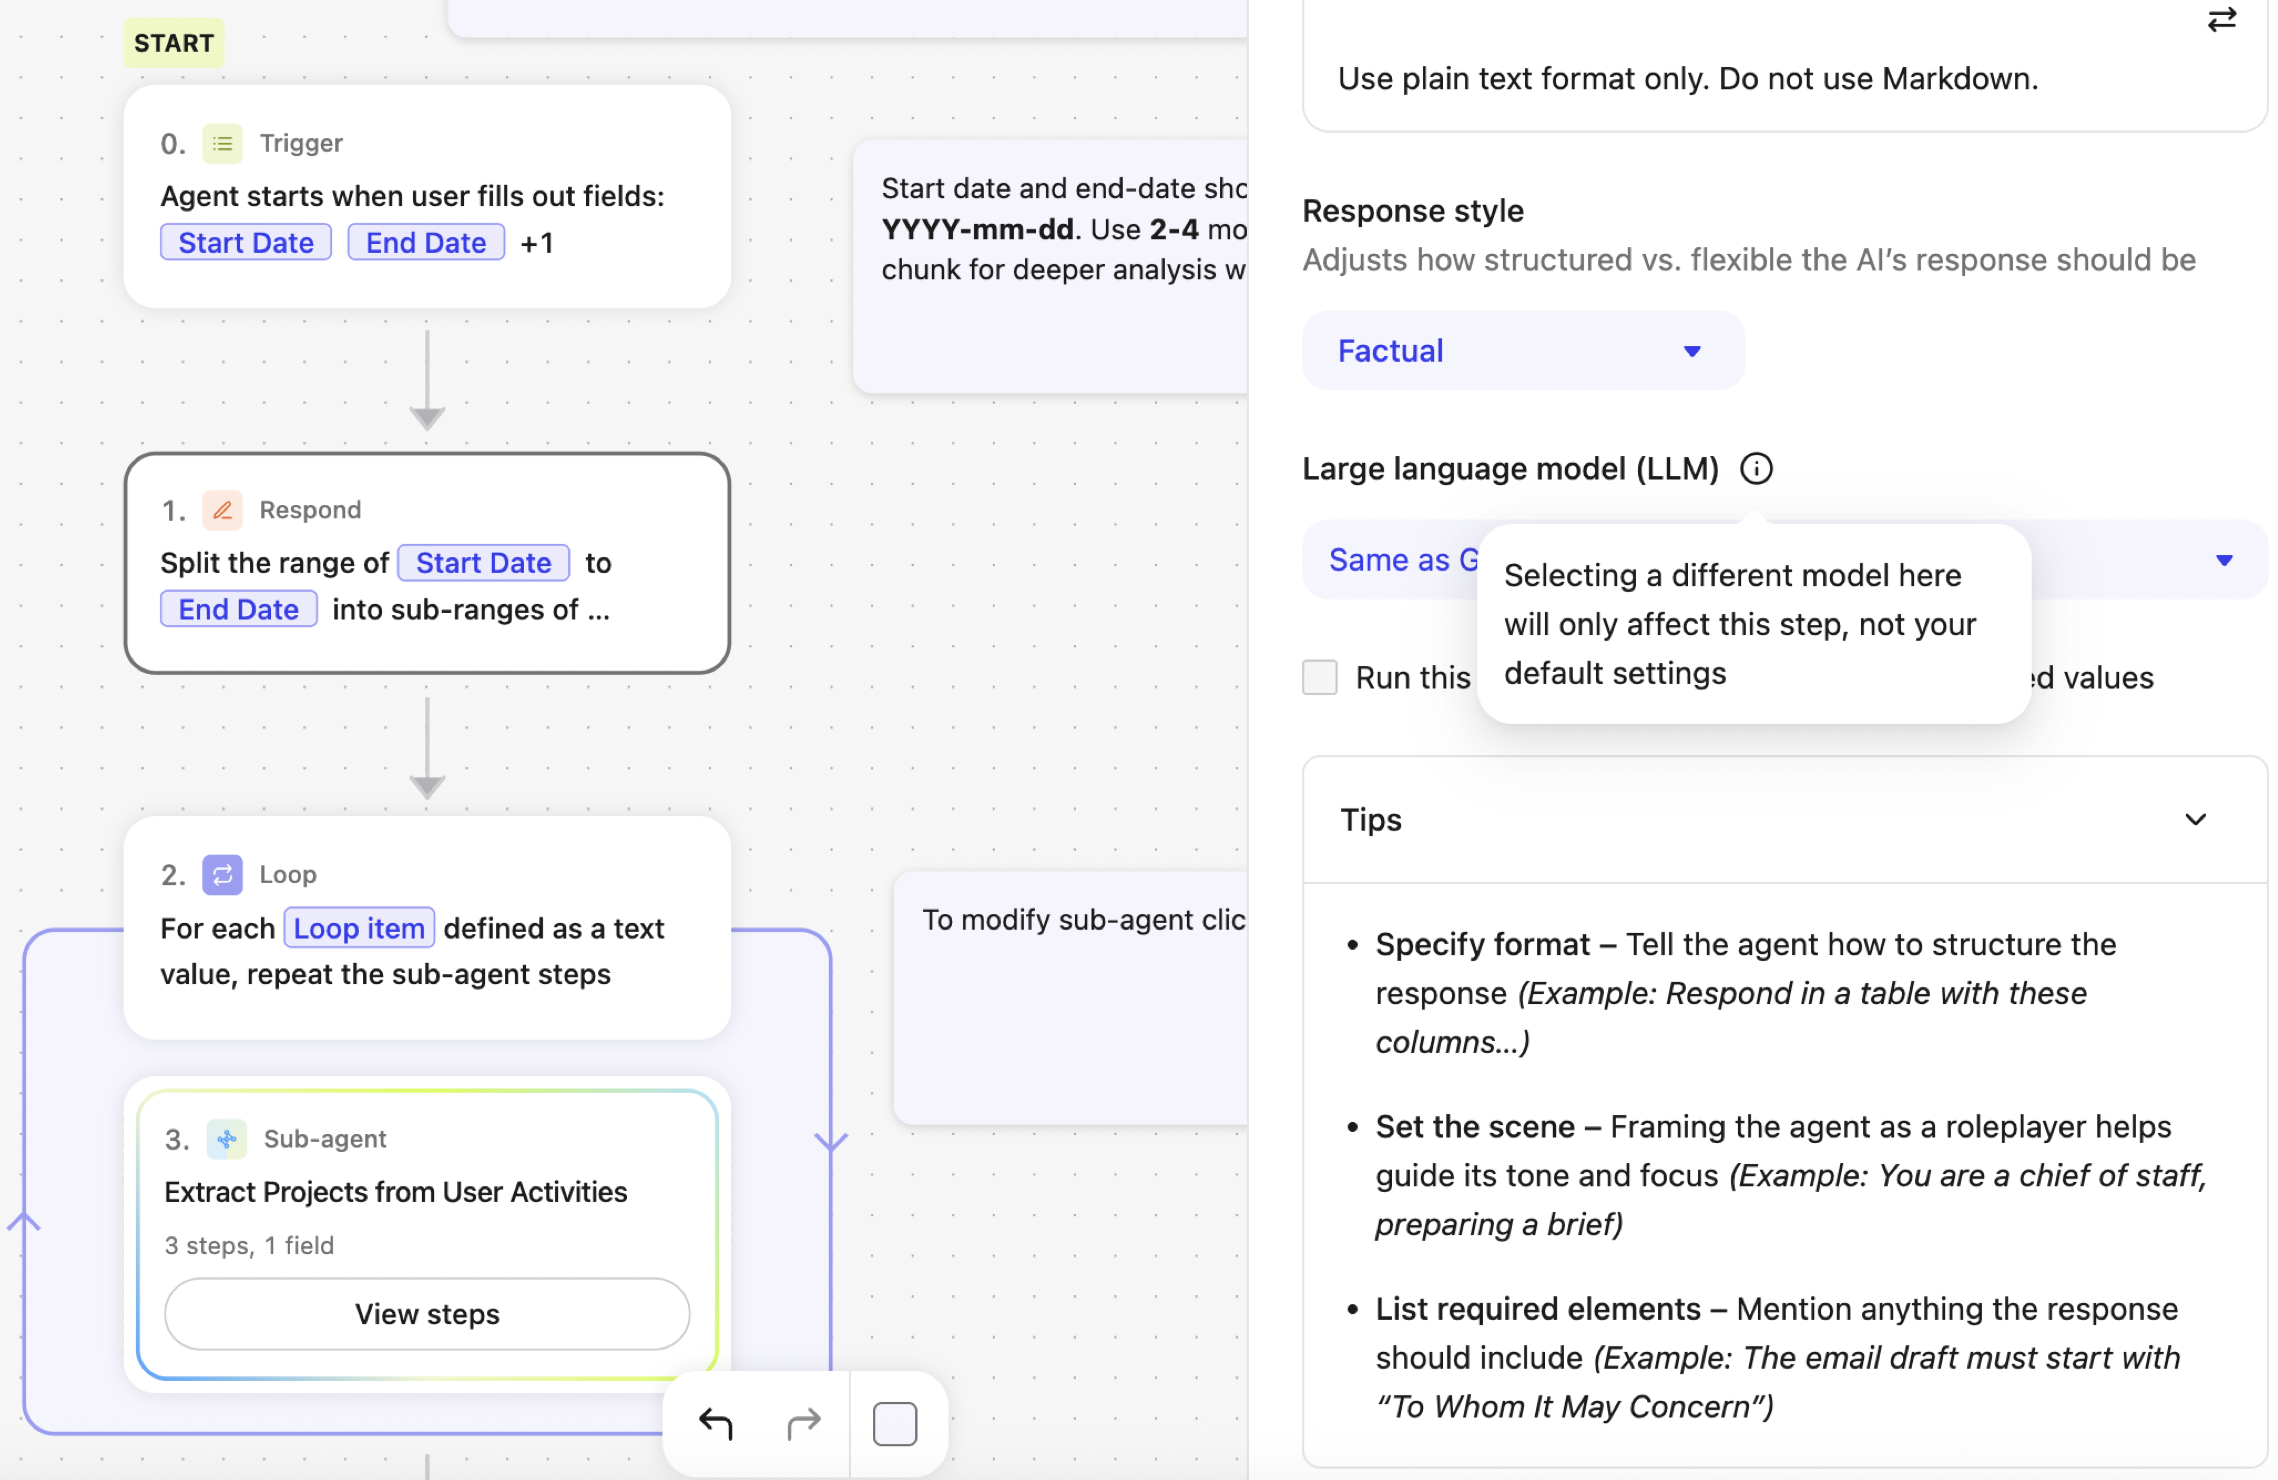
To configure the LLM for a specific step, select the step on the canvas, then choose a model from the Large language model (LLM) dropdown.
Exhaustive retrieval and tool-call limits
Each agent run has a tool-call budget, a guardrail that caps the total number of tool calls the agent can make in a single execution. This budget protects against runaway costs, latency, and reliability issues from unbounded retrieval patterns.
When working with paginated connectors, the tool-call budget means the agent may not iterate through every page of a large result set. Instead of relying on open-ended get everything queries:
- Narrow scope with filters. Use status, assignee, priority, date range, or other source-specific filters to reduce the result set before the agent begins iterating.
- Use time-based or key-based batching. Break large queries into smaller windows, for example, one query per month so each call returns a manageable number of results. Configure your agent to iterate through these windows and aggregate the output.
- Avoid unbounded retrieval patterns. Queries like "get every issue in the project" are likely to exhaust the tool-call budget before completing. Always scope the query to the data you actually need.