ServiceNow Setup
Connect to ServiceNow
Required permissions for setup
- The user setting up this data source must be a ServiceNow Admin.
Other prerequisites
-
Glean currently only indexes the following:
- Knowledge Articles
- Service Catalog items
- ITSM incidents (incident table)
- APM
- Business Applications (cmdb_ci_business_app table) and SPM demands
- epics and projects (dmn_demand, rm_epic, pm_project tables) in ServiceNow.
- News Articles (Content Publishing application)
- Portal Content (Content Publishing application)
- Quick Links (Employee Center application)
To enable this, the ServiceNow admin creates a dedicated ServiceNow user with access only to the above doctypes.
-
All steps are to be done by a ServiceNow administrator. Note that the described steps are for the Tokyo release. If your instance is on a different ServiceNow release, the steps may differ slightly. If you have any questions, please contact Glean support.
-
Glean also supports additional configurations for custom ServiceNow URLs and custom Knowledge Article templates.
If applicable, please contact Glean support to set these up after completing the below steps.
-
Glean supports simple permissioning for ITSM, APM and SPM object types we support. Users with specific roles are granted access to all the documents. If you require a customized role, please reach out to Glean support.
1. Create a service account that Glean will use for fetching information from ServiceNow:
-
Navigate to Organization → Users and click New.
- Set User ID to
gleansearch. - Set Time zone to
GMT. This is required for new content updates to be picked up by Glean. - Set Email to a valid company email address on a domain registered with your Glean deployment. Glean uses this email during OAuth authorization. If the service account does not have an email address, or if the email domain is not recognized, authorization can fail.
- Leave the remaining fields as-is. Click Submit.
- Set User ID to
-
Click on the
gleansearchuser that was created. -
Click Roles → Edit... and add the following roles:
knowledge_adminuser_criteria_adminuser_admincatalog_adminsnc_read_only- Only add the following role if it exists in your instance:
snc_internal - Add the following role if you want to index ITSM incidents as well:
itil - Add the following role if you want to index APM Business Applications:
sn_apm.apm_user - Add the following role if you want to index SPM documents (demands, projects and epics*):
it_demand_userit_project_userscrum_usersafe_scrum_user
- Add one of the following roles if you want to index News Articles or Portal Content from Content Publishing:
sn_cd.content_admin(provides full administrative access to Content Publishing)sn_cd.content_manager(provides management access to Content Publishing)
Glean accesses only the following tables:
sys_usersys_user_has_rolesys_user_groupsys_user_grmemberuser_criteriakb_knowledgekb_knowledge_basekb_uc_can_read_mtomkb_uc_cannot_read_mtomkb_uc_can_contribute_mtomkb_uc_cannot_contribute_mtomkb_categorykb_usesc_cat_itemsc_cat_item_user_criteria_mtomsc_cat_item_user_criteria_no_mtomsc_categorysc_catalogsys_audit_delete (if provided access)incident (if enabled)cmdb_ci_business_app (if enabled)dmn_demand (if enabled)pm_project (if enabled)rm_epic (if enabled)sn_cd_audience (if enabled)sn_cd_news_article (if enabled)sn_cd_content_portal (if enabled)sn_cd_content_visibility (if enabled)sn_ex_sp_quick_link (if enabled)The
snc_read_onlyrole:- With the
snc_read_onlyrole, the user would not be able to log in to ServiceNow. The user needs write access to theoauth_credentialtable during token creation. - After the OAuth flow has completed, you can assign the
snc_read_onlyrole to the user to prevent write access to any other tables during crawl.
2. Provide access to sys_audit_delete table. This will help in faster updates to document permissions when identity data changes.
-
Create a new role:
read_access_sys_audit_delete:- Navigate to User Administration → Roles.
- Click on New and enter the name as
read_access_sys_audit_delete - Save.
-
Add an ACL rule that gives this role read access to the
sys_audit_deletetable:- Elevate role to security_admin to be able to create a new ACL.
- Navigate to System Security → Access Control (ACL).
- Click on New and enter the following details.
- Type:
record - Operation:
read - Name: Select the
sys_audit_deletetable - Add the new
read_access_sys_audit_deleterole under Requires role - Submit.
- Type:
-
Assign the new role
read_access_sys_audit_deletetogleansearchuser.
3. Configure ACLs for News Articles or Portal Content (Content Publishing):
This step is required only if you intend to index documents from the Content Publishing application. Access to these articles is controlled via audiences specified on each article. To enable Glean to access documents from the Content Publishing application, you need to create two new ACL rules:
-
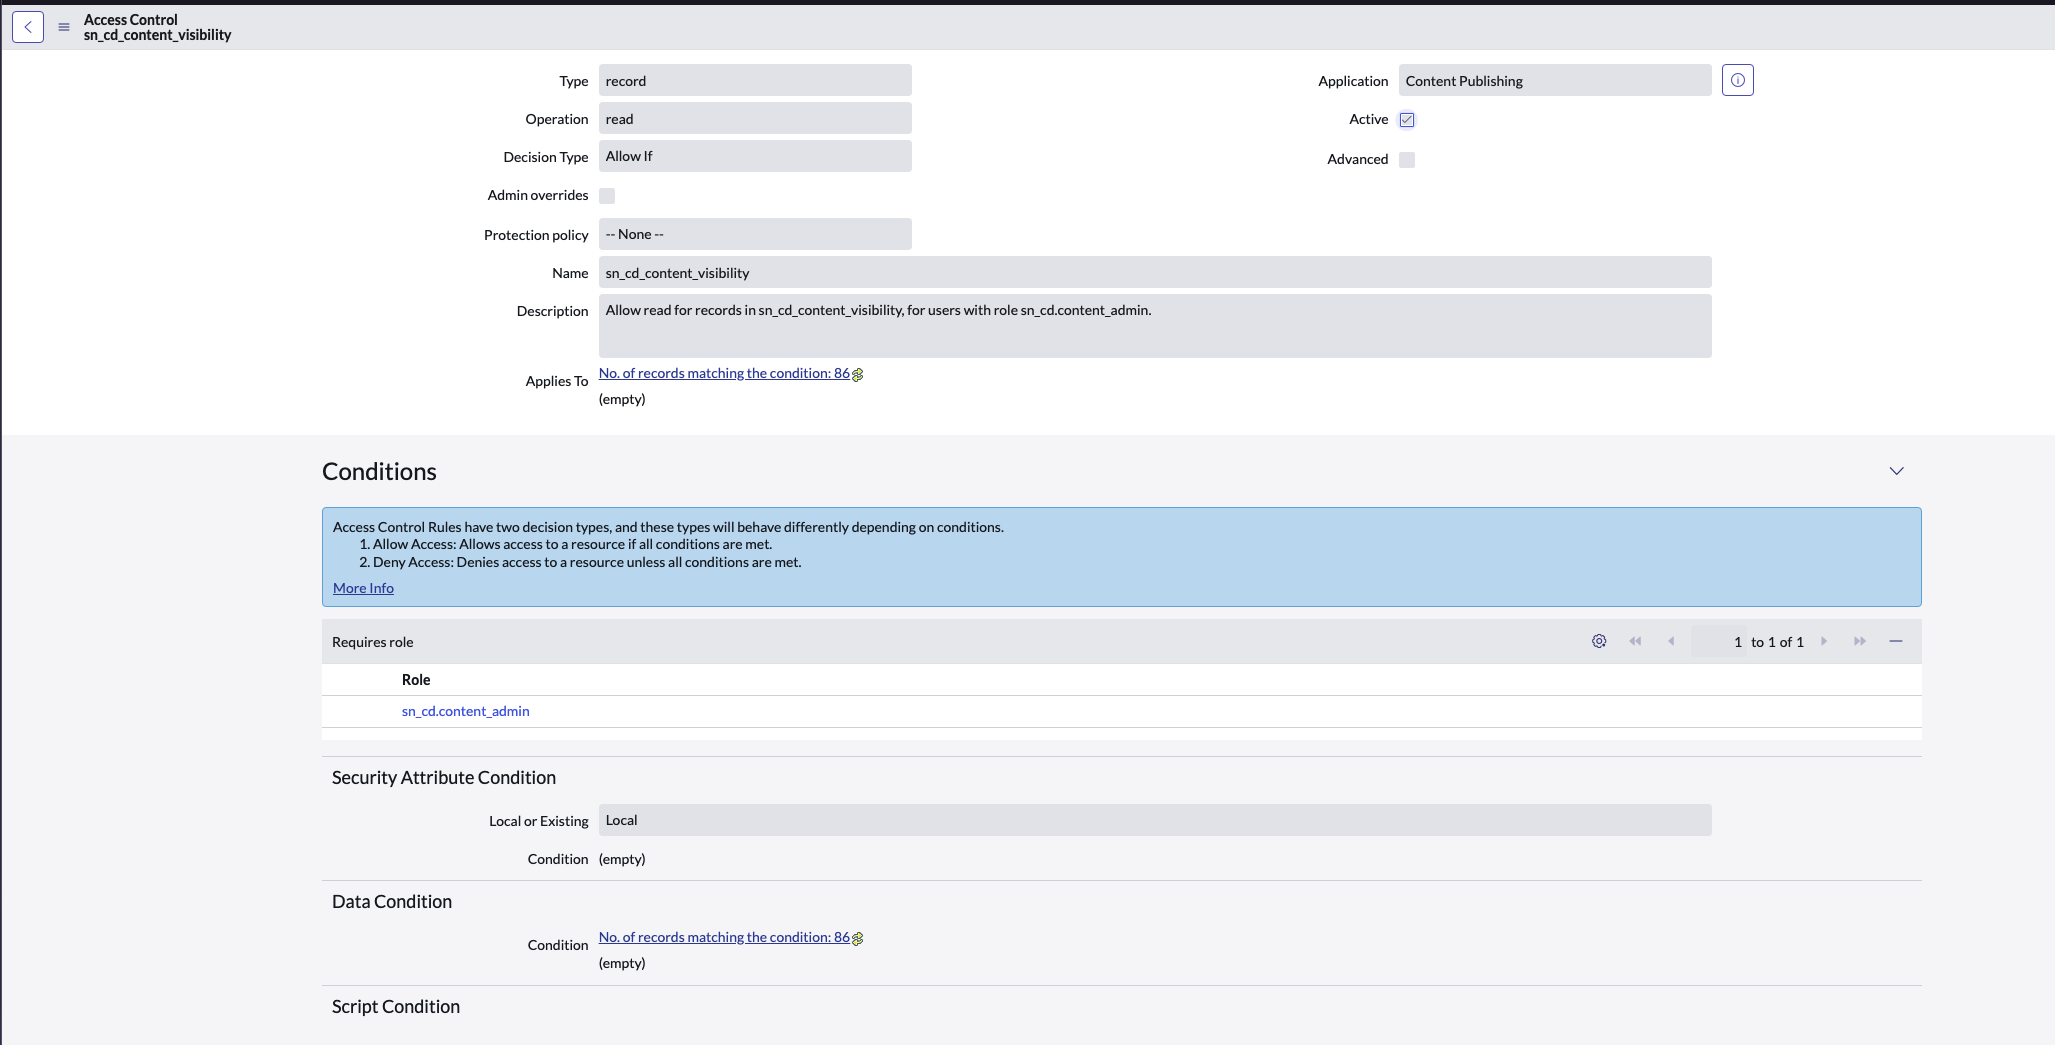
Create a Table ACL for the News Article table:
- Elevate your role to
security_adminto be able to create a new ACL. - Navigate to System Security → Access Control (ACL).
- Click on New and enter the following details:
- Type:
record - Operation:
read - Name: Select the
sn_cd_news_articletable - Under Requires role, add either:
- The existing
sn_cd.content_managerorsn_cd.content_adminrole that was assigned to the gleansearch user, OR - A new custom role created in the Content Publishing application (if you prefer to use a custom role instead of the built-in ones)
- The existing
- Submit.
- Type:
- Elevate your role to
-
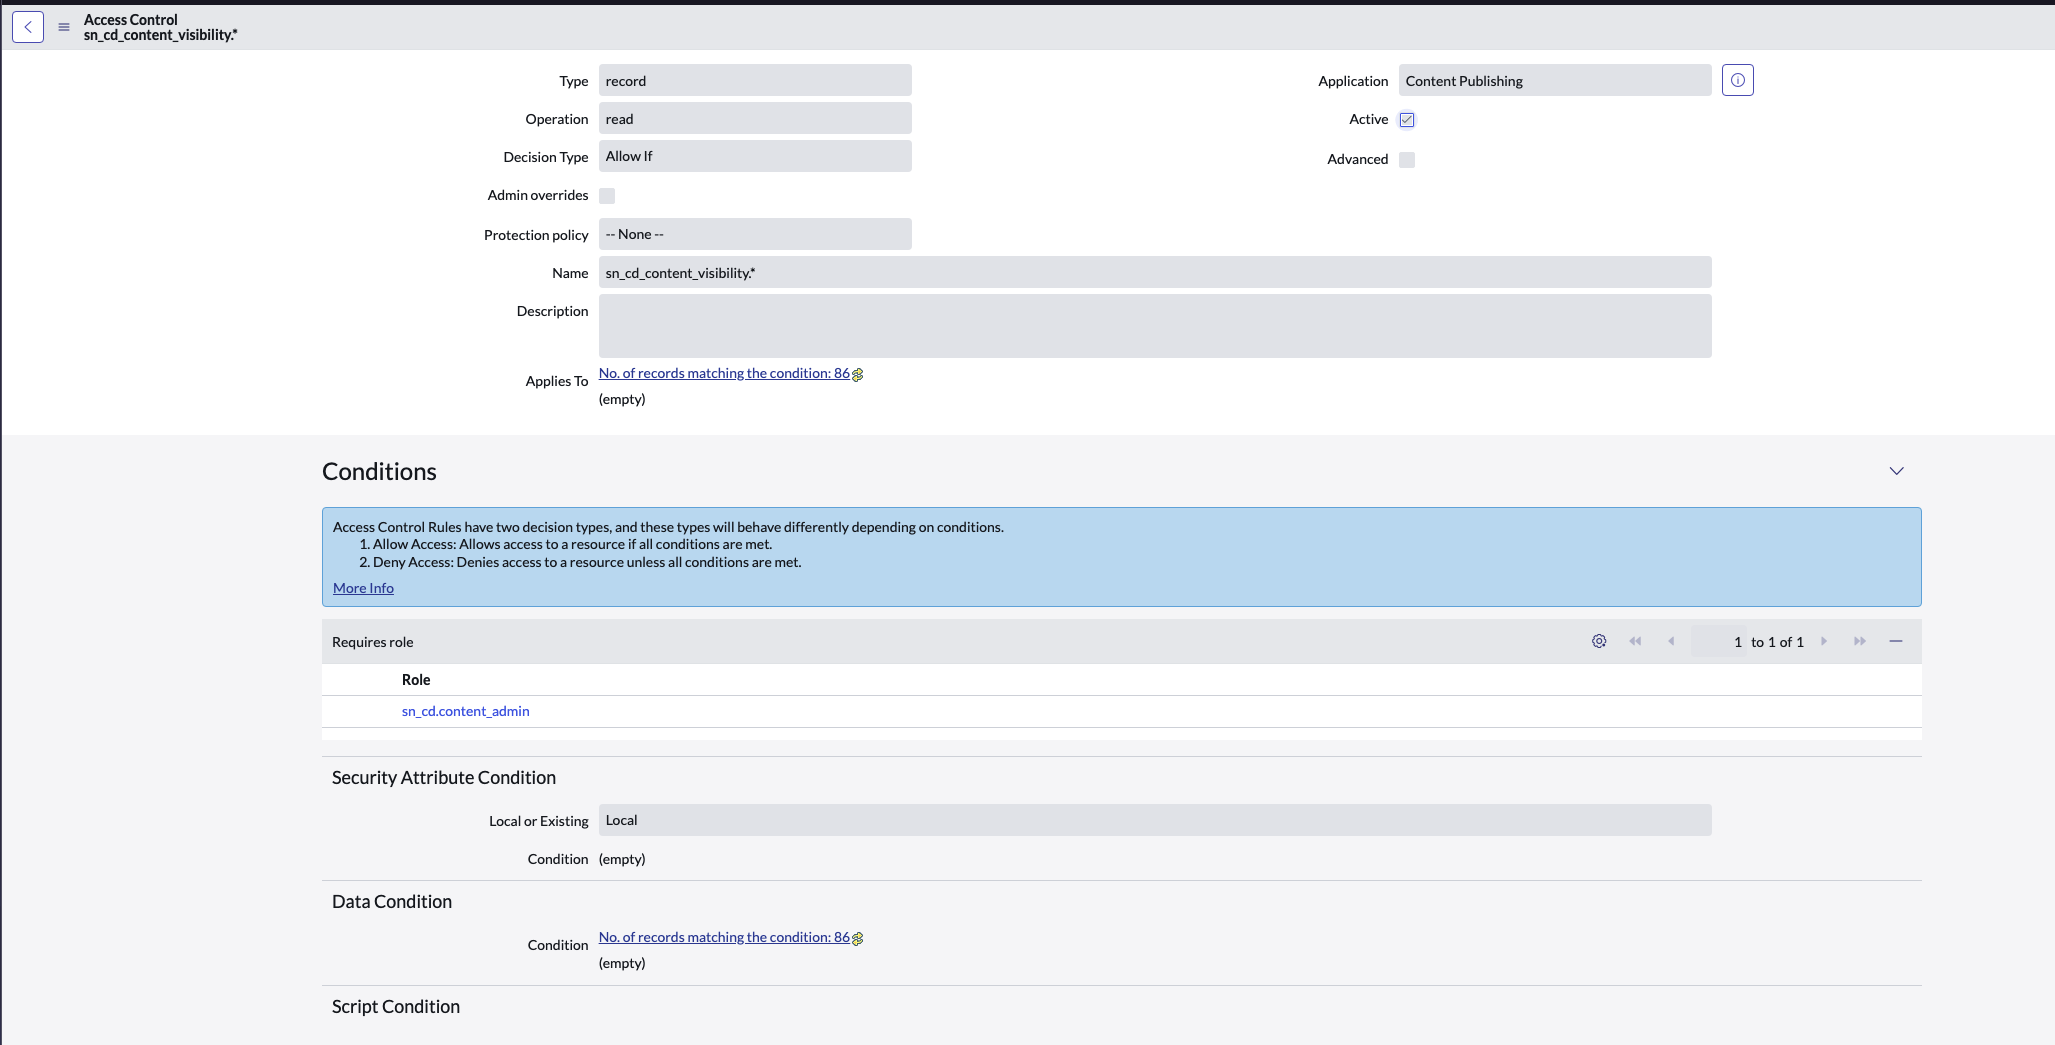
Create a Record ACL for News Article records:
- Elevate your role to
security_adminto be able to create a new ACL. - Navigate to System Security → Access Control (ACL).
- Click on New and enter the following details:
- Type:
record - Operation:
read - Name: Select
sn_cd_news_article.*(all fields) - Under Requires role, add the same role used in the table ACL above
- Submit.
- Type:
- Elevate your role to
You can choose to either use the existing sn_cd.content_manager or sn_cd.content_admin roles, or create a new custom role in the Content Publishing application. If creating a custom role, ensure it's assigned to the gleansearch user and used in both ACL configurations above.
4. Configure an OAuth application that will provide access tokens to Glean acting as the above user:
- Navigate to System OAuth → Application Registry and click New.
- Click Create an OAuth API endpoint for external clients.
- Set Name to
Glean Search OAuth. - Set Refresh Token Lifespan to
2,147,483,647. - Set Access Token Lifespan to
86,400. - Set Redirect URL to
https://<deployment-instance>-be.glean.com/instance/servicenow/oauth/verify_code, where<deployment-instance>is your instance's deployment environment identifier. - Leave the remaining fields as-is. Click Submit.
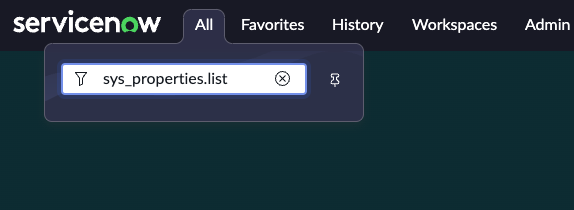
5. Validate System Properties:
-
Navigate to the System Properties List (All → Enter sys_properties.list).
-
Identify and note the system property glide.knowman.apply_article_read_criteria and its value.

-
Identify and note the system property glide.knowman.block_access_with_no_user_criteria and its value.

-
Identify if you have Knowledge Article templates enabled and want to index template-based articles.
- Navigate to All → System Applications → All Available Applications → All
- Look for the plugin Knowledge Management Advanced (com.snc.knowledge_advanced) and check if it is enabled.
- You can learn more about knowledge article templates here.
6. Finally, enter ALL of the following information into the Glean admin console in the corresponding fields:
- Domain Name: Accepts domain or domain url. Note, the domain url should not include any http
prefixes, and should follow the format of
<domain>.service-now.com. It is preferred to enter the domain url - User ID:
gleansearch - OAuth Client ID: Client ID from the application in step 3.
- OAuth Client Secret: Client Secret from the application in step 3.
- Set the Apply article read criteria box to mirror the system property glide.knowman.apply_article_read_criteria.
- Set the Block access with no user criteria box to mirror the system property glide.knowman.block_access_with_no_user_criteria.
- If you have Knowledge Article templates enabled in your instance, check the Enable fetching template-based knowledge articles box.
- Tick the checkbox for the document types you want Glean to index Click Save in Glean. You’re all set!