setup
Connect to your SharePoint On-Premise instance
Required for setup
- An Entra (Azure AD) Premium P1 or P2 license.
- An on-premises server where you can install the Entra Application Proxy connector
- The user setting up this connector must be the Global Admin.
- A service user account with Admin access to all Sharepoint Sites being added
- Use Entra Application Proxy to sync on-premise Active Directory users and groups to O365 users and groups via User Principal Name
Gather Setup Info
- The Sharepoint On-Premise App URL (http://your-onprem-app/)
- This is the base url which you access sites from your internal network
- The list of Site Collection names. The full list of site collections can be found at https://your-onprem-app/_admin/SiteCollections.aspx. These are often prefixed with /sites/.
- The NTLM credentials of the service account you will use to authenticate with
- username
- password
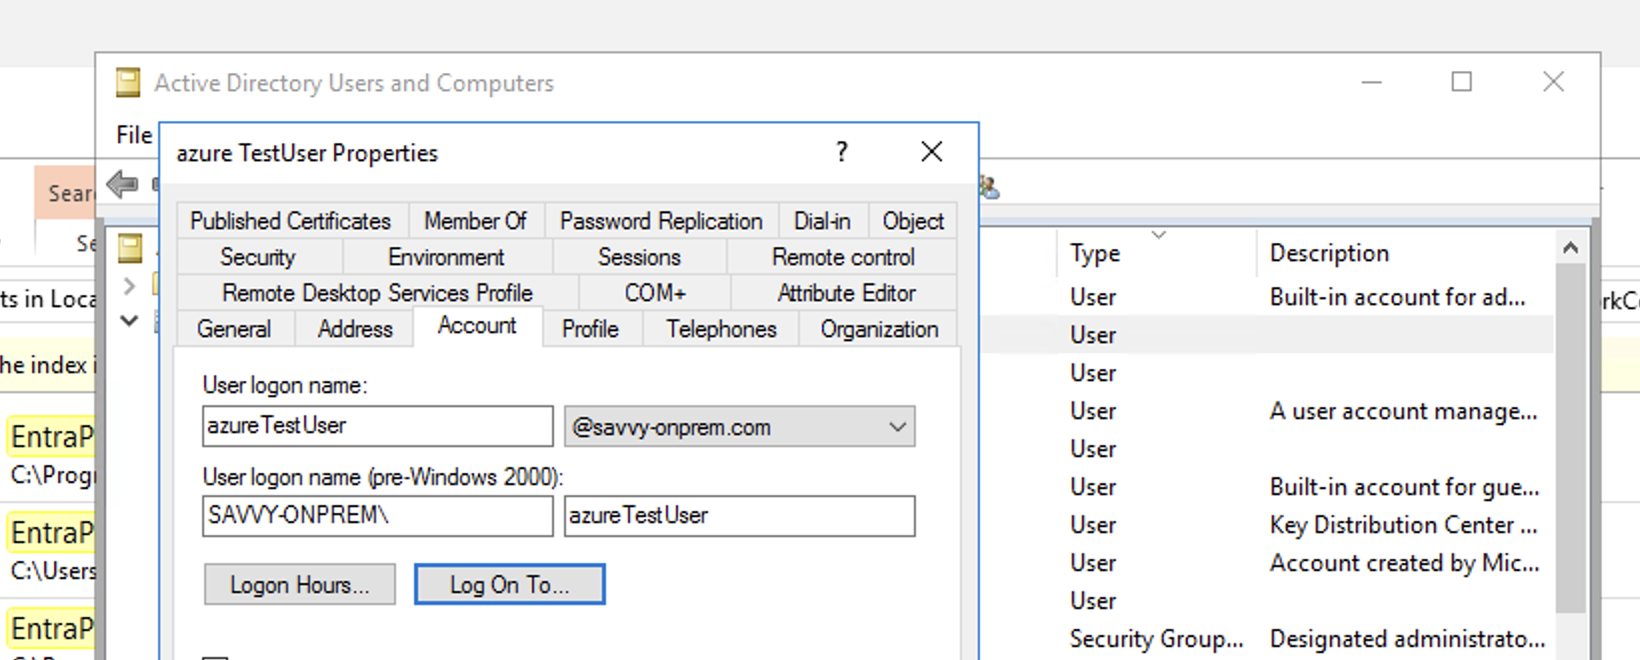
- The User Principal Name (UPN) Suffix
- This can be found within your on-premise Active Directory by going to a user and selecting the Account tab
- Look for the field User logon name:
- The portion following the @ separator (@some-domain.com) will be the UPN Suffix
Register O365 Sharepoint or OneDrive app for Glean
- You can register your O365 app here
- Glean can enable user and groups only syncs by:
- Permissions required for the app would be
User.Read.AllandGroupMember.Read.All - Save these credentials and ignore/skip any validation errors
- Permissions required for the app would be
- Users and Groups synced from your on-premise Active Directory will be accessed here
Register a new app for you On-Premise instance
- Sign into the Azure portal. Select Azure Active Directory, then App registrations → New registration.
- On the Register an application page, register an app with the following: | Field | Value | |---|---| | Name | Glean for Sharepoint On-Premise | | Supported account types | Accounts in this organizational directory only (Single tenant) | | Redirect URI | (Leave this field blank) |
- Click Register.

Setup Microsoft Entra Application Proxy Connector
This sets up secure remote access to your Sharepoint environment without exposing it directly to the internet, leveraging the capabilities and security of Microsoft Entra Application Proxy (formerly known as Azure AD Application Proxy).
Step 1: Install and Configure the Entra Application Proxy Connector
- Download the Connector:
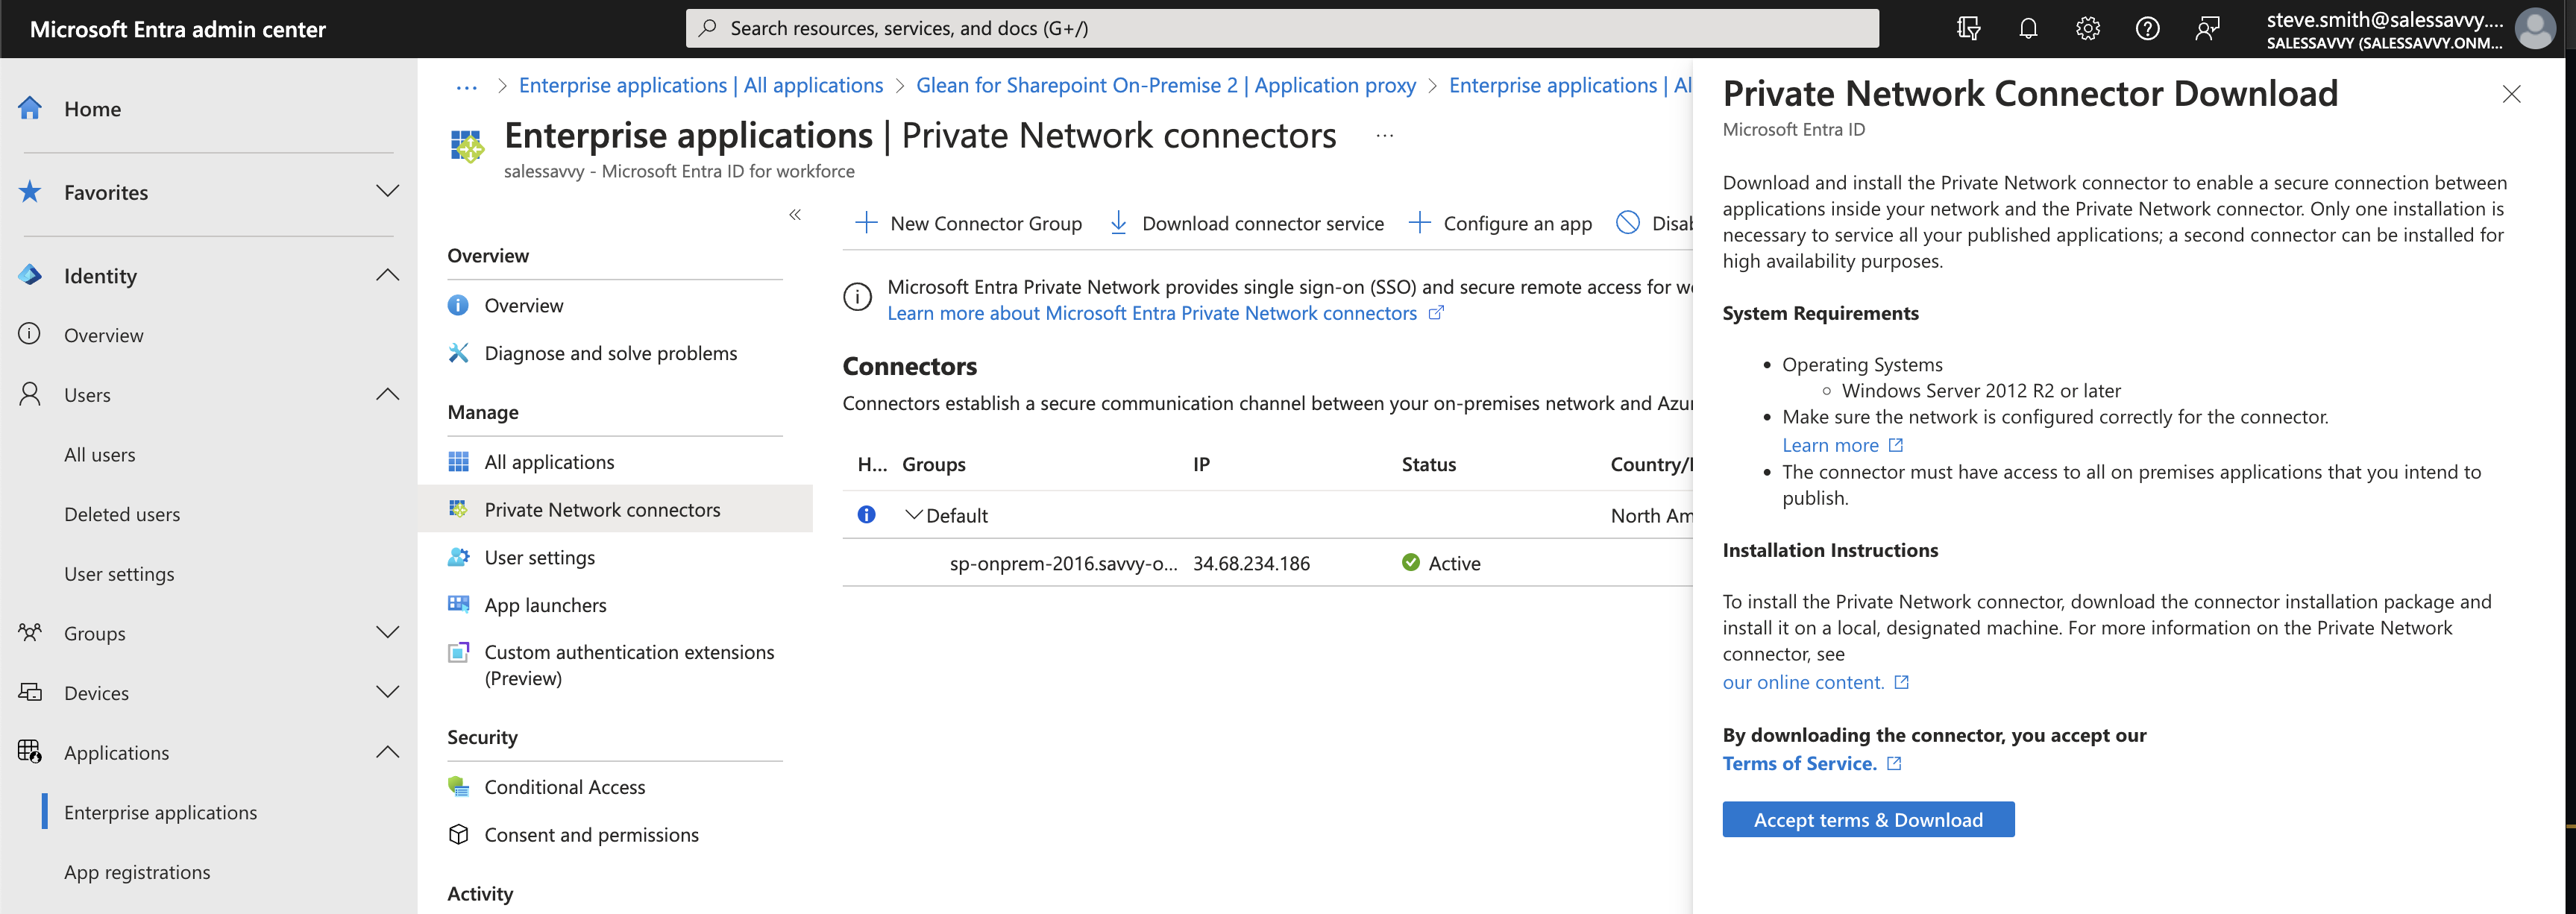
- Sign in to the Microsoft Entra admin center.
- Navigate to Identity → Applications → Enterprise applications → Private Network connectors.
- Click Download connector service to get the Application Proxy connector installer.
- Install the Connector:
- Execute the downloaded installer on your on-premises server that has network access to the SharePoint site.
- During installation, sign in with your Microsoft Entra global administrator account.
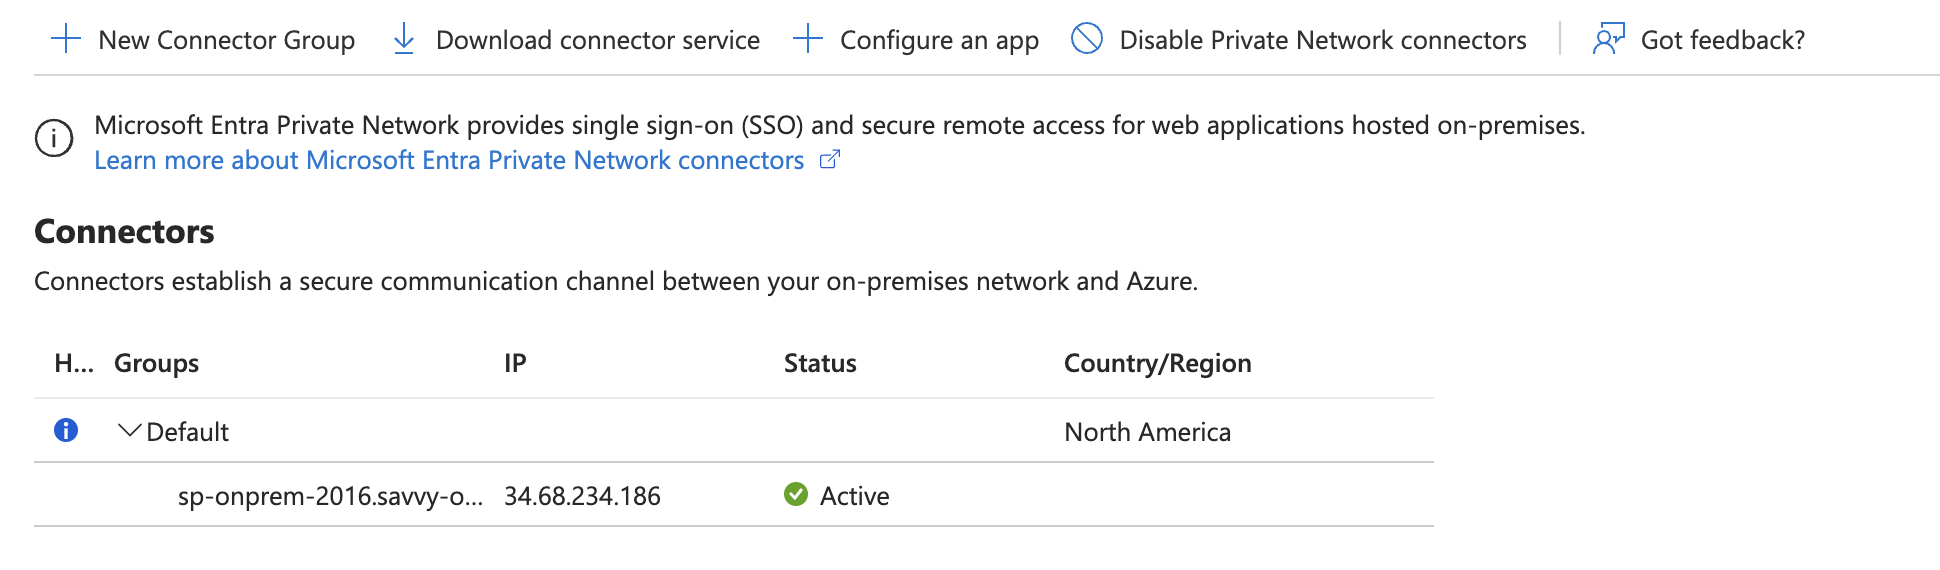
- After installation, the connector will automatically register with Entra, appearing in the Application Proxy section of the Entra admin center.
- Verify Connector Status: Check under Application proxy in the Entra admin center to ensure your connector is listed and its status is Active.
Step 2: Configure the Enterprise Application
App registration should have created an enterprise application
- Sign in to the Microsoft Entra admin center.
- Navigate to Identity → Applications → Enterprise applications
- Search for "Glean for Sharepoint On-Premise" and click on the application
- Setup the Application Proxy
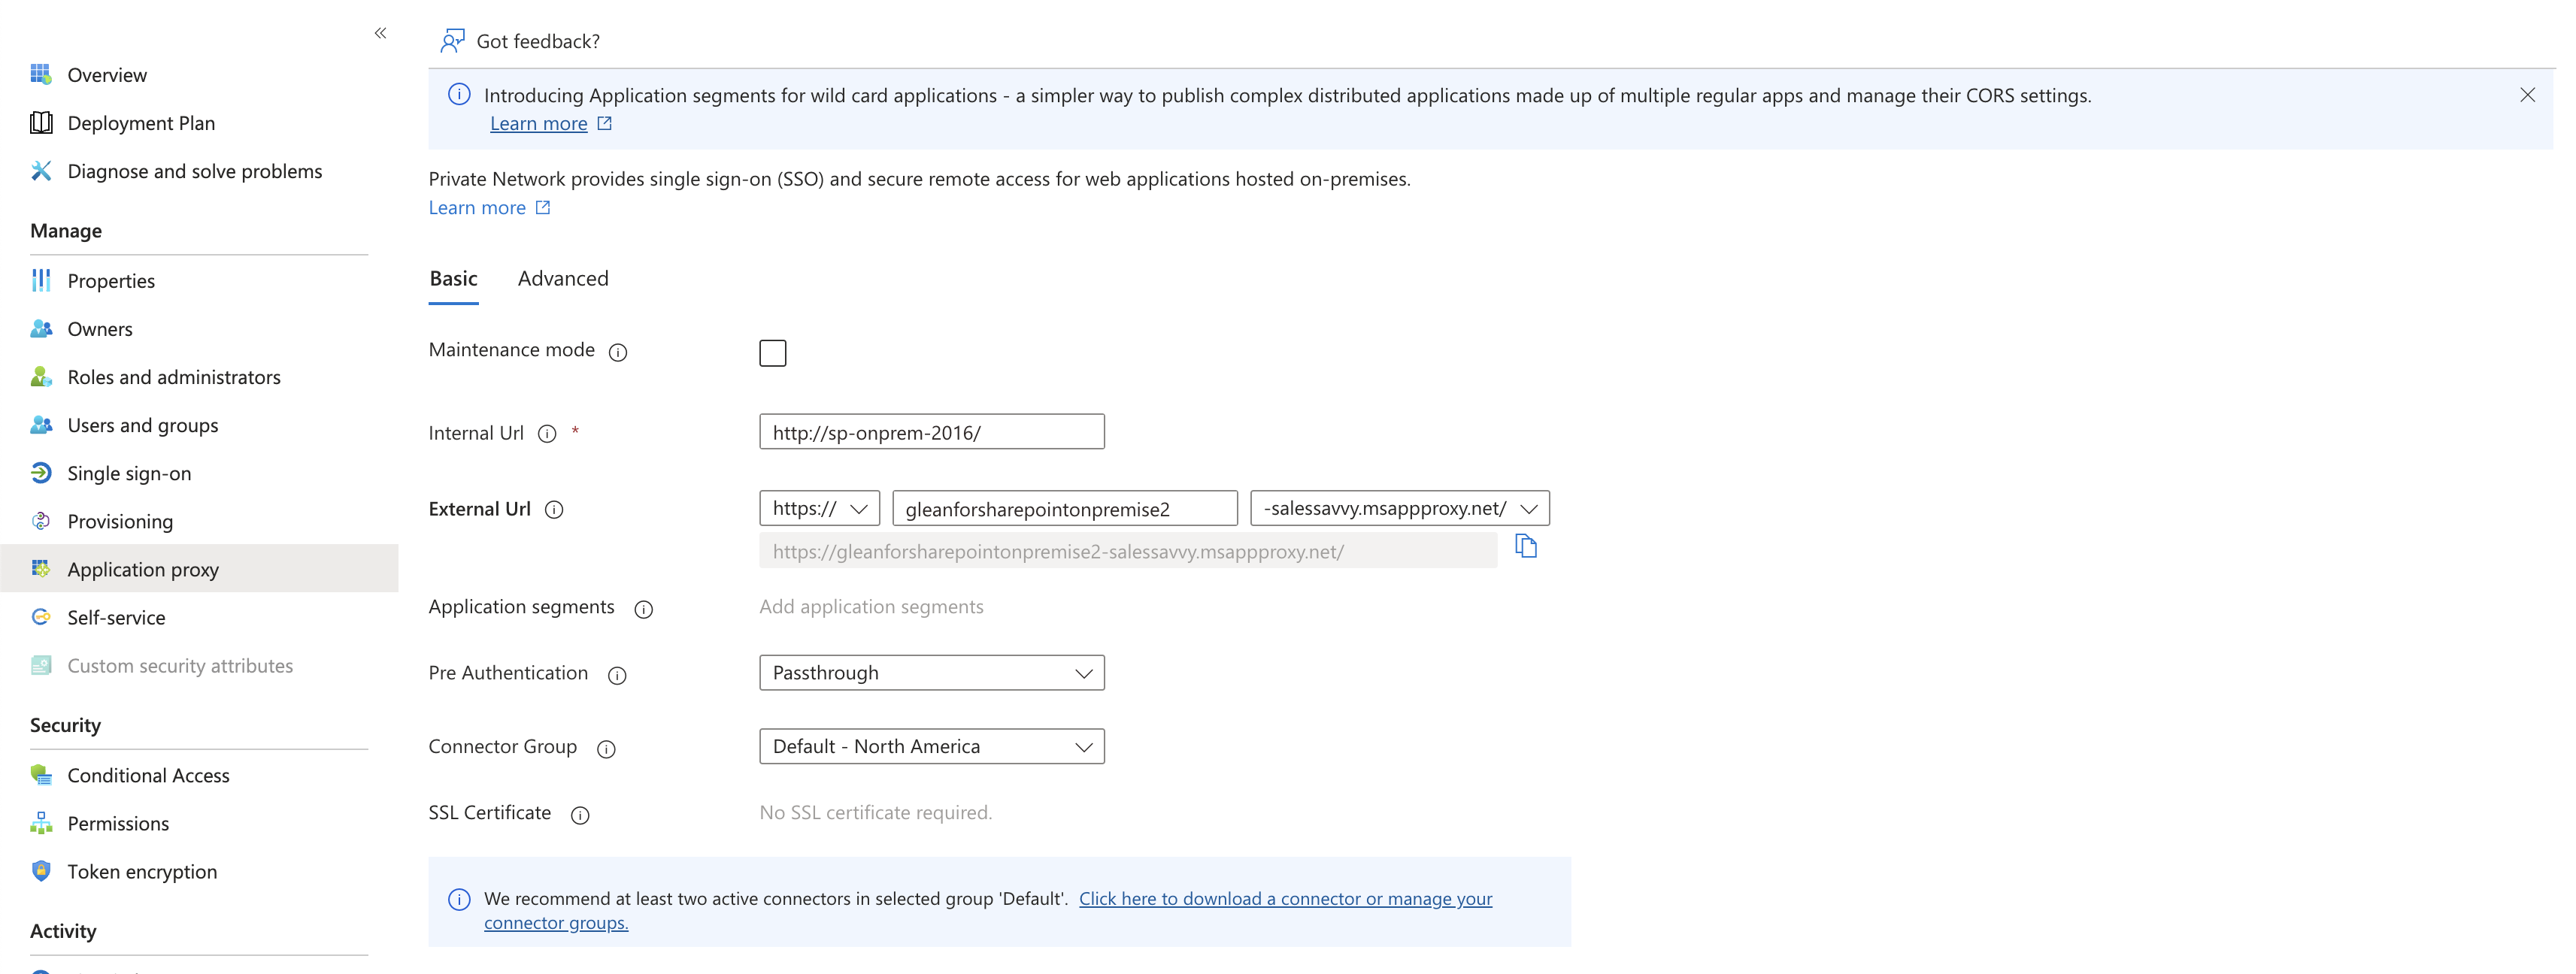
- Navigate to Application proxy tab
- Internal URL: Enter the URL used within your network to access SharePoint (this should be Sharepoint On-Premise App URL).
- External URL: Entra generates an external URL. You can customize this URL to match your organization's domain if you've added a custom domain to Entra.
- Note this domain down as it will be used in Glean setup to Azure Application Domain (Application ID URI domain)
- Pre Authentication: Passthrough
- Connector Group: Set the connector group to the same group the Entra Application Proxy was added to (should be Default)
- Save the configuration to publish your application
Step 3: Fill out the Glean Sharepoint On-Premise App settings
- Fill out the matching fields from the Info you gathered for setup.
- Make sure to set Azure Application Domain with only the domain value (Application Proxy External Url Domain), not the full URL
- Make sure to include the full relative path to the site (e.g. sites/MySiteCollection)
- Make sure the UPN Suffix from the "Gather Setup Info" section (2.4.3) does not include "@" and only includes the user's domain
- If the UPN is anne@company-domain.com, then the UPN Suffix is company-domain.com
- In the future, if you need to add a new site collection, then:
- Add the service account to the site collection to ensure the Glean app has permissions to crawl it
- Add the site collection name to
siteList