Create agents with Auto mode
Glean provides two distinct modes for building agents, allowing you to choose between AI-driven automation and manual precision. Whether you need to deploy a flexible researcher in minutes or design a rigid, rules-based process, Glean adapts to your specific operational requirements.
Auto mode is the most efficient way to transform an idea into a functional agent. By describing your objective in natural language, the agentic engine of Glean automatically architectures the logic, selects the necessary tools, and generates a refined draft for you.
- Speed to value: Skip manual configuration and move straight to testing and refinement.
- Dynamic execution: Ideal for fluid tasks like multi-source research, complex data analysis, and cross-tool drafting.
- Collaborative refining: Use the generated draft as a foundation, then fine-tune the steps inside the Agent Builder to meet your exact standards.
While Auto mode prioritizes speed and flexibility, Workflow mode is built for scenarios where predictability is paramount. Use this mode for processes that require:
- Strict determinism: Ensuring the agent follows the exact same sequence every time.
- Custom logic: Defining complex branching, specific "if/then" scenarios, and rigid hand-offs between tools.
- Total control: Granular oversight of every individual step within the agent's lifecycle.
Auto mode is the most efficient way to transform an idea into a functional agent. By describing your objective in natural language, Glean’s agentic engine automatically architects the logic, selects the necessary tools, and generates a refined draft for you.
Comparison at a Glance
Use Auto mode for open-ended, outcome-oriented tasks such as research, analysis, summarization, and drafting and use Workflow mode when you need a fixed, repeatable process with more explicit control over each step.
| Use Auto Mode If... | Use Workflow Mode If... |
|---|---|
| You want to build and iterate quickly. | You require a rigid, step-by-step process. |
| The task is open-ended like "Summarize these reports". | The task is rules-based like "If X, then execute Y". |
| You prefer the AI to plan the workflow for you. | You need to manually define every logic branch. |
For most use cases, we suggest starting with Auto mode. It provides a high-quality first draft that you can review and test, significantly reducing the time from concept to deployment.
Before you begin
Make sure the following are true:
- Agents are enabled for your organization.
- You have permission to create agents.
- Auto mode is available in your Glean environment.
- Any connectors, tools, or triggers your agent depends on are already configured for your organization.
Create an Auto mode agent
- In Glean, open the Agent library.
- Click Create agent. Auto mode is selected by default.

- Describe what you want the agent to do in the Builder Assistant.
- Review the draft that Builder Assistant creates.
- Refine the instructions, tools, resources, triggers, and settings of the agent.
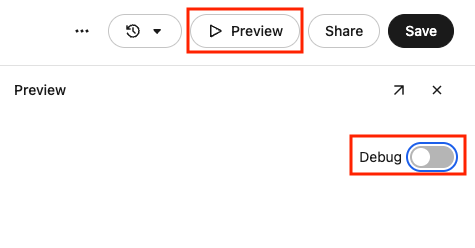
- Run tests in Preview and use Debug to inspect how the agent behaves.
- Click Save when you are ready to publish the latest version.
Start with Builder Assistant
Builder Assistant is the primary way to create an Auto mode agent.
With Builder Assistant, you can:
- Describe the agent in natural language.
- Use a conversation starter to get ideas for what to build
- Answer follow-up questions so Glean can capture the goal, behavior, and expected output of the agent more accurately.
- Ask Builder Assistant to refine the draft after the initial version is generated.
The builder uses a flexible three-panel layout which you can hide or resize panels as you work:
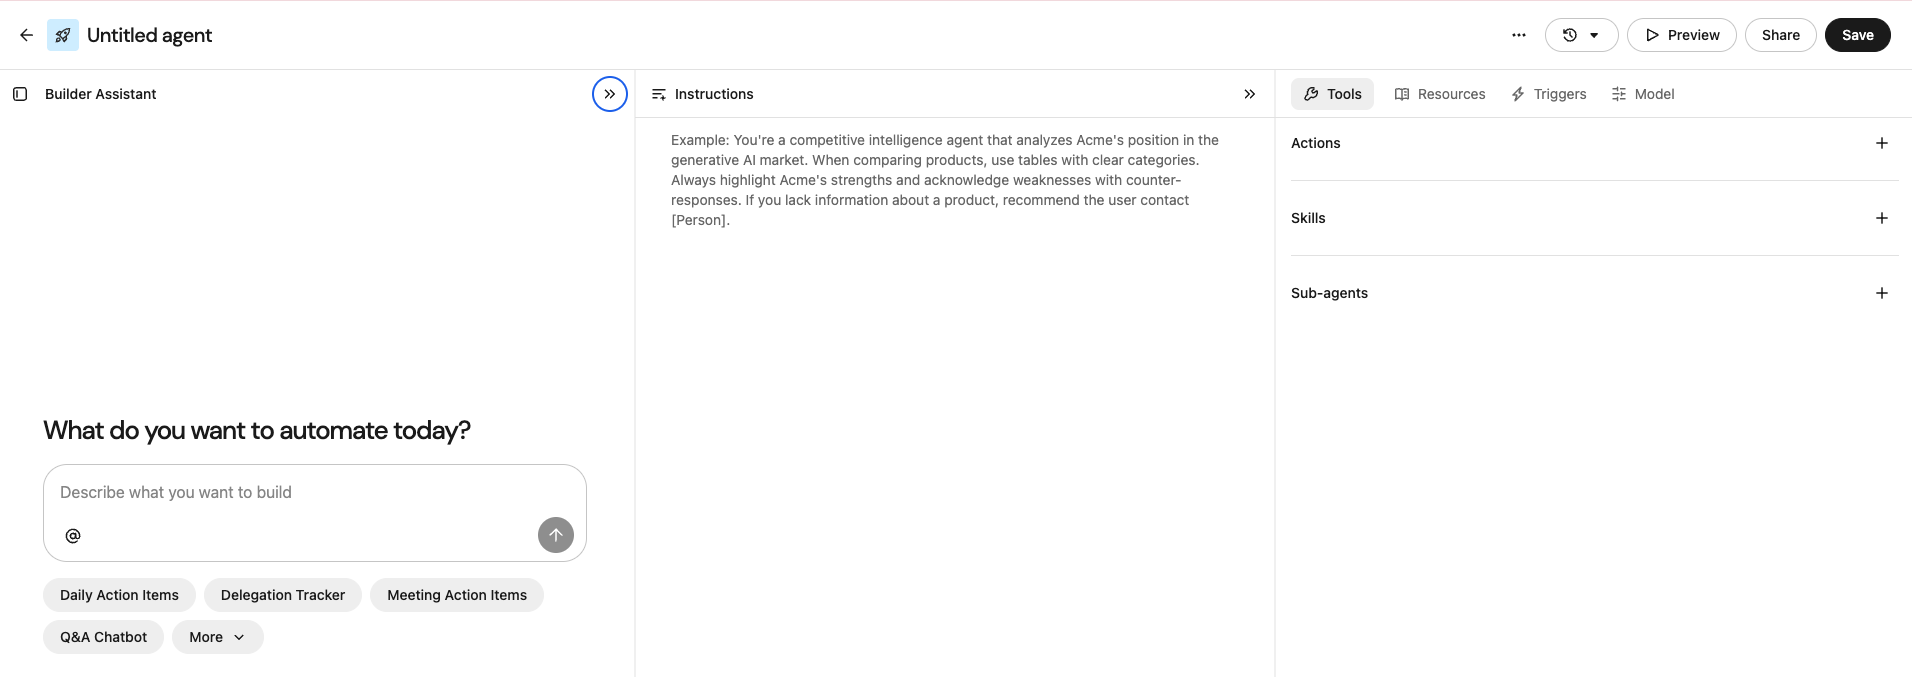
- Builder Assistant for describing the job, analyzing debug traces to diagnose and fix issues, answering follow-up questions, and iterating on the draft.
- Instructions tab is where you shape the behavioral policy and output expectations of the agent.
- Configuration tabs for instructions, tools, resources, triggers, and settings.
Use conversation starters for inspiration
Conversation starters help you quickly understand the kinds of agents you can build. They are especially useful if you are new to Agent Builder or you want to explore common patterns before writing your own prompt.
Use a conversation starter as your foundation, then edit it to match your workflow, audience, and connectors.
Answer clarifying questions
After you describe the agent, Builder Assistant may ask follow-up questions.
These questions help Glean understand details such as:
- What the agent should do.
- What it should not do.
- What inputs it needs.
- Which systems it should read from or write to.
- How the final output should be structured.
- When the agent should run.
The more specific your answers are, the better the first draft usually is.
Builder Assistant can update more than instructions
Builder Assistant does more than rewrite prompt text. It can help shape the broader agent configuration, including:
- Instructions
- Tools
- Resources
- Triggers
- Settings
This means you can stay in the builder and iteratively shape how the agent behaves without manually rebuilding everything from scratch.
Review and refine your agent
After Builder Assistant creates a first draft, review the agent configuration in the editor. The builder displays Builder Assistant alongside configuration tabs for instructions, tools, resources, triggers, and settings.
Instructions
Use the Instructions tab to define how the agent should behave. The instructions editor is a markdown-first surface, so you can structure guidance with headings, lists, and emphasis. Instead of filling in rigid fields, write instructions the way you would write an SOP or operating guide for a teammate — for example, # Goal, ## Rules, and 1. Check the request.
In most cases, the best instructions explain:
- The job the agent should do
- The steps or reasoning it should follow
- The output format it should return
- Any rules, limitations, or safety constraints it must respect
Tools
Use the Tools tab to choose which apps and capabilities the agent can use.
Depending on the tool, you may grant access at the app level instead of selecting each tool individually. Limit tool access to only what the agent needs. This improves reliability and makes the agent easier to review.
If the agent uses write tools, confirm that the selected tools match your intended workflow and governance requirements.
Grant access at the app level
For supported apps, Auto mode lets you grant access at the app level instead of selecting individual tools one by one.
For example, you can allow an agent to use apps such as Jira, Slack, Gmail, or Google Docs, and Glean uses the tools it needs within those apps at runtime.
Keep the app list small and practical. Narrow tool access makes agents easier to review and often improves reliability.
Resources
Use the Resources tab to connect the documents, folders, collections, and other indexed content the agent should rely on.
Add only the sources that are helpful for the task. Narrow, high-quality resources usually perform better than broad, loosely related context.
Triggers
Use the Triggers tab to define when the agent starts. Depending on your configuration, an Auto mode agent can run in these ways:
- Manual run: Use a manual run when you want a person to start the agent on demand. This is the most common option for agents that support interactive work, such as research, drafting, summarization, or other tasks that begin when a user asks for them.
Choose the input type for manual runs
If the agent runs manually, you can also define what kind of input it accepts.
-
Chat message: Use a chat message when the user should be able to start the agent conversationally. This works best when the request is open-ended or when the user may provide different instructions each time they run the agent.
-
Input form: Use an input form when the agent needs structured inputs before it starts. This works best when users must provide specific fields such as a date range, URL, account name, ticket ID, or other required parameters. Choose the trigger and input type that best match how users will start the agent and what information the agent needs to run reliably.
-
Scheduled run: Use a scheduled run when you want the agent to run automatically at a defined time. This is useful for recurring work such as weekly summaries, periodic checks, or routine follow-ups.
-
Content trigger: Use a content trigger when you want the agent to run automatically when selected content changes. This is useful for workflows that should react to new or updated documents, tickets, records, or other source content.
Model
Use the Model tab to manage agent-level controls such as reasoning behavior and model selection.
Depending on your environment, you may be able to choose:
- A reasoning mode for the task.
- The model the agent must use.
Use Fast reasoning mode for simpler tasks such as summarization, or straightforward drafting. Thinking mode is recommended for more complex tasks such as multi-step analysis, research, or work that requires deeper reasoning.
If your environment exposes multiple models, choose the one that best matches the task, performance needs, and governance requirements for your organization.
Test and debug your agent
Before you share the agent, test it in Preview.
Preview helps you verify that the agent:
- Understands the task correctly.
- Asks for the right inputs.
- Uses the expected tools and resources.
- Returns useful output.
- Behaves safely when information is missing or ambiguous.
Use test runs to iterate
Run the agent with realistic prompts and inputs. After each run, review the result and refine the configuration until the behavior matches your intent.
Use Debug to inspect traces
Connect the files, folders, collections, or connectors the agent should rely on. Auto mode may propose knowledge sources, although you choose which ones to include.
Debug helps you understand how the agent reached its result. It gives you step-by-step visibility into how the agent ran, which is especially useful when the agent works across multiple systems or when you need to understand why a run produced unexpected output.
After reviewing a run, you can use Builder Assistant to test again, investigate trace details, and refine the agent to address issues revealed during debugging.
Depending on the run, you can inspect details such as:
- The path the agent took.
- Tool calls.
- Prompts and intermediate steps.
- Run traces and execution details.
- Context-window usage for model calls.
Review context-window usage
Use this information to understand how much context the run is consuming and whether the agent may be approaching truncation limits.
- Reference authoritative sources whenever possible
- Keep the tool set focused
- Test in both Fast mode and Thinking mode if available and compare performance
- Validate the agent with multiple types of tasks before saving
- If the agent appears to stall, try reducing the knowledge scope, simplifying the instructions, or starting in Fast mode before switching to Thinking mode
- Review the run trace to identify which step is causing delays or errors
Troubleshooting
For common issues with agents, including timeout errors, inconsistent outputs, and content access problems, see Troubleshoot agents.
- Narrow the resources available to the agent.
- Simplify or shorten instructions.
- Remove tools the agent doesn't need.
- Use a different reasoning mode or model if available.
- Prompt the Builder Assistant to make modifications based on your desired output or changes.
Ask Builder Assistant questions while you build
You can ask Builder Assistant questions about how specific configurations work, including tools, triggers, and other agent settings.
For example, you can ask what a trigger does, when to use a particular tool, or how a configuration behaves.
These questions help builders learn the product while staying inside Agent Builder. Asking a question does not update the agent unless you explicitly ask Builder Assistant to make a change.
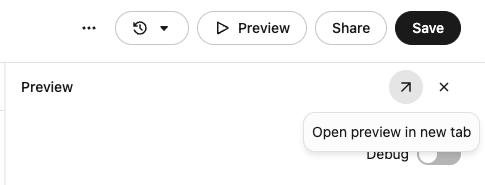
Open Preview in a new tab
Use Preview in new tab to test the agent in a larger, end-user-style view that more closely matches the live experience. This is useful for validating how the agent feels outside the builder and for testing longer conversations or richer outputs.
Add skills and subagents
You can add skills and sub-agents to extend what the agent can do.
Use skills when you want to give the agent reusable instructions or specialized behavior for a focused task.
Use subagents when you want to break a larger workflow into smaller, more specialized units.
For example, a main agent might:
- Gather context from multiple systems.
- Call a specialized subagent to analyze the information.
- Return a final summary or recommendation.
Reusing the existing skills or agents is currently in private beta. If you would like to enable it, reach out to your account executive. If your organization does not yet support reusing existing skills or library agents as subagents, build and test the agent using the options currently available in your environment.
Save and share your agent
When you are ready, click Save.
Saving makes the latest version available based on the sharing settings you choose. Before sharing broadly, confirm the following:
- The name clearly describes the agent.
- The description explains what it does.
- The conversation starters are useful.
- The tools and resources are scoped correctly.
- The trigger behavior is correct.
- The agent is tested in Preview.
If you share an agent without a description, Glean may suggest an icon and AI-generated description that you can review before sharing.
If an agent is Verified, that status appears as a badge next to the agent name. Verified status is not a setting you edit in the builder.
Additional Auto mode capabilities
Depending on your environment, Auto mode can support additional capabilities beyond text-based chat runs.
Native image generation
Some Auto mode agents can generate images as part of their output.
Image generation follows the eligibility, quota, and safety controls configured in your environment. If image generation is unavailable for a run, the agent may fall back to text output.
Sandboxed code execution
For more advanced tasks, Auto mode can use sandboxed execution and dynamic context handling as part of the broader agent runtime.
These capabilities help with tasks such as research, analysis, and other workflows that benefit from intermediate computation or structured processing.
Create a workflow agent instead
Workflow agents remain fully supported.
Use a workflow agent when you need more explicit control over the flow, including structured steps, precise branching, or deterministic execution.
There are two common ways to get to the workflow agent path:
-
Click the arrow near the Create agent button in the Agent library.

-
From the Build a workflow agent banner on the first Auto mode screen.

Auto mode is now the default starting point when you create an agent. Workflow is a secondary path for builders who want manual control.
Try an existing workflow agent in Auto mode
If you want to explore a more flexible version of an existing workflow agent, use Try in auto mode to create a new Auto mode draft based on that workflow.
This action does not replace the original workflow agent. The original workflow remains unchanged, so you can safely compare behavior, test the Auto mode draft, and decide which version to keep.
Changes do not sync automatically between the workflow agent and the new Auto mode draft. There is no automatic reverse conversion from Auto mode back to workflow mode.