Requirements to set up Glean in Microsoft Teams
To successfully set up Glean in Microsoft Teams, admins in your organization must have specific access and permissions across various platforms. Running Glean in Microsoft Teams requires read-only access (Chat.Read.All and Chat.ReadBasic.All). Below is a list of the essential requirements:
-
Admin Rights for Teams Developer Portal
Admins need the necessary permissions to create and deploy applications within the Teams Developer Portal. This is where applications are built and managed before deployment to the organization. -
Azure App Permissions Admin Access: Azure portal
Admin access to the Azure portal is required to manage app permissions and ensure that Glean has the necessary privileges to operate within your organization’s environment. -
Admin Access to Teams Admin Center
Admins must also have the ability to manage Teams through the Teams Admin Center. This is where the application will be deployed and configured for users across the organization. -
Admin Access to Glean Workspace
Lastly, admins need access to Glean Workspace to manage Glean’s settings and integration with Teams, ensuring that it functions smoothly for end-users.
Set up Glean in Microsoft Teams
Admins can set up Glean in Microsoft Teams with full control using a structured, three-phased approach. Phase 1: Set up Glean app in Teams Developer Portal Phase 2: Deploy to your organization or specific users using Teams admin console Phase 3: Enable Glean in Microsoft Teams with Glean self-servePhase 1: Set up Glean app in Teams Developer Portal
- Go to Teams Developer Portal.
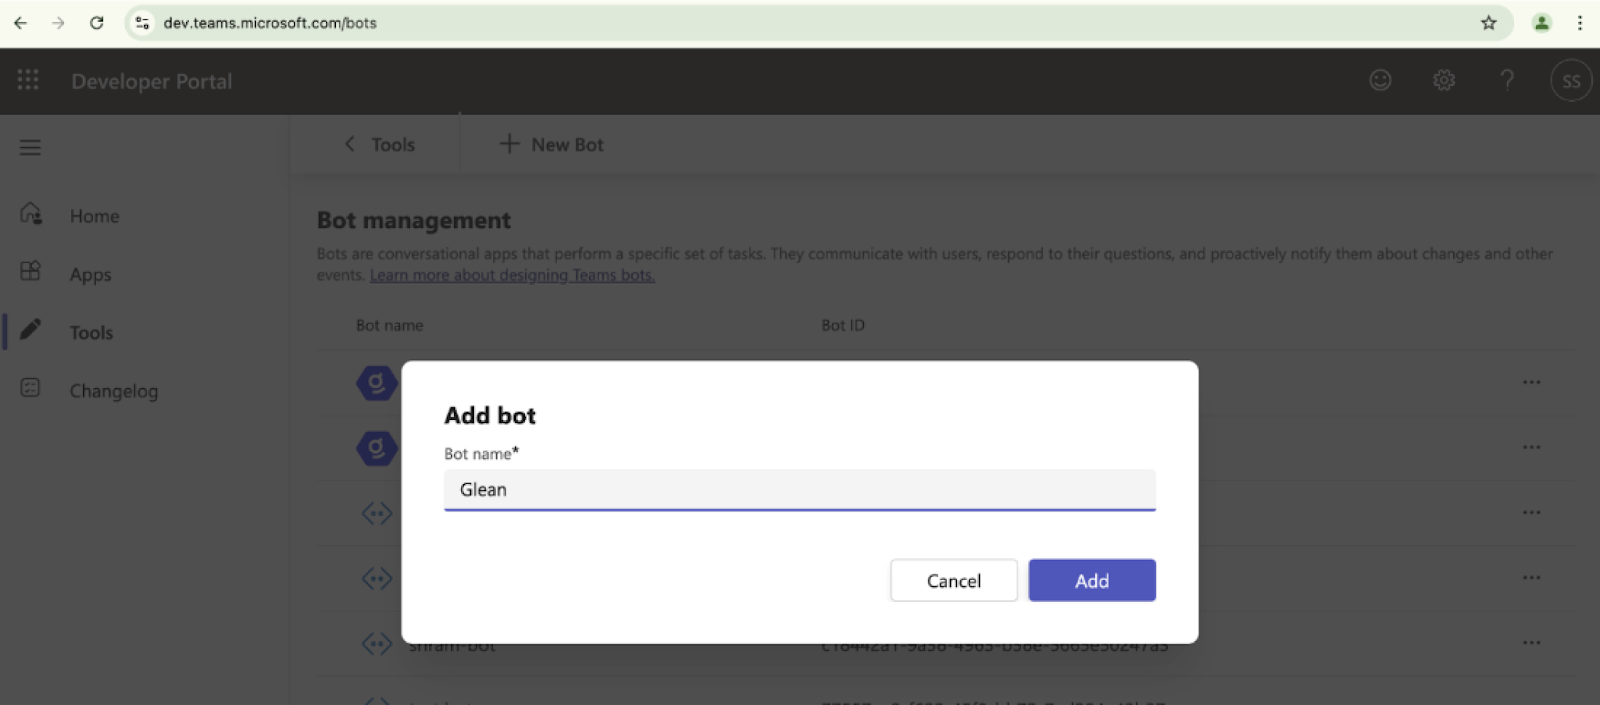
Create a New Bot
a. In the left navigation, go to Tools, then select Bot Management.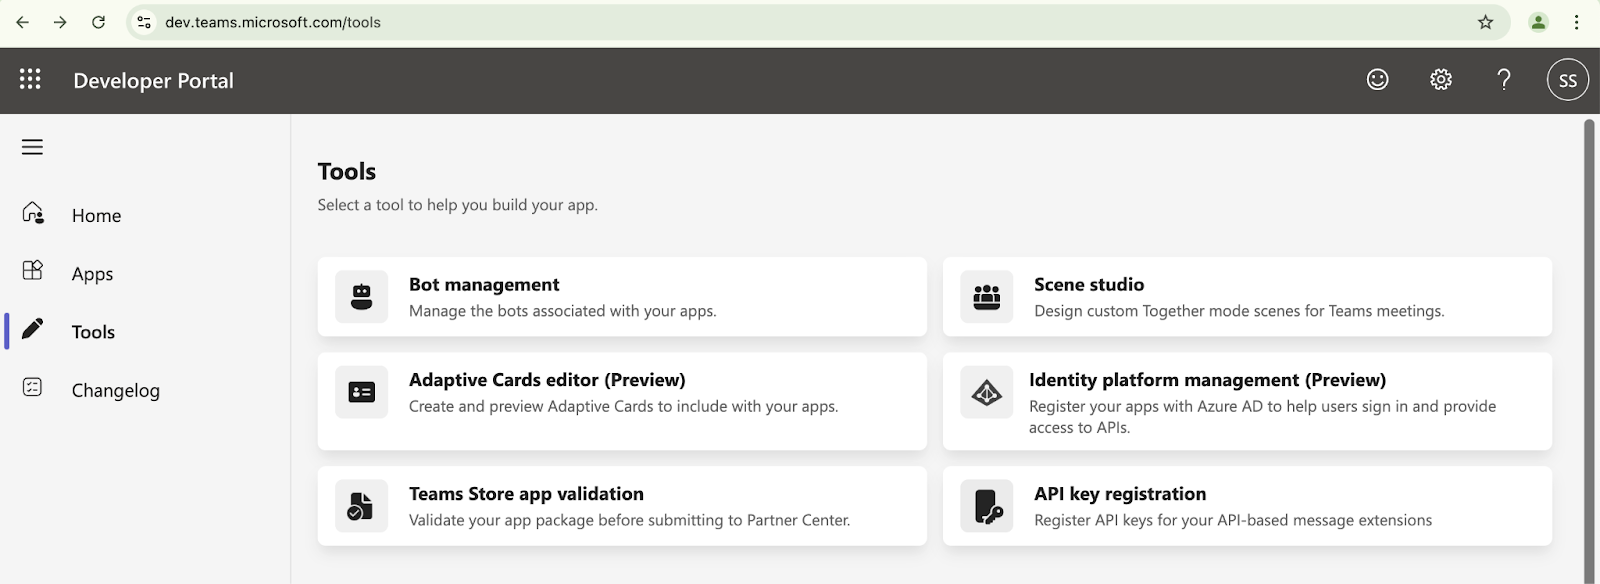

This name will appear in the Teams Admin Console and in users’ Teams chat after deployment.
Upload Custom Bot Icon
a. On the same page, find the “Bot Framework Portal” link and click it. b. Upload the custom color icon provided for the Glean app by clicking on “Upload Custom Icon”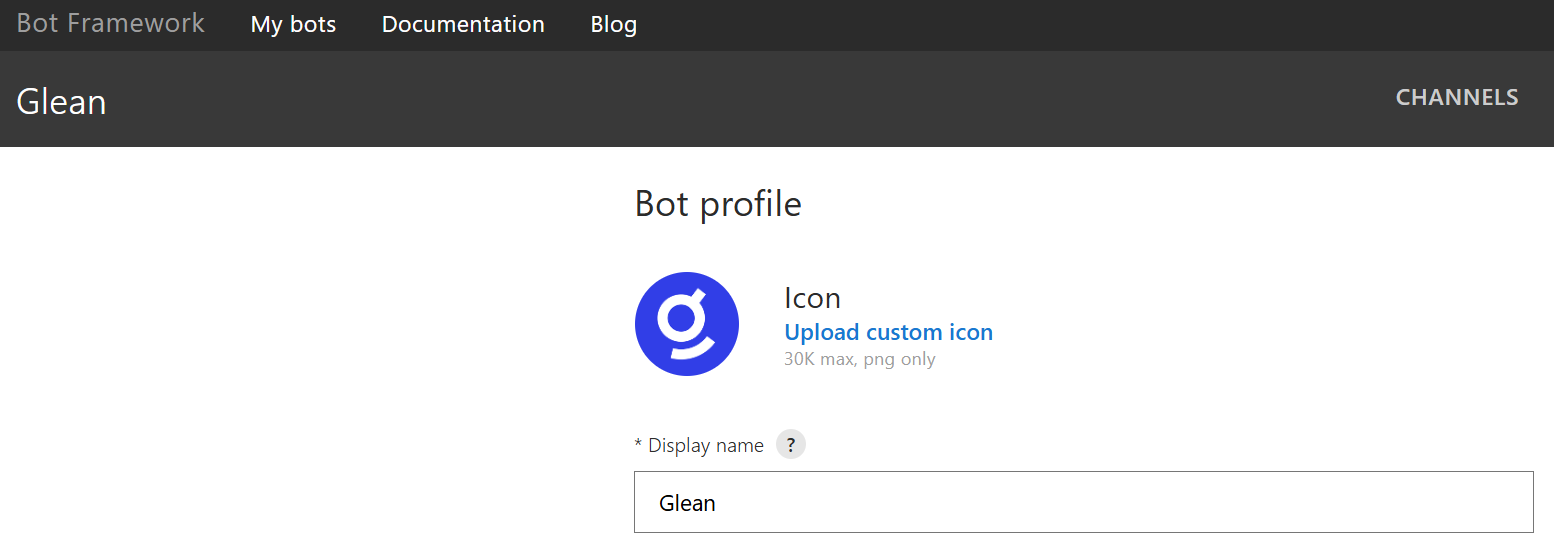
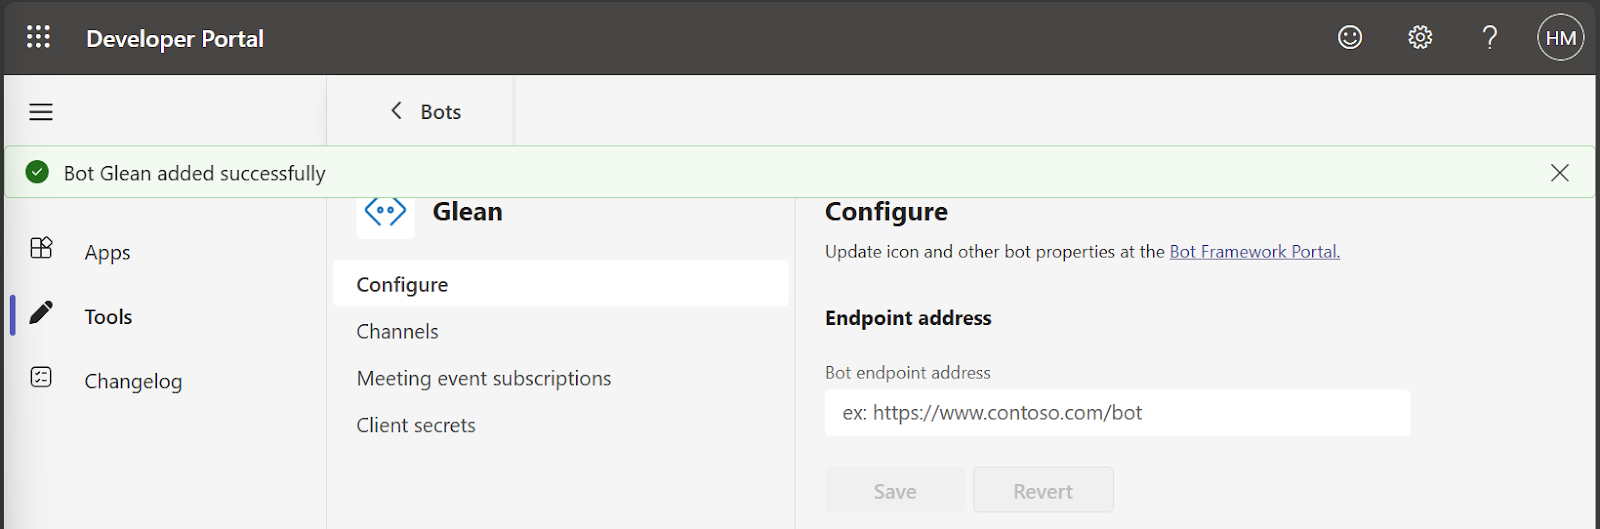
Add Endpoint Address
a. Return to the Developer Portal. b. For the Endpoint address, add your backend URL followed by /datasources/ms_teams/activity. For example, if your backend URL is https://glean-dev-be.glean.com, the full endpoint should be https://glean-dev-be.glean.com/datasources/ms_teams/activity c. Click “Save”.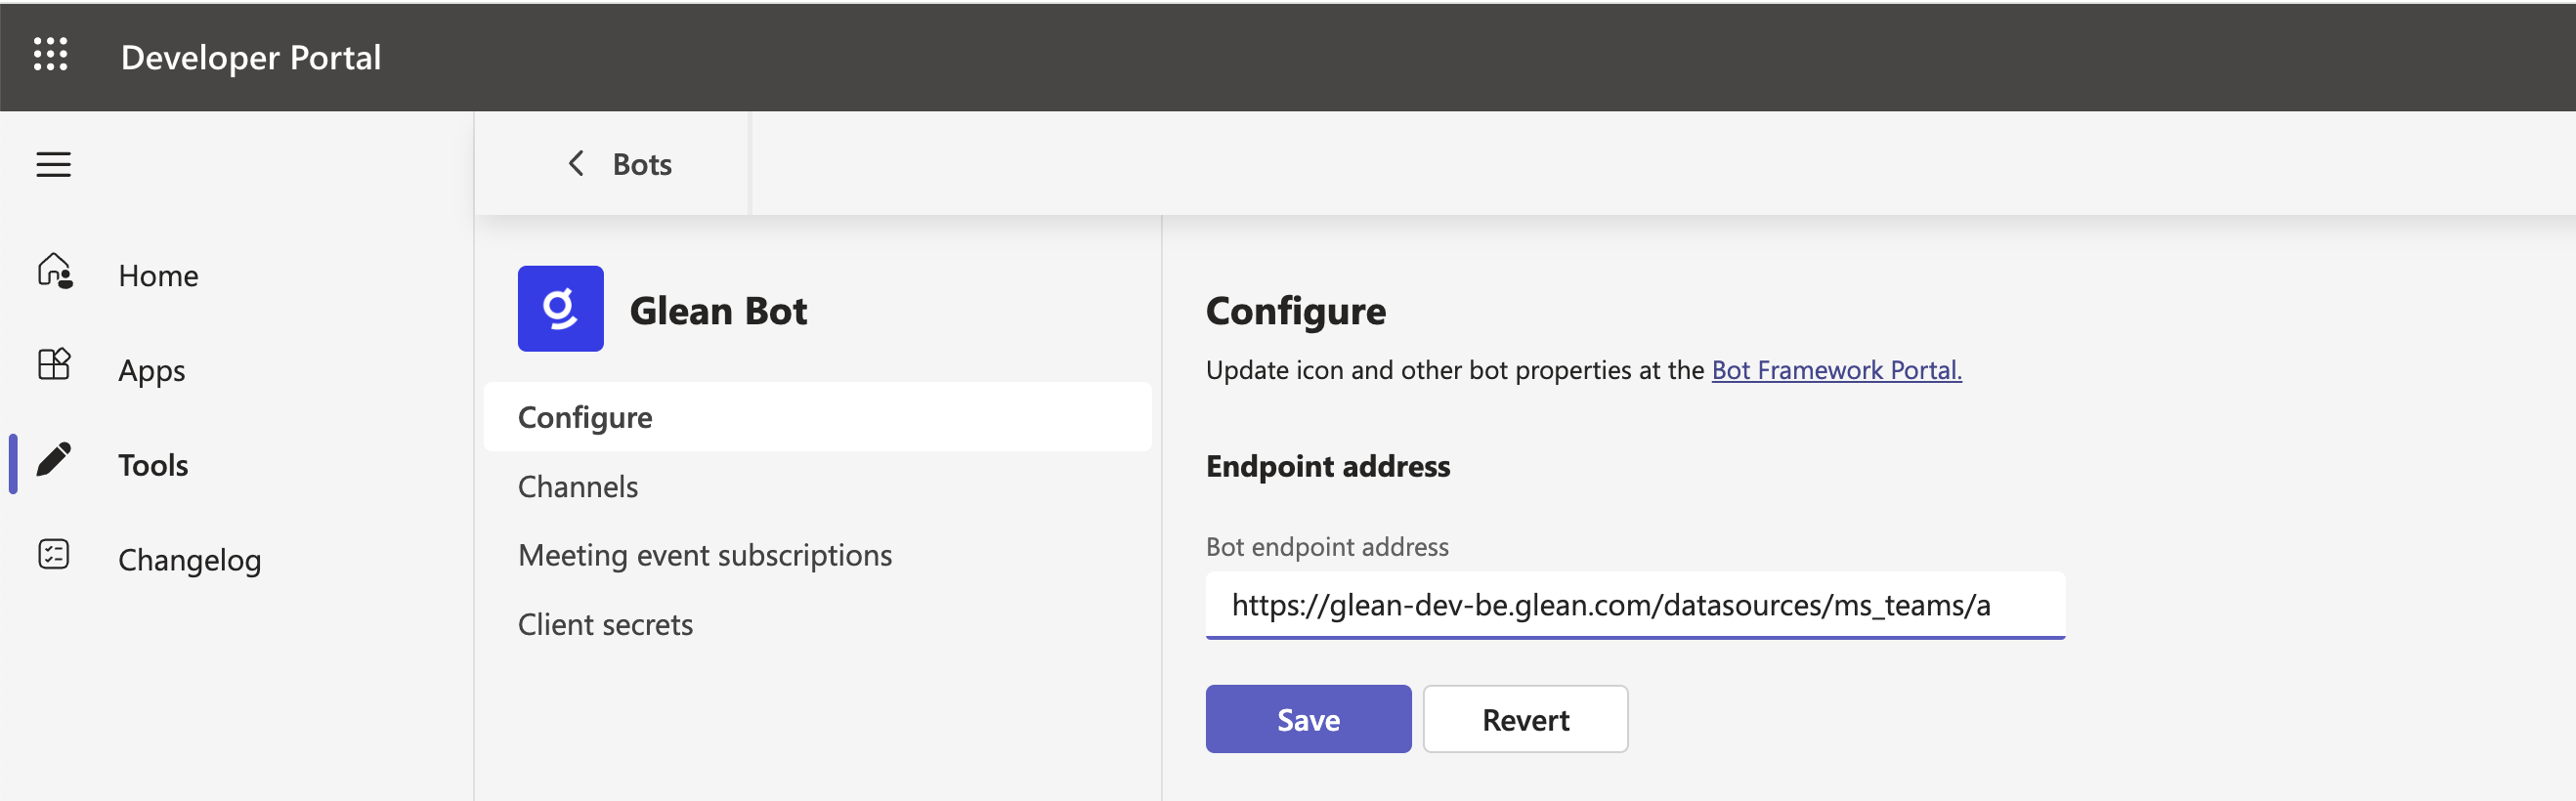
Generate a Client Secret
a. On the left tab, go to Client Secrets. b. Generate a new secret and copy the long string—you will need this later in Phase 2.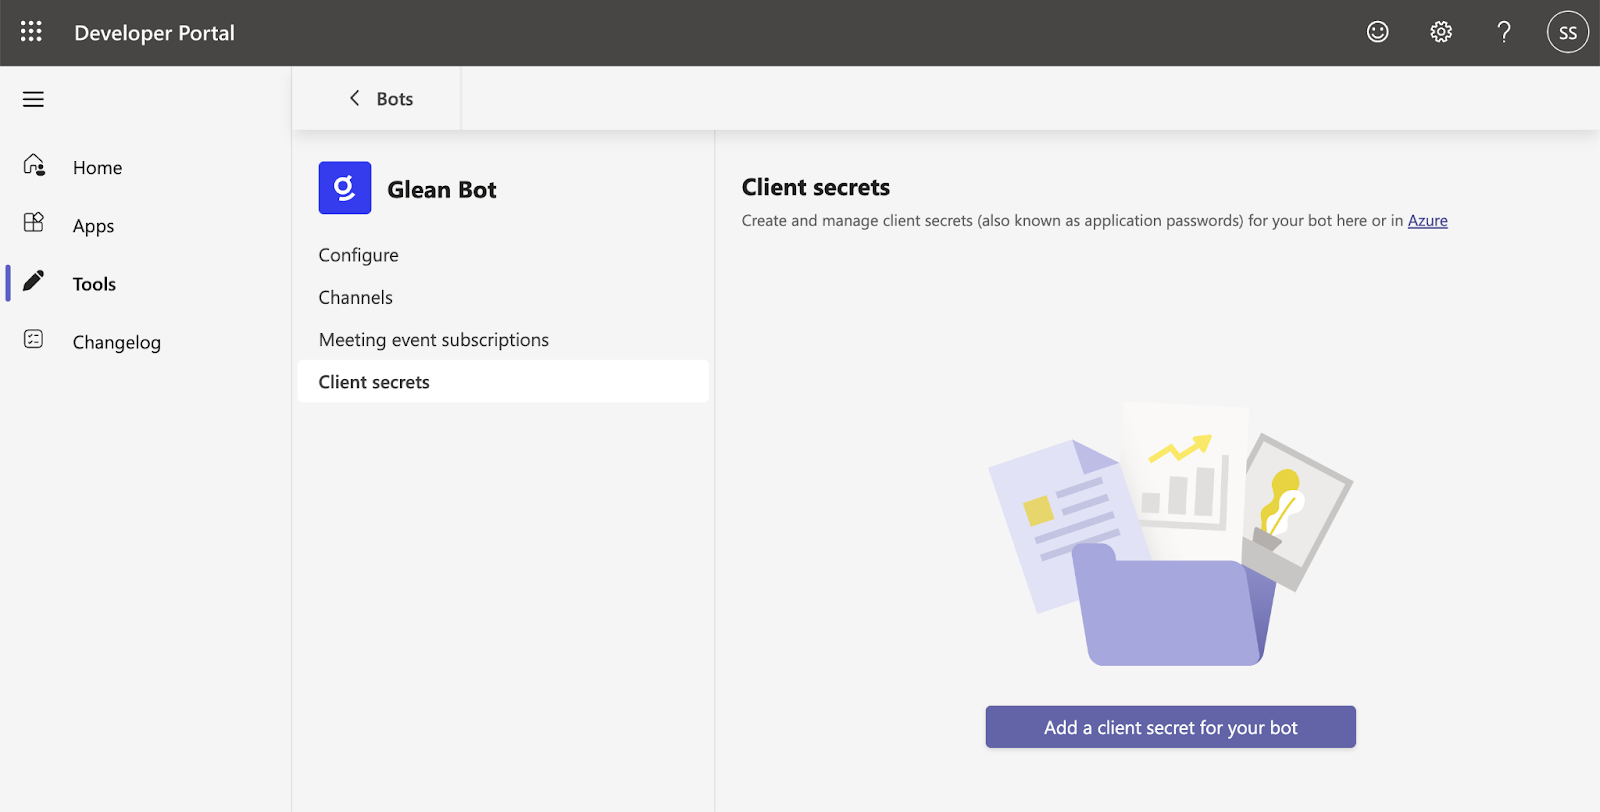
Configure Azure App Permissions
a. In the Azure portal , search for App Registrations in Azure Services.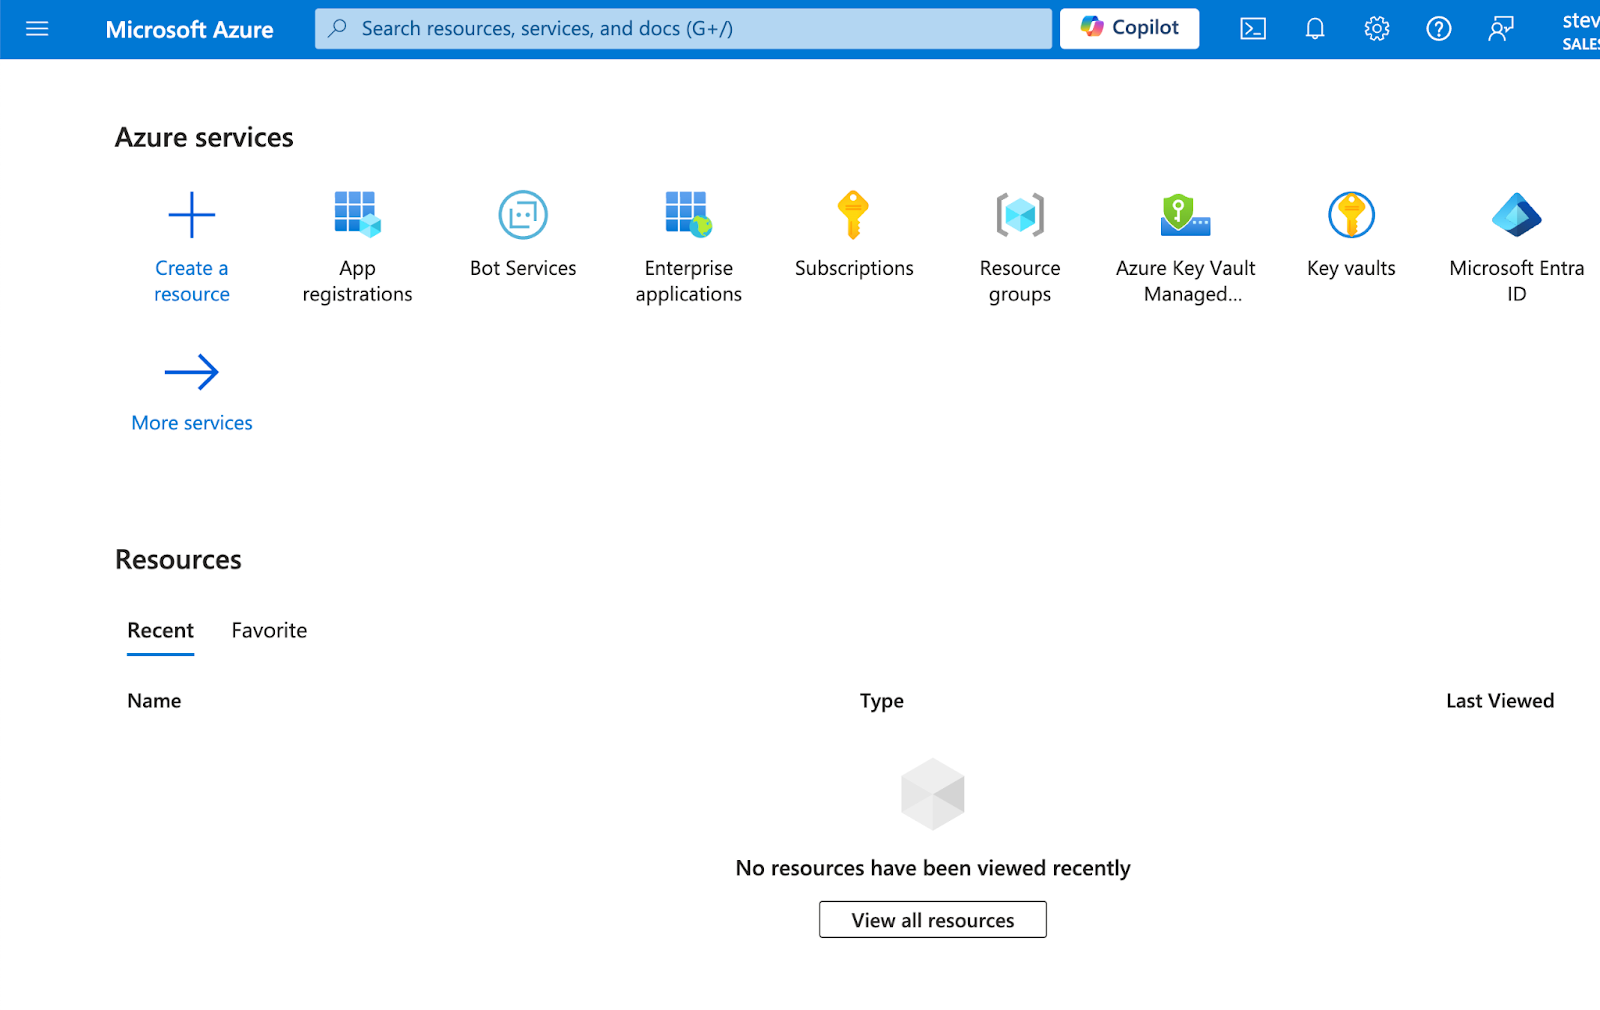
Require single-tenant app registration
Important: The Azure app registration for the Glean Teams bot must be configured as single-tenant. Multi-tenant configurations can cause authentication failures when the bot attempts to reply to user messages.
- In the app registration overview, look for the Supported account types setting (also known as the sign-in audience).
- Ensure it is set to Accounts in this organizational directory only (Single tenant).
- If it shows a multi-tenant option (such as “Accounts in any organizational directory”), you must change it:
- Go to Authentication in the left-side panel under Manage.
- Under Supported account types, select Accounts in this organizational directory only (Single tenant).
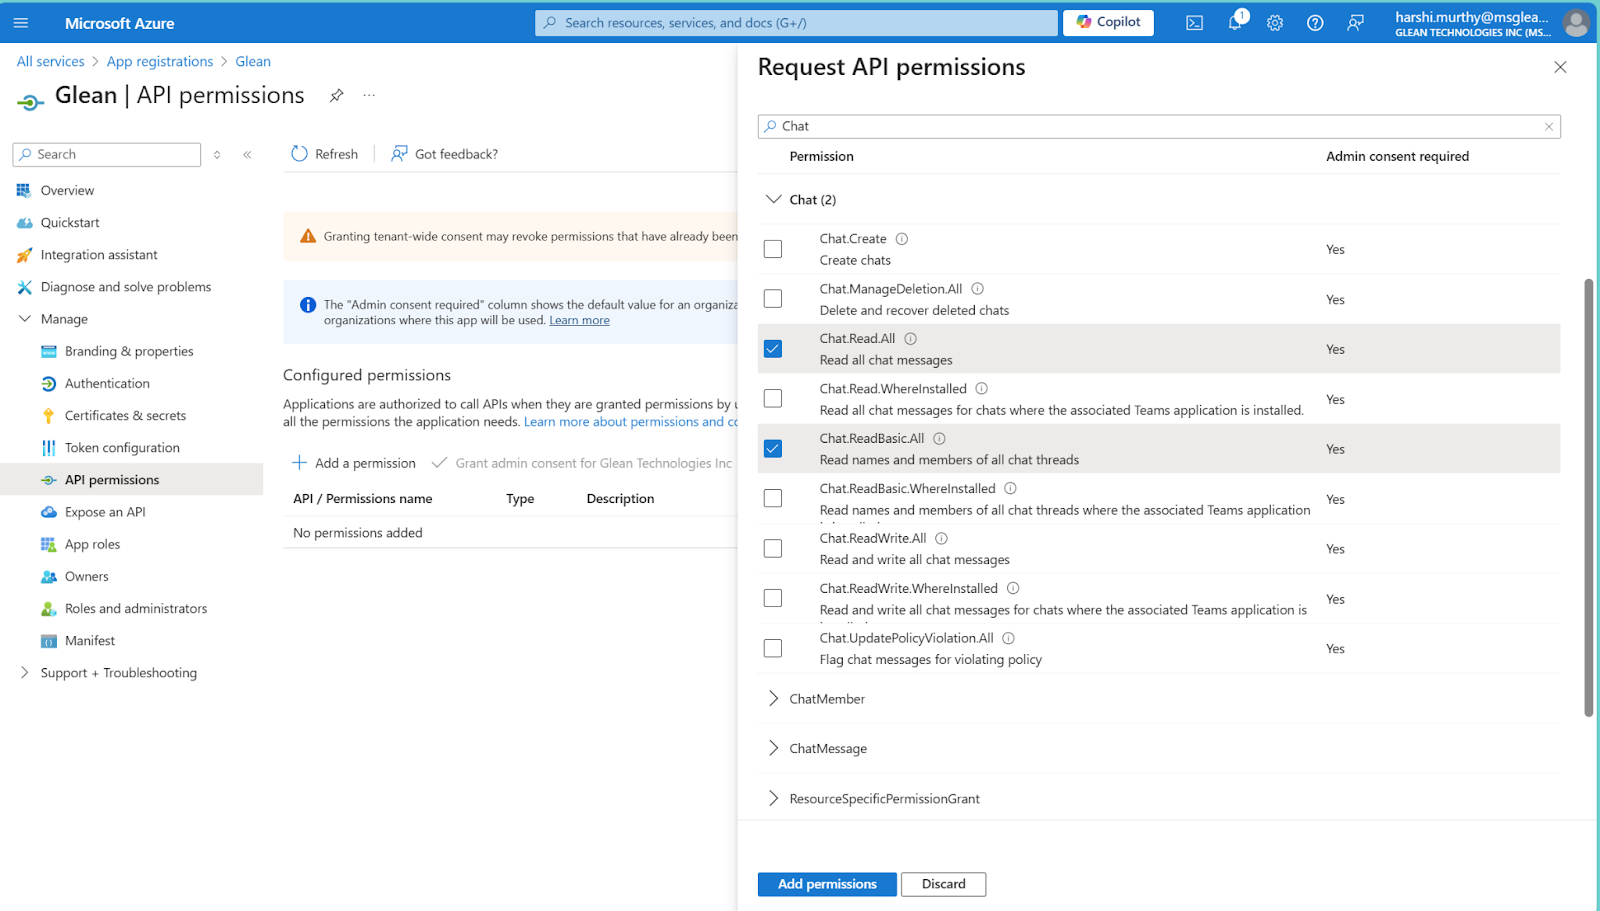
- Click Save.

- Chat.Read.All
-
Chat.ReadBasic.All

Upload a Certificate for Your Azure Apps
You need to upload certificate to the Microsoft Entra for your applications.Prerequisites
- This step is only required for certificate-based authentication. If your organization is using a client secret (legacy), you can skip this step.
- Use the same certificate you prepared for the Microsoft Teams connector.
Prepare Your Certificate
Before you upload, ensure you have a public key certificate file in either.cer or .pem format. If you have a .pfx file, you must first convert it to a .cer file. You can do this using OpenSSL with the following command:
openssl pkcs12 -in yourfile.pfx -clcerts -nokeys -out yourfile.cer
Upload the Certificate for the Teams Bot App
- Go to the Azure Portal.
- In the Microsoft Entra admin center, from the left-hand navigation menu, go to App registrations.
- Select your bot application from the list.
- In the left-hand navigation menu, under Manage, select Certificates & secrets.
- Go to the Certificates tab.
- Click Upload certificate, then select your
.ceror.pemfile. - Click Add to upload the certificate.
Upload the Certificate for the Teams App
- Go back to App registrations.
- Find and select your Teams App.
- Go to Certificates & secrets > Certificates and repeat the upload process to add the same certificate.
8. Create the Glean app
a. Return to the Developer Portal Home
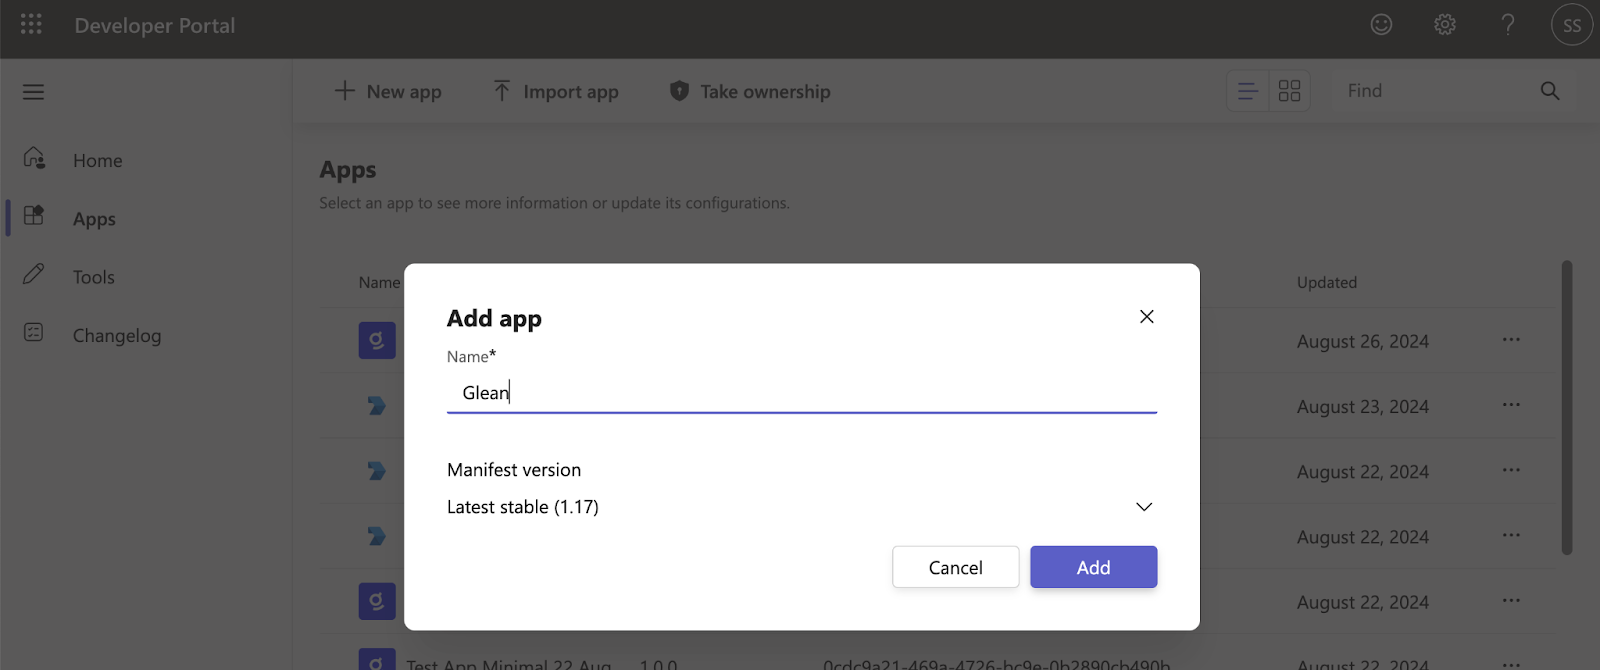
- Short description: Trusted search and generative AI for work.
- Long description: Glean unlocks your company’s knowledge and enables powerful work AI for everyone.
- Developer or company name: Glean Work
- Website URL: https://www.glean.com
- Privacy Policy: https://www.glean.com/privacy-policy
- Terms of Use: https://www.glean.com/terms
9. Customize Branding
a. Go to “Branding” in the left tab. b. Add the color icon and outline icon c. Use Hex Color for accent: #343ced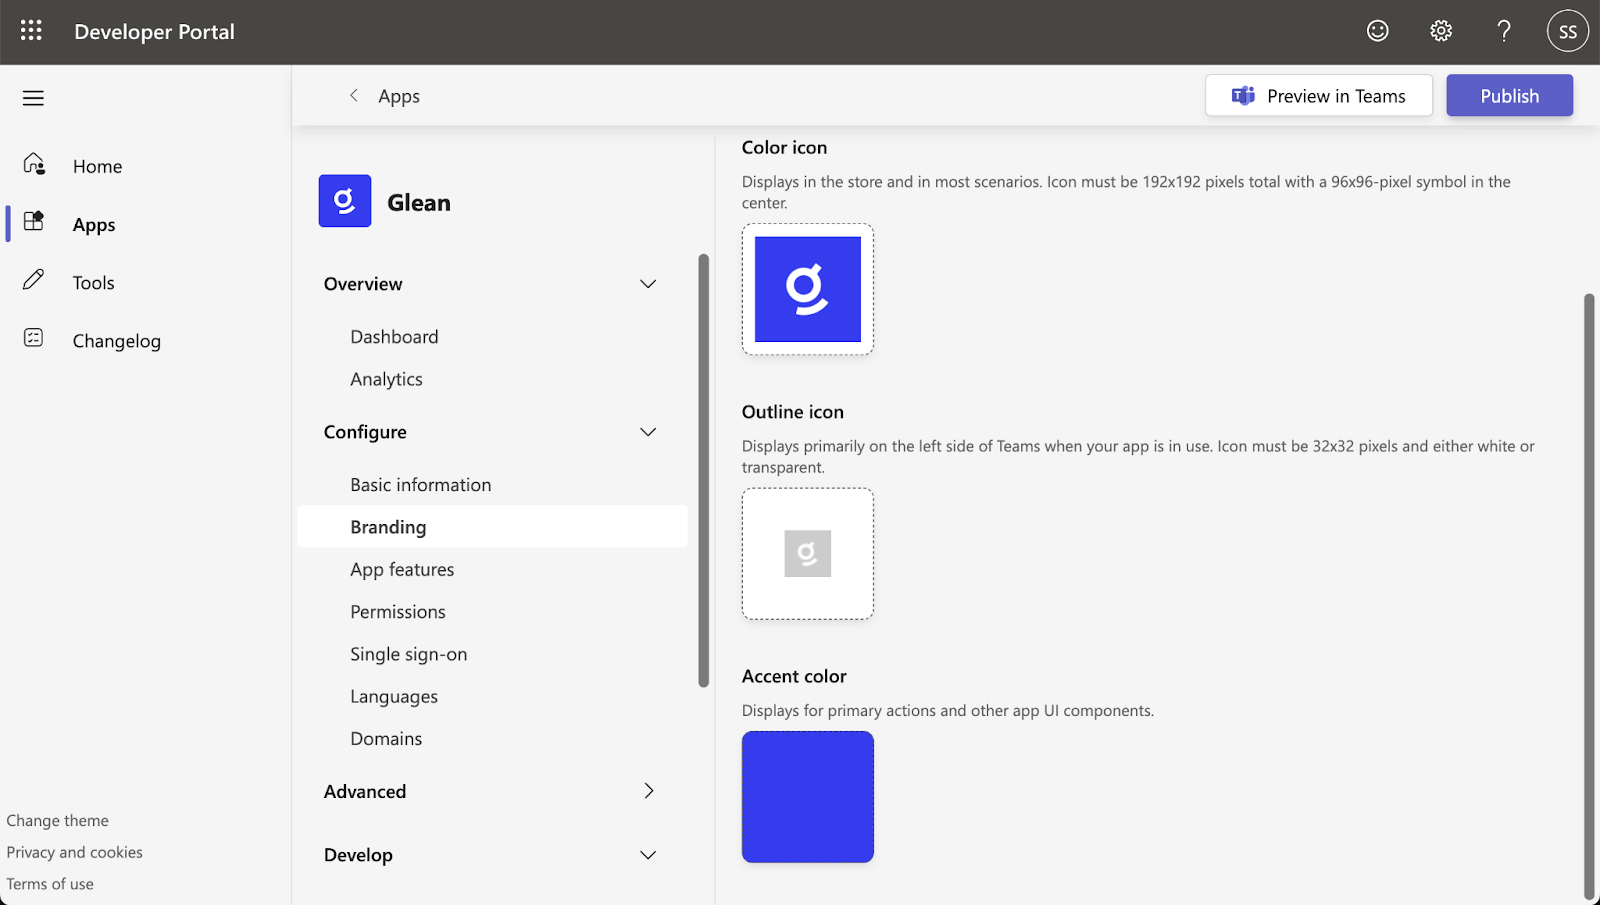
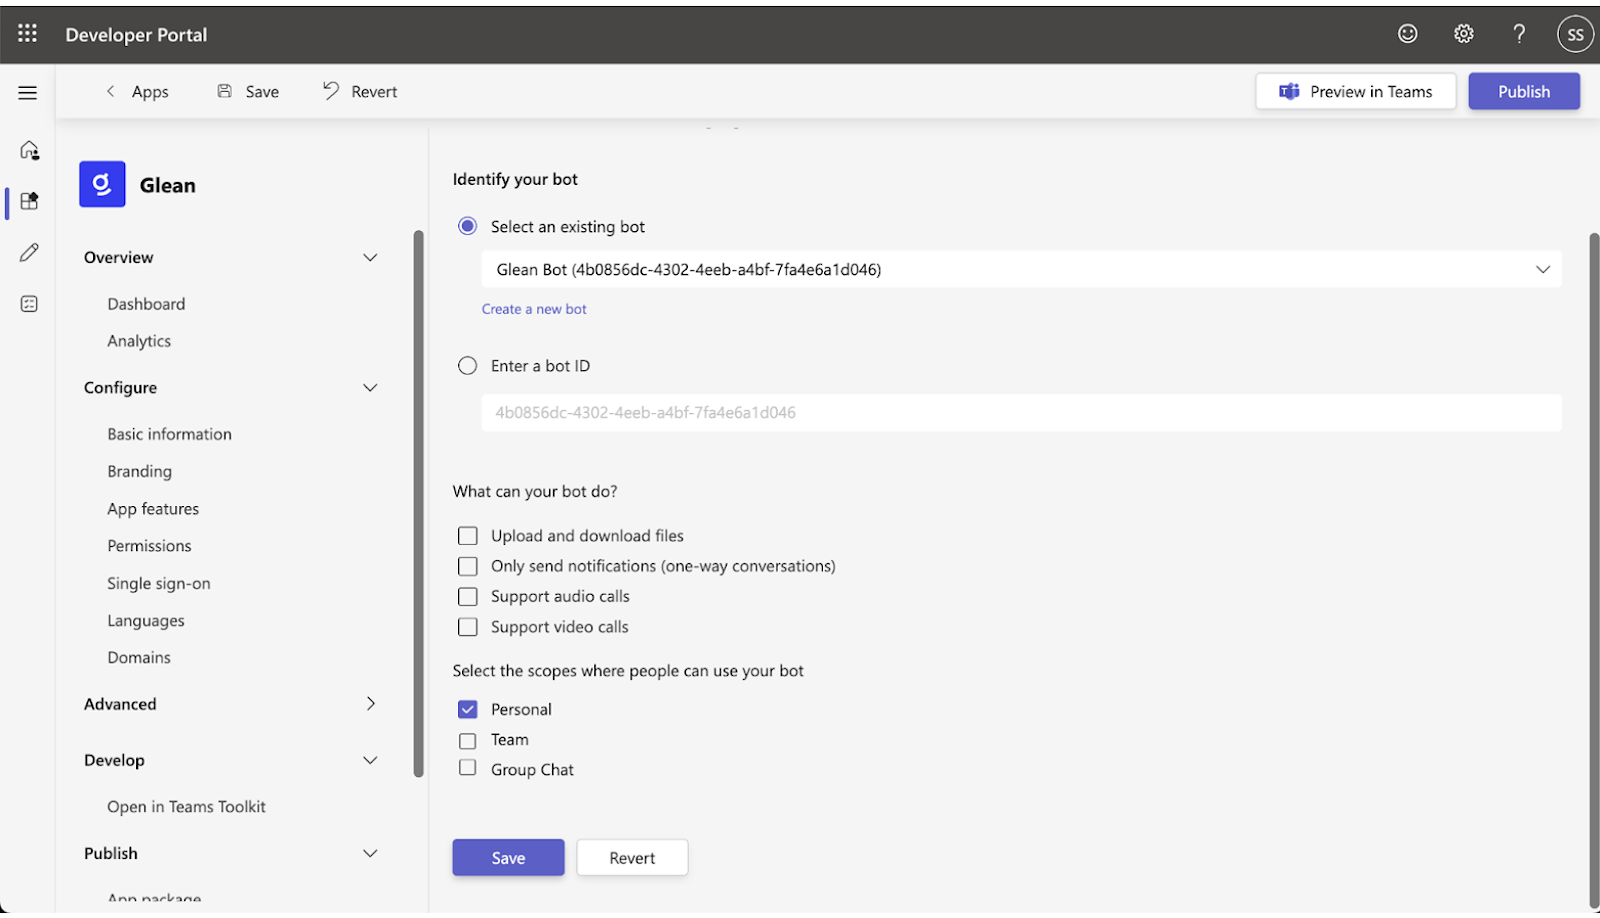
10. Configure App Features
a. Navigate to “App Features” in the left tab and choose “Bot”.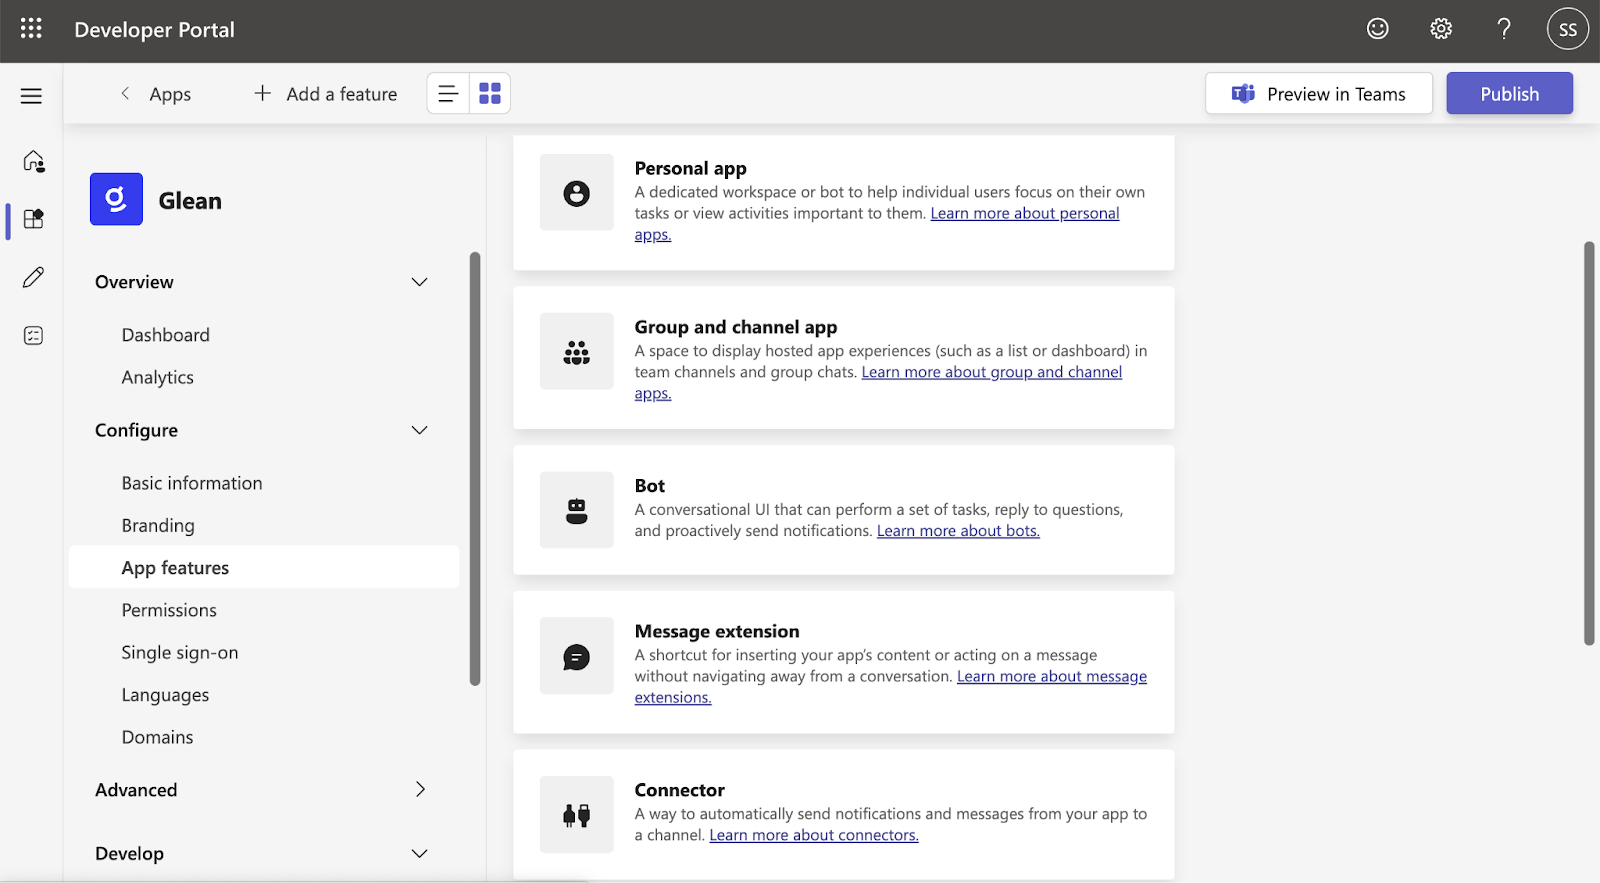
- Choose only “Personal” since the first version only supports “Personal DM”
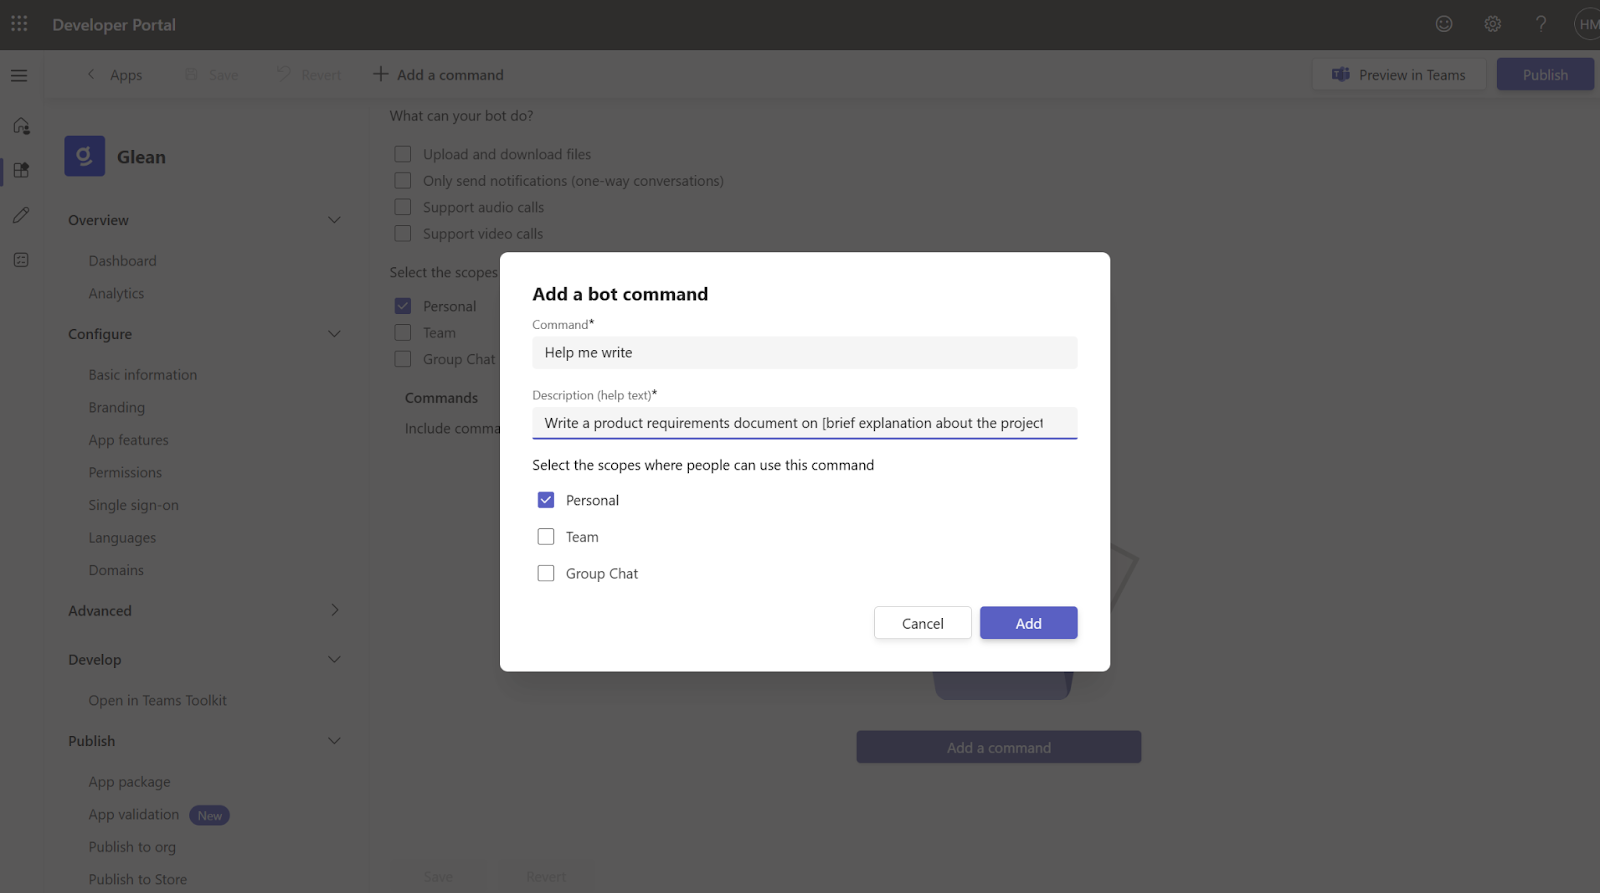
11. Adding Starter Prompts in the Glean App
Starter prompts provide users with an intuitive way to interact with the Glean app when they first use it. Follow these steps to add prompts within the App Features section. a. Within the same App features section, Click on Add a command b. Add the prompts. Here are some recommended prompts c. Select the scope and click Add Prompt 1: Summarize documents Summarize<linked documents> and highlight key points on specific topics
Prompt 2: Help me write
Write an [email, company announcement, etc] on [project explanation]
Prompt 3: Who should I ask
Who is the subject matter expert on [topic] to ask about [describe question]?
Prompt 4: Learn more about a project
Research a new project. Identify insights, resources, and subject matter expert
Prompt 5: Ask about a company policy
Find and research company policies and answer specific questions.
Prompt 6: Learn about a team
Research a team’s focus area and current projects.
Prompt 7: Prepare for an executive review
Identify questions that could be asked during a presentation to an executive.
Prompt 8: Explain acronym
Expand and provide a detailed explanation of the given acronym.
Prompt 9: Brainstorm
Brainstorm ideas for a presentation on [Project Name]
Prompt 10: Explain a technical term
Provide a clear and simple explanation of a technical term.
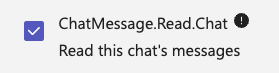
12. Configure permissions
Note: This is not needed if you want Glean only on Personal chat Go to “Permissions” in the left tab. Then go to “Team Permissions”, and select ChannelMessage.Read.Group. Also, go to “Chat/Meeting Permissions” and select “ChatMessage.Read.Chat” (These permissions are required for supporting the proactive mode in the future).
13. App features
At this point, refresh the page and return to the ‘App Features’ tab. Occasionally, a ‘Personal App’ might be added by default. Since this isn’t necessary, you can proceed to delete it.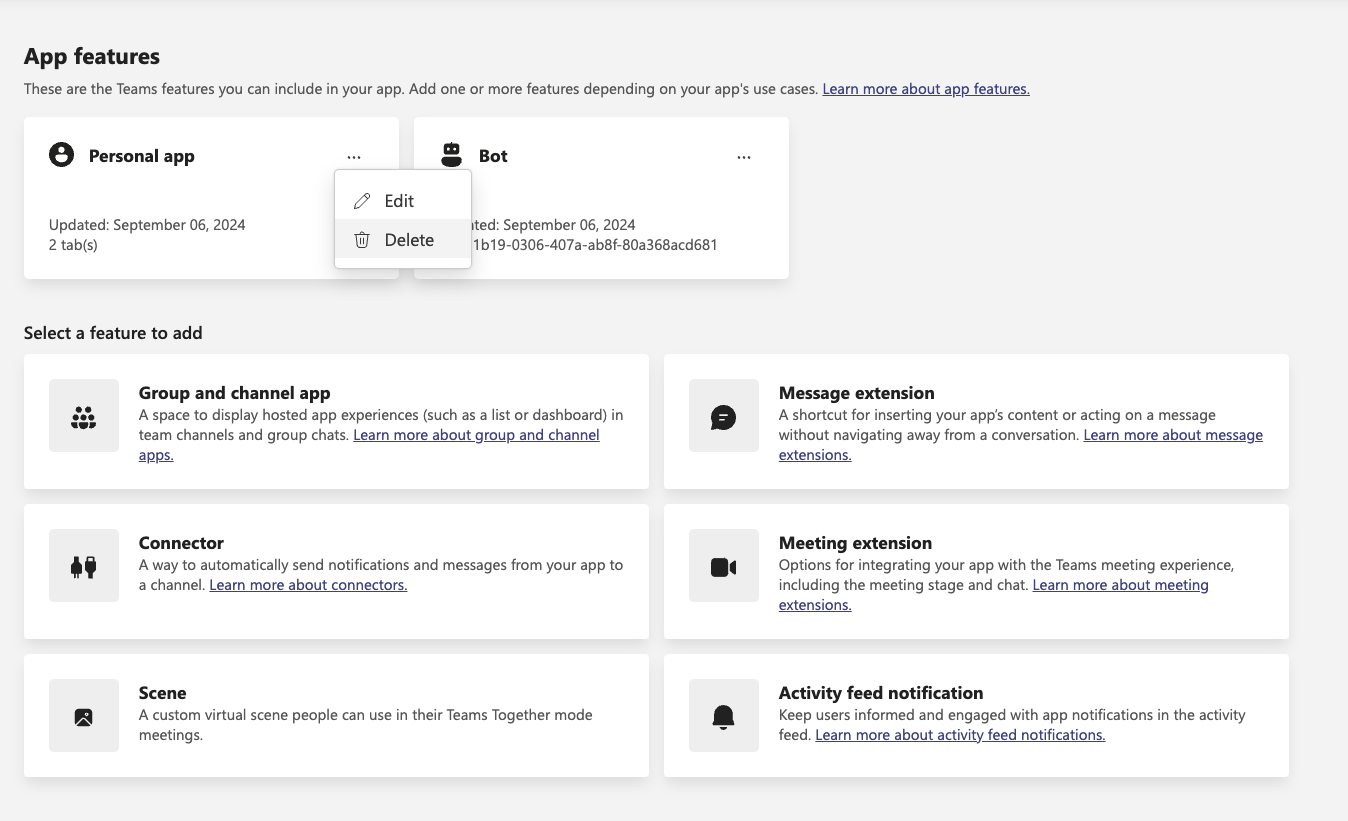
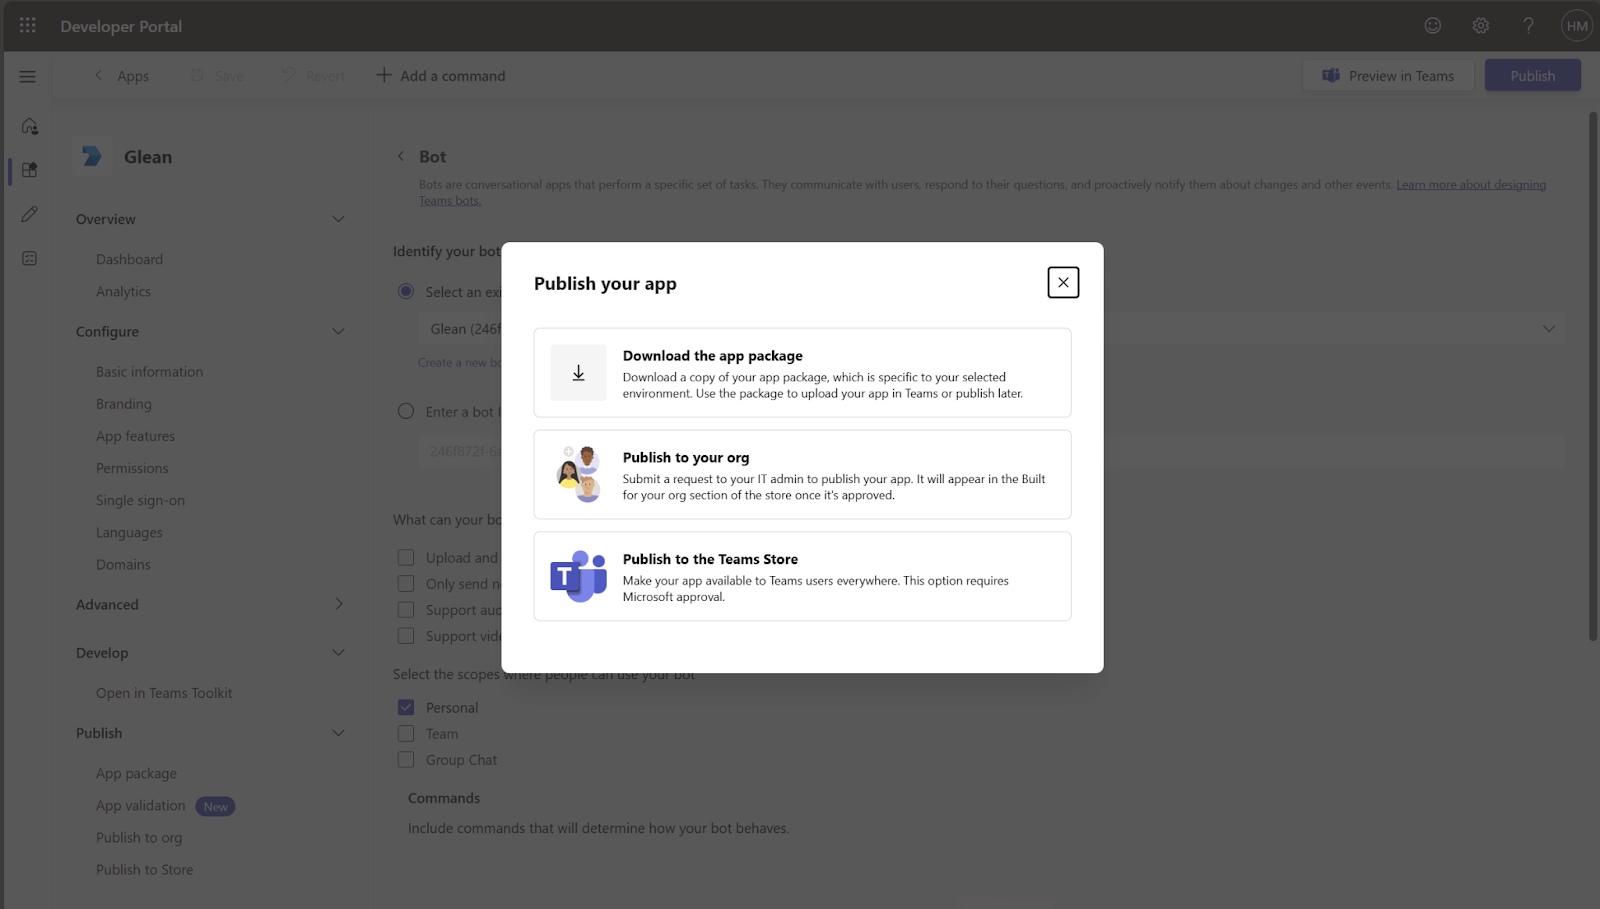
14. Publish Glean to Your Organization
a. In the left tab, go to “Publish to Org”. b. Click “Publish Your App”.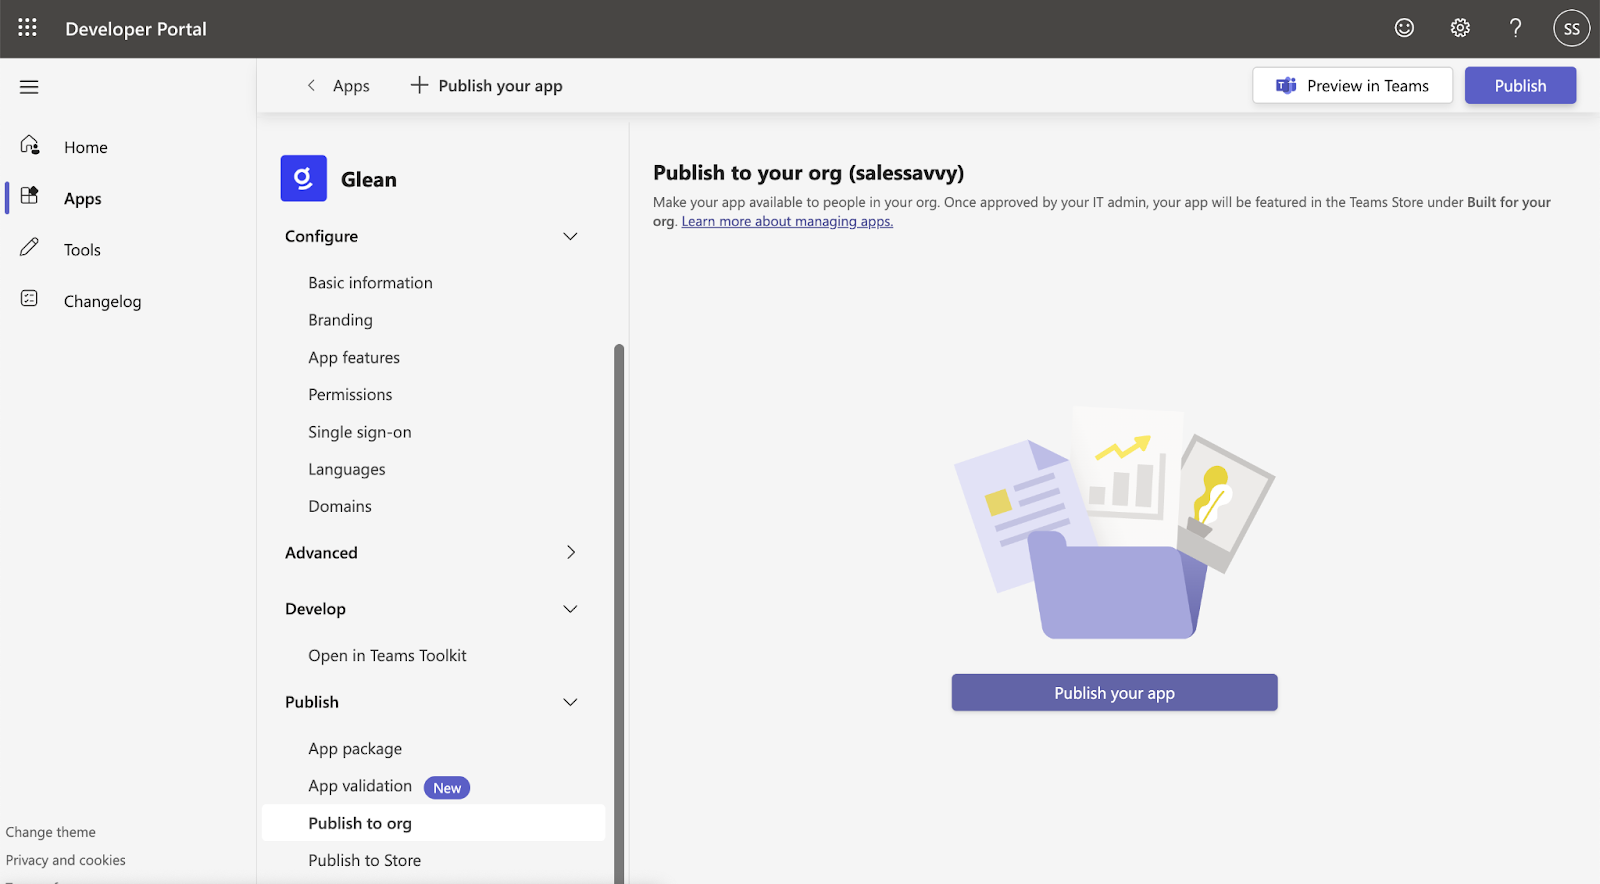
Phase 2: Deploy to your organization or specific users using Teams admin console
Follow these steps to deploy Glean to your organization or specific users via the Teams Admin Console.-
Access Teams Admin Center
- Go to the Teams Admin Center.
- On the left panel, navigate to Teams apps > Manage apps.
- In the search bar, type “Glean” and locate the app.
-
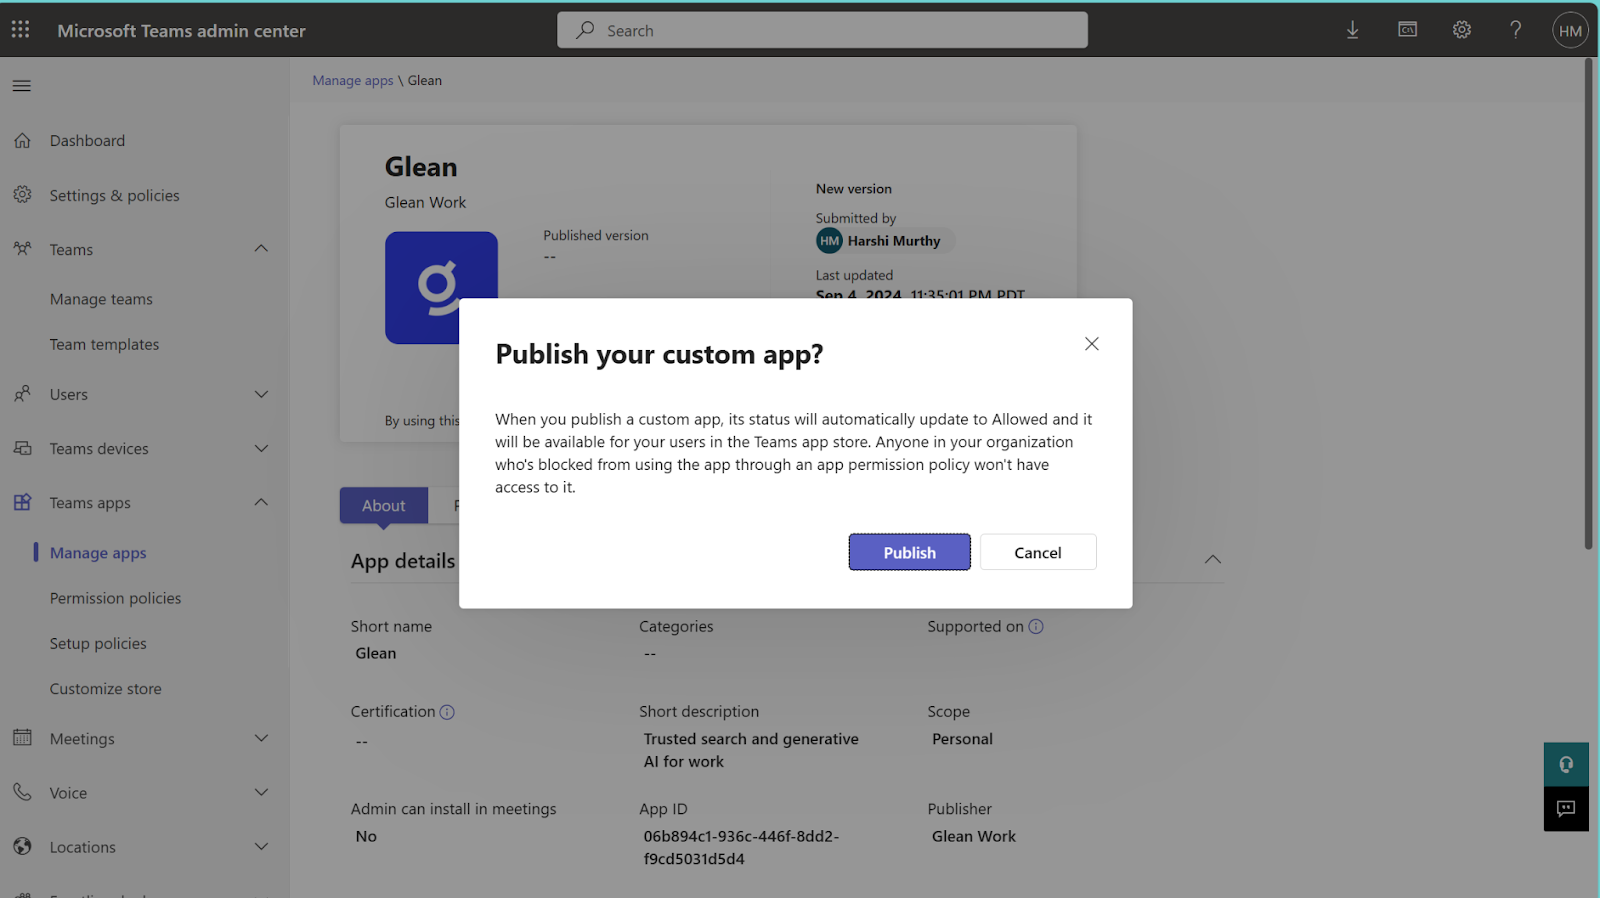
Unblock and Publish Glean App
- The app status will be set to “Blocked” by default.

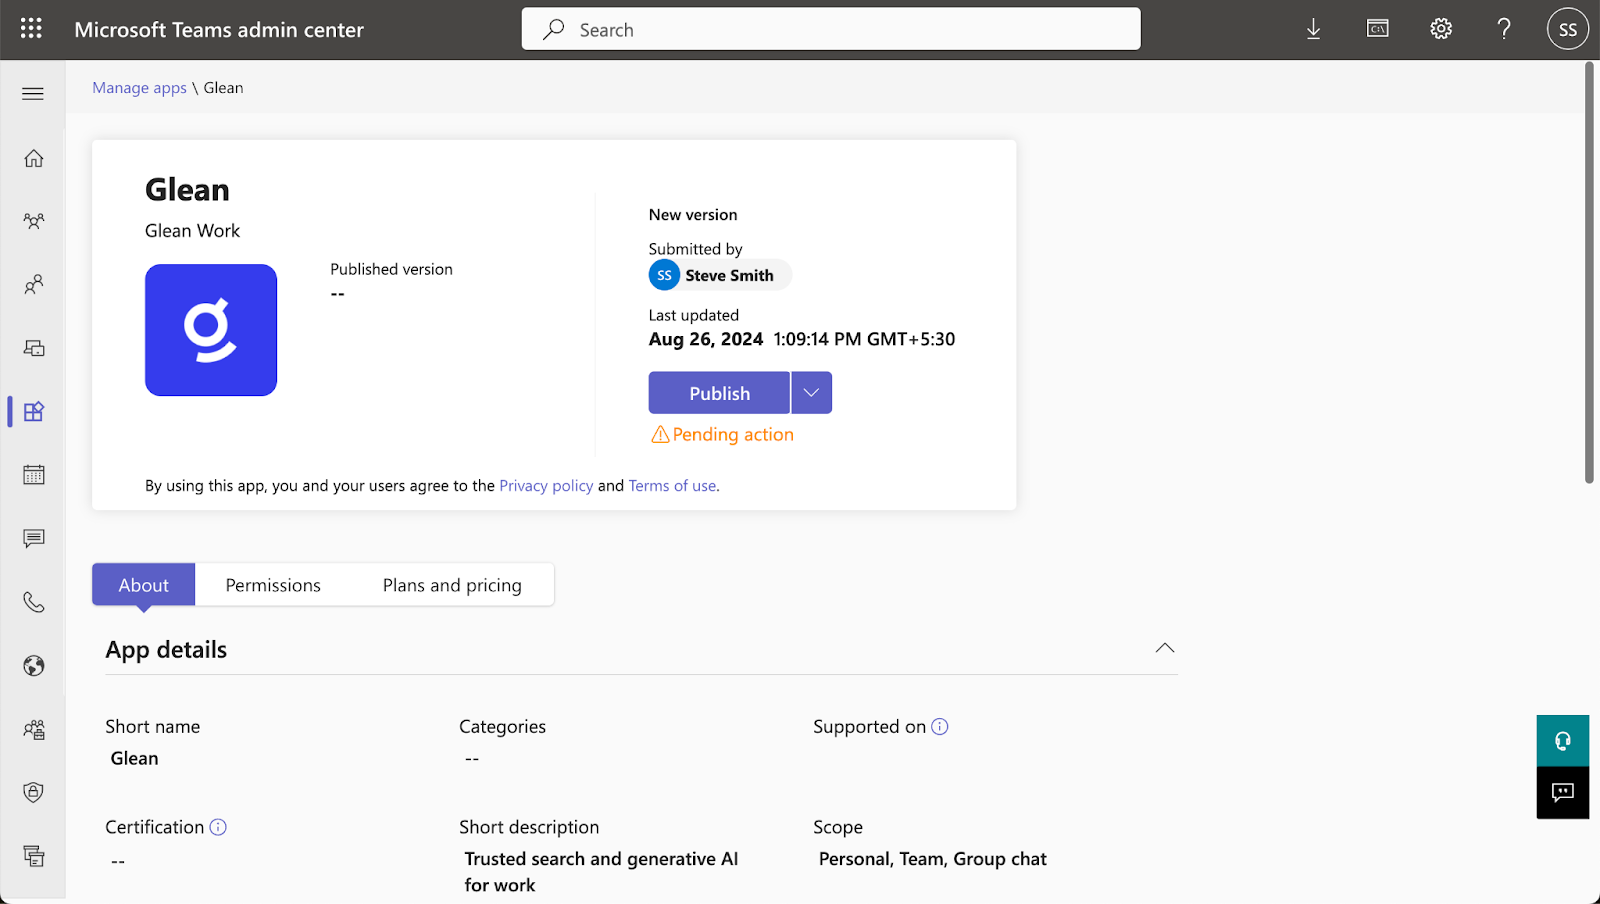
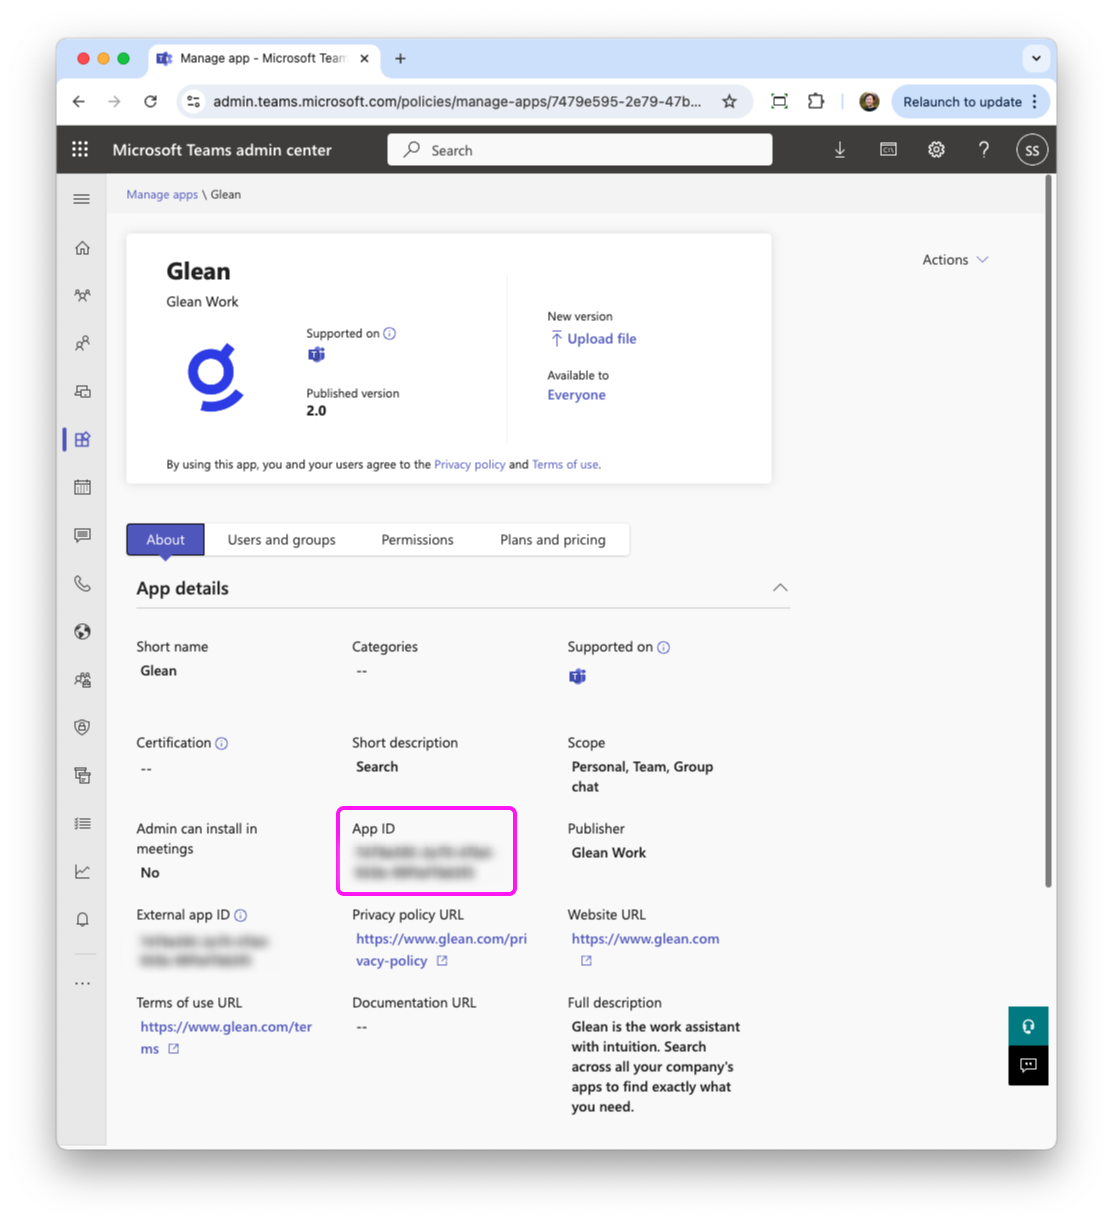
3. 📝 IMPORTANT - Note the App ID—you will need this in Phase 3.
4. Manage Users and Groups (Optional)
a. While waiting for the app to appear in the store, you can control which users or groups in your organization can access the Glean app. b. By default, Glean is made available to Everyone in your organization.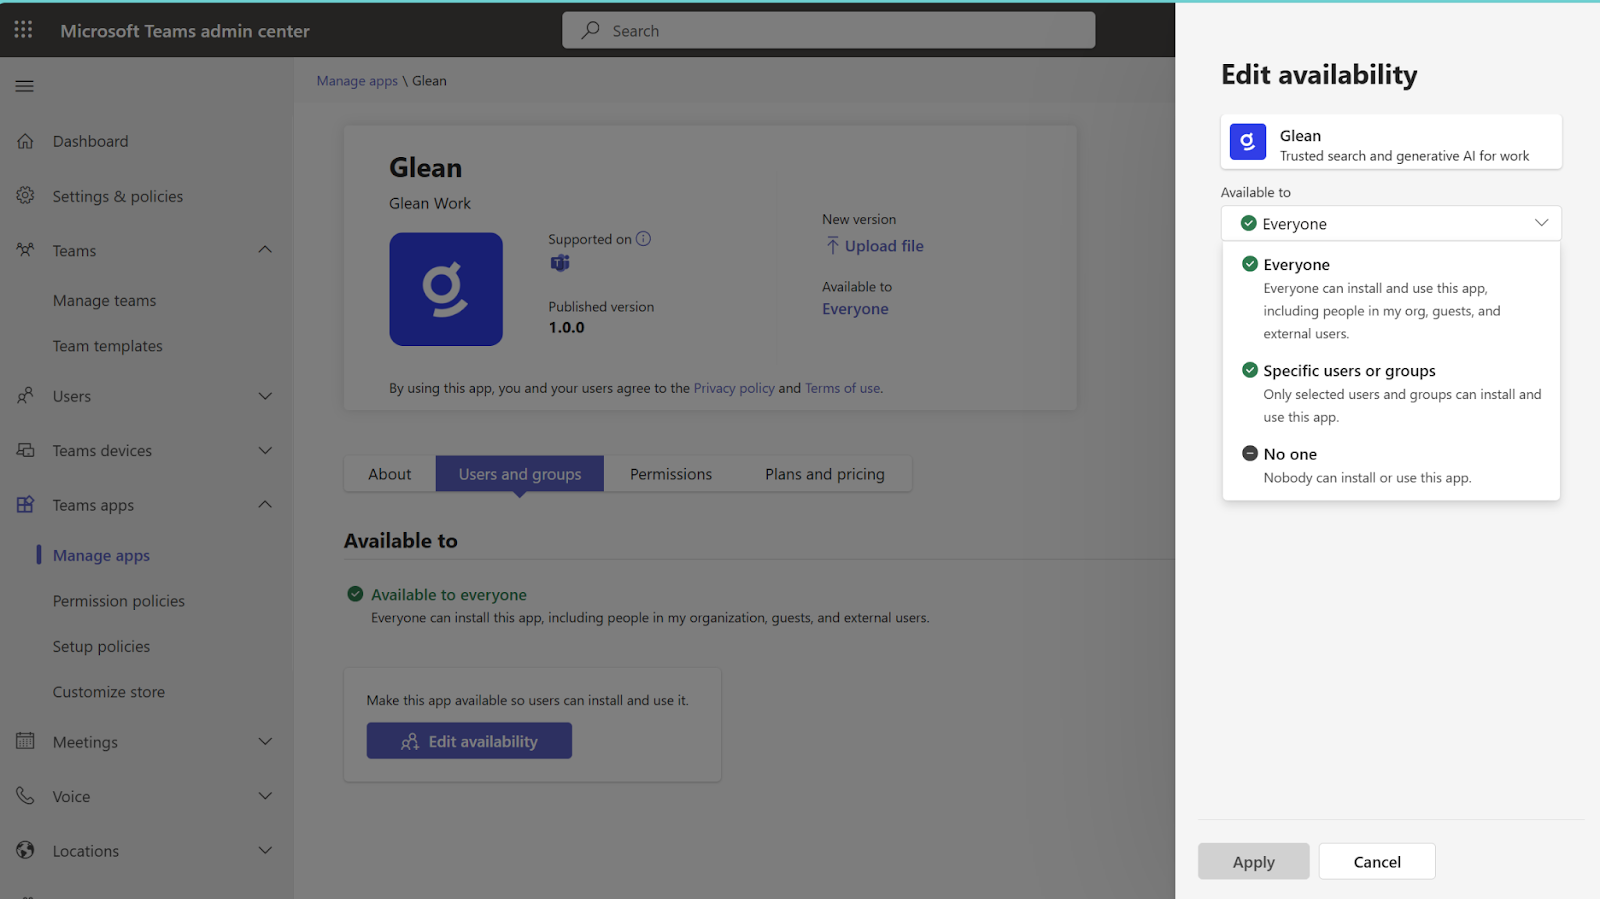
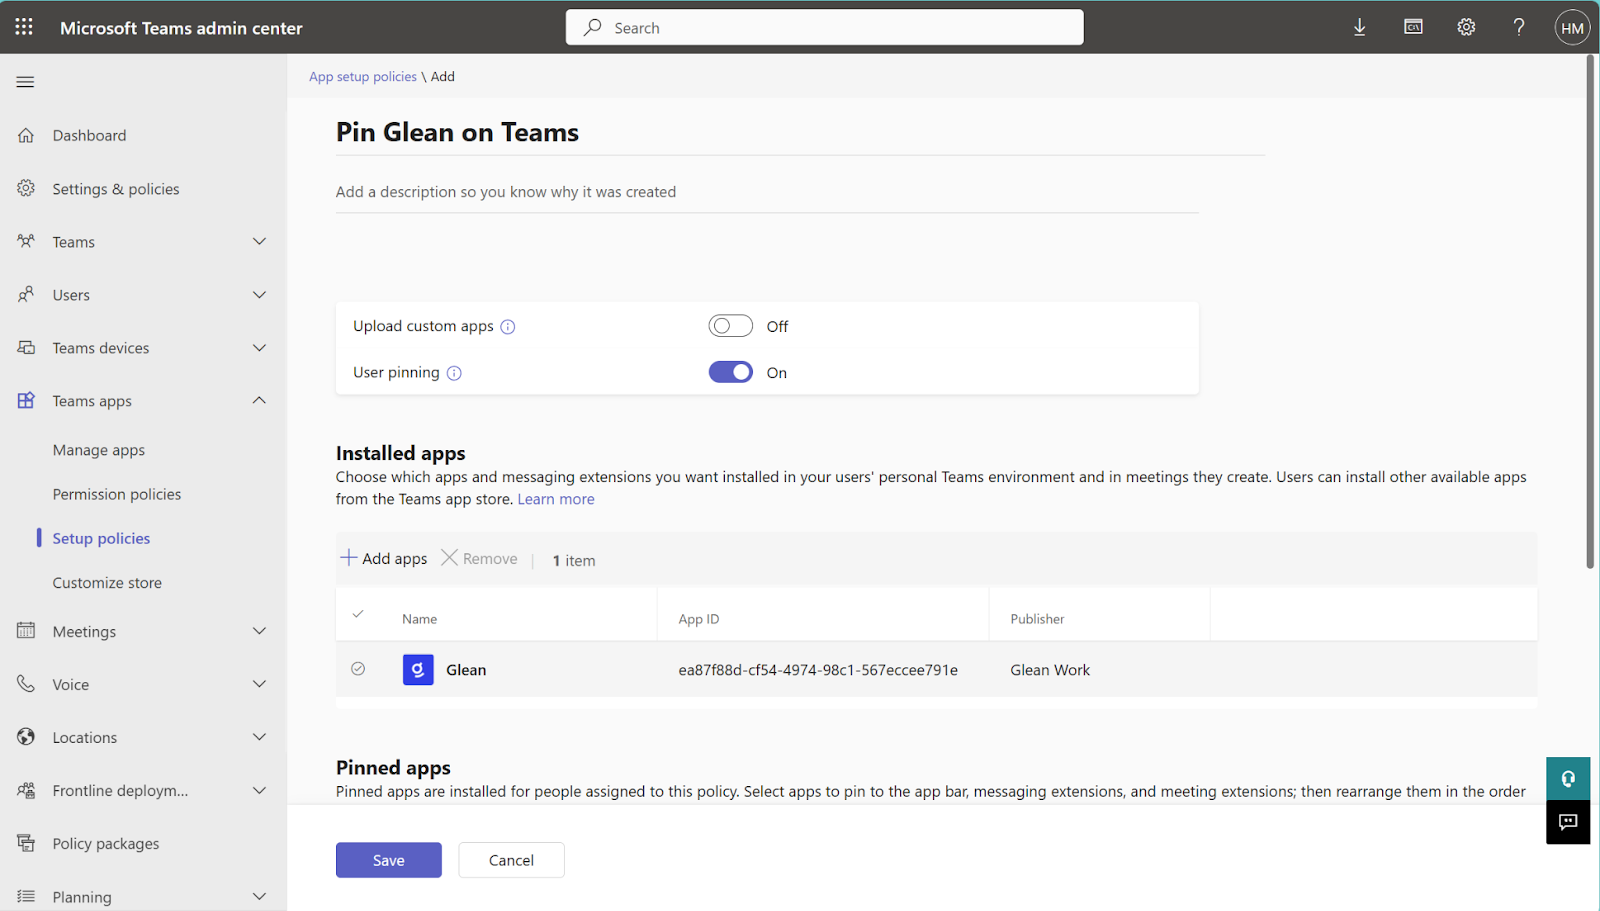
5. Pin Glean in Microsoft Teams Sidebar (Optional, but recommended)
By pinning the Glean app to the Teams sidebar, it will be easily accessible to users directly from the main Teams interface. a. To make Glean more accessible, go to the left side panel in the Teams Admin Center and select “Setup Policies”. b. In the “Manage Policies” section, click “Add”.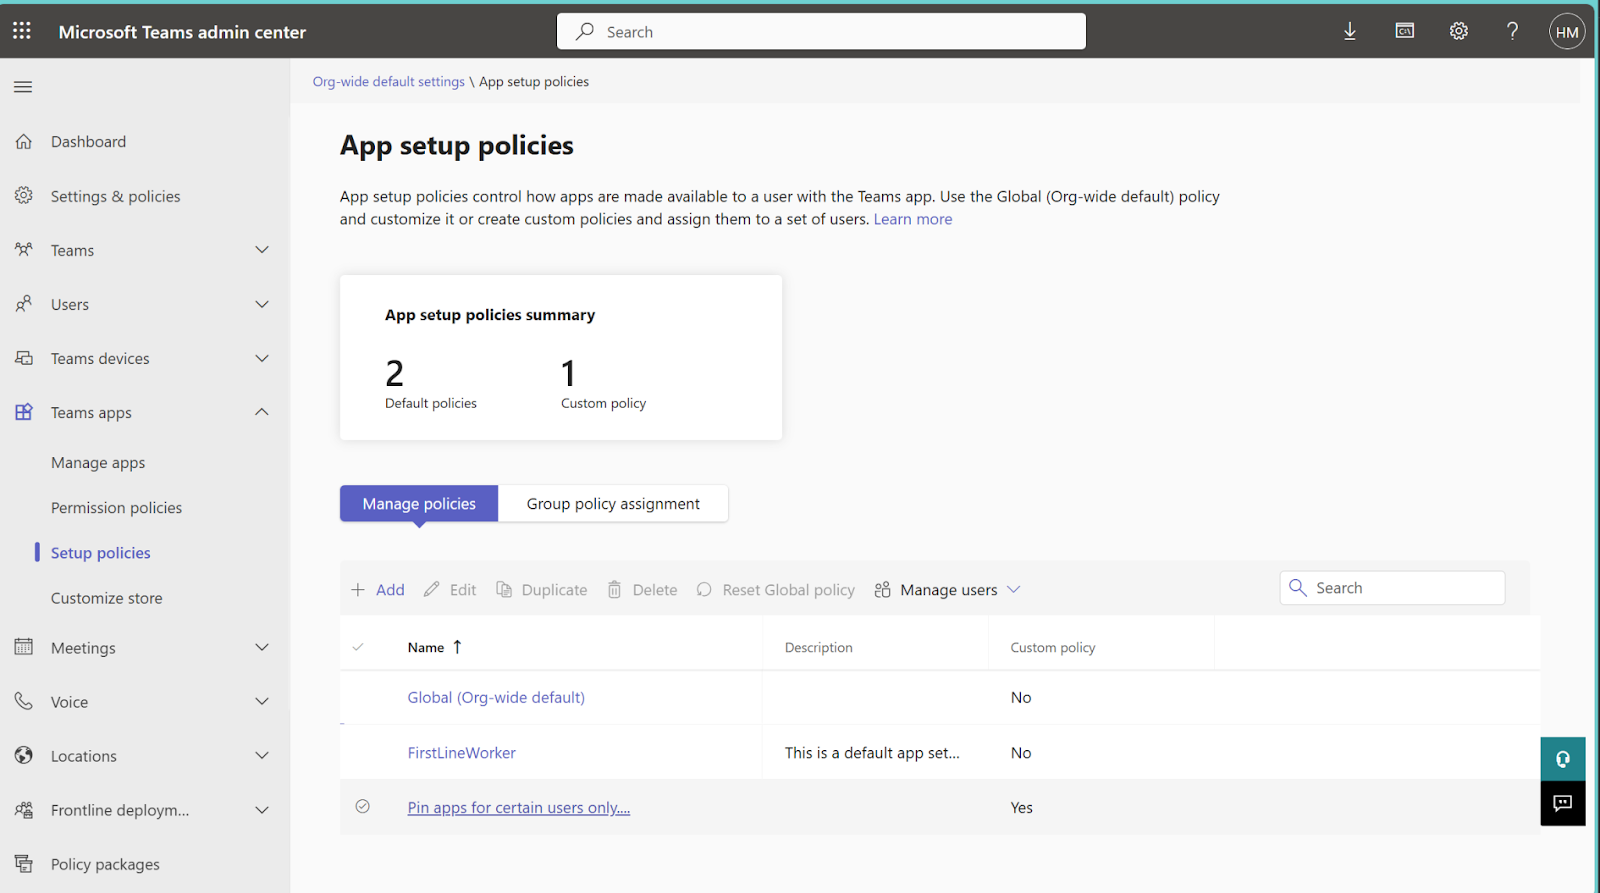
Phase 3: Enable Glean in Microsoft Teams with Glean admin console
In this phase, you will complete the setup process to allow Teams to access Glean by configuring the necessary fields in the Glean admin console.-
Navigate to Glean admin console
- Go to Glean admin console.
- On the left-side menu, click on “Data Sources”.
- Under Data Sources, select Microsoft Teams > Glean in Microsoft Teams.
-
Fill in Required Fields
a. In the Glean in Microsoft Teams section, you will need to input information collected from previous phases b. Application (client) ID
Source: Phase 1 – Step 3c (App ID copied when creating the bot). c. Client Secret
Source: Phase 1 – Step 5b (Generated from the Teams Developer Portal). d. Glean in Microsoft Teams App ID
Source: Phase 2 – Step 3 (App ID noted when publishing the app).
3. Finalize the Setup
a. After filling in all the required fields, click “Save” to enable the integration. b. Glean is now enabled for Teams, allowing your organization to access the app and its features directly through Teams.4. Share the end user guide to users in your organization
Glean in Microsoft Teams: User GuideTroubleshooting
Bot installed but not responding (401 Authorization has been denied)
If the Glean bot is installed in Microsoft Teams and appears to be correctly configured, but replies from the bot fail with a 401 “Authorization has been denied” error (or similar) from Microsoft’s Bot API, the issue is likely caused by an incorrect sign-in audience setting on the Azure app registration.Symptoms
- The Glean bot is installed in Microsoft Teams and visible to users.
- The bot can receive user messages.
- Graph API calls (such as fetching chat IDs) work correctly.
- However, when the bot attempts to reply, the response fails with a 401 “Authorization has been denied for this request” error from the Bot Framework.
Cause
This error occurs when the Azure app registration used for the Glean Teams bot is configured as multi-tenant instead of single-tenant. The Bot Framework requires the app registration to use single-tenant authentication for proper authorization when sending replies.Resolution
To resolve this issue, change the app registration to single-tenant:- Go to the Azure portal.
- Navigate to Azure Active Directory → App registrations and select the app registration you created for the Glean Microsoft Teams bot.
- In the left-side panel, under Manage, select Authentication.
- Locate the Supported account types setting (also referred to as the sign-in audience or “Who can use this application or access this API”).
- Change it to Accounts in this organizational directory only (Single tenant).
- Click Save.
- Wait up to 60 minutes for the change to propagate (the bot’s refresh token is refreshed by a background job that runs every hour).
- Send a direct message to the bot again to verify it now responds correctly.
This misconfiguration has been observed in production environments. Switching the app registration to single-tenant consistently resolves the 401 authorization error when the bot attempts to reply to user messages.