Prerequisites
Before beginning the setup process, ensure you have:
- An active administrator account in your SSO provider
- Access to your Glean admin account with Admin or Setup Admin roles
- Basic understanding of SAML 2.0 and SSO concepts
SSO Provider Configuration
If your workspace is still in the central setup phase and has not yet been initialized, configuration URLs associated with your tenant ID will not exist. In this case, you must direct your SSO configuration to Glean’s central URL in order to complete verification and enable SSO-based login. Follow the appropriate instructions below based on your setup stage.Before workspace initialization:
1
Create a new SAML App
Create a new SAML application in your SSO provider’s management console.Configure the following fields (some may not be required by your provider):
| Field | Value |
|---|---|
| Single Sign-On (SSO) URL | https://apps-be.glean.com/central_sso/authorization-code/callback |
| Recipient / Destination URL | https://apps-be.glean.com/central_sso/authorization-code/callback |
| ACS (Consumer) URL | https://apps-be.glean.com/central_sso/authorization-code/callback |
| Audience URI (SP Entity ID) | https://apps-be.glean.com |
| Default RelayState | Leave blank |
| Login URL | https://apps-be.glean.com/login |
| Logout URL | https://apps-be.glean.com/logout |
| SAML initiator | Service Provider (Glean) |
| SAML signature element | Assertion |
| Name ID format | emailAddress |
| Sign requests? | True |
| X.509 signature | Standard Strength Certificate (2048-bit) |
| X.509 signature algorithm | SHA-512 |
2
Copy the IdP Metadata XML URL
Glean requires a publicly accessible IdP Metadata XML URL to configure SSO. Direct XML file uploads are not supported.
What if my SSO provider doesn't provide an accessible metadata URL?
What if my SSO provider doesn't provide an accessible metadata URL?
If your SSO provider doesn’t offer a publicly accessible URL, you should host the file at a location within your organization that Glean can access. If this isn’t feasible, contact Glean Support via ticket in the support portal and have them coordinate with the Glean Platforms team.
What if my SSO provider doesn't provide a metadata XML file or URL?
What if my SSO provider doesn't provide a metadata XML file or URL?
If your provider doesn’t supply an IdP Metadata file or URL, you’ll need to create one manually. Here’s a sample template:Replace the
entityID, X509Certificate, and Location fields with your SAML IdP details.After workspace initialization:
1
Create a new SAML App
Create a new SAML application in your SSO provider’s management console.Configure the following fields (some may not be required by your provider):
You’ll need your tenant ID and/or tenant backend domain (format:
tenant_name-be.glean.com).
You can find your tenant ID by following the instructions here. Contact Glean support if unsure.| Field | Value |
|---|---|
| Single Sign-On (SSO) URL | https://tenant_name-be.glean.com/authorization-code/callback |
| Recipient / Destination URL | https://tenant_name-be.glean.com/authorization-code/callback |
| ACS (Consumer) URL | https://tenant_name-be.glean.com/authorization-code/callback |
| Audience URI (SP Entity ID) | https://tenant_name-be.glean.com |
| Default RelayState | Leave blank |
| Login URL | https://tenant_name-be.glean.com/login |
| Logout URL | https://tenant_name-be.glean.com/logout |
| SAML initiator | Service Provider (Glean) |
| SAML signature element | Assertion |
| Name ID format | emailAddress |
| Sign requests? | True |
| X.509 signature | Standard Strength Certificate (2048-bit) |
| X.509 signature algorithm | SHA-512 |
2
Copy the IdP Metadata XML URL
Glean requires a publicly accessible IdP Metadata XML URL to configure SSO. Direct XML file uploads are not supported.
What if my SSO provider doesn't provide an accessible metadata URL?
What if my SSO provider doesn't provide an accessible metadata URL?
If your SSO provider doesn’t offer a publicly accessible URL, you should host the file at a location within your organization that Glean can access. If this isn’t feasible, contact Glean Support via ticket in the support portal and have them coordinate with the Glean Platforms team.
What if my SSO provider doesn't provide a metadata XML file or URL?
What if my SSO provider doesn't provide a metadata XML file or URL?
If your provider doesn’t supply an IdP Metadata file or URL, you’ll need to create one manually. Here’s a sample template:Replace the
entityID, X509Certificate, and Location fields with your SAML IdP details.Glean Configuration
1
Configure SAML
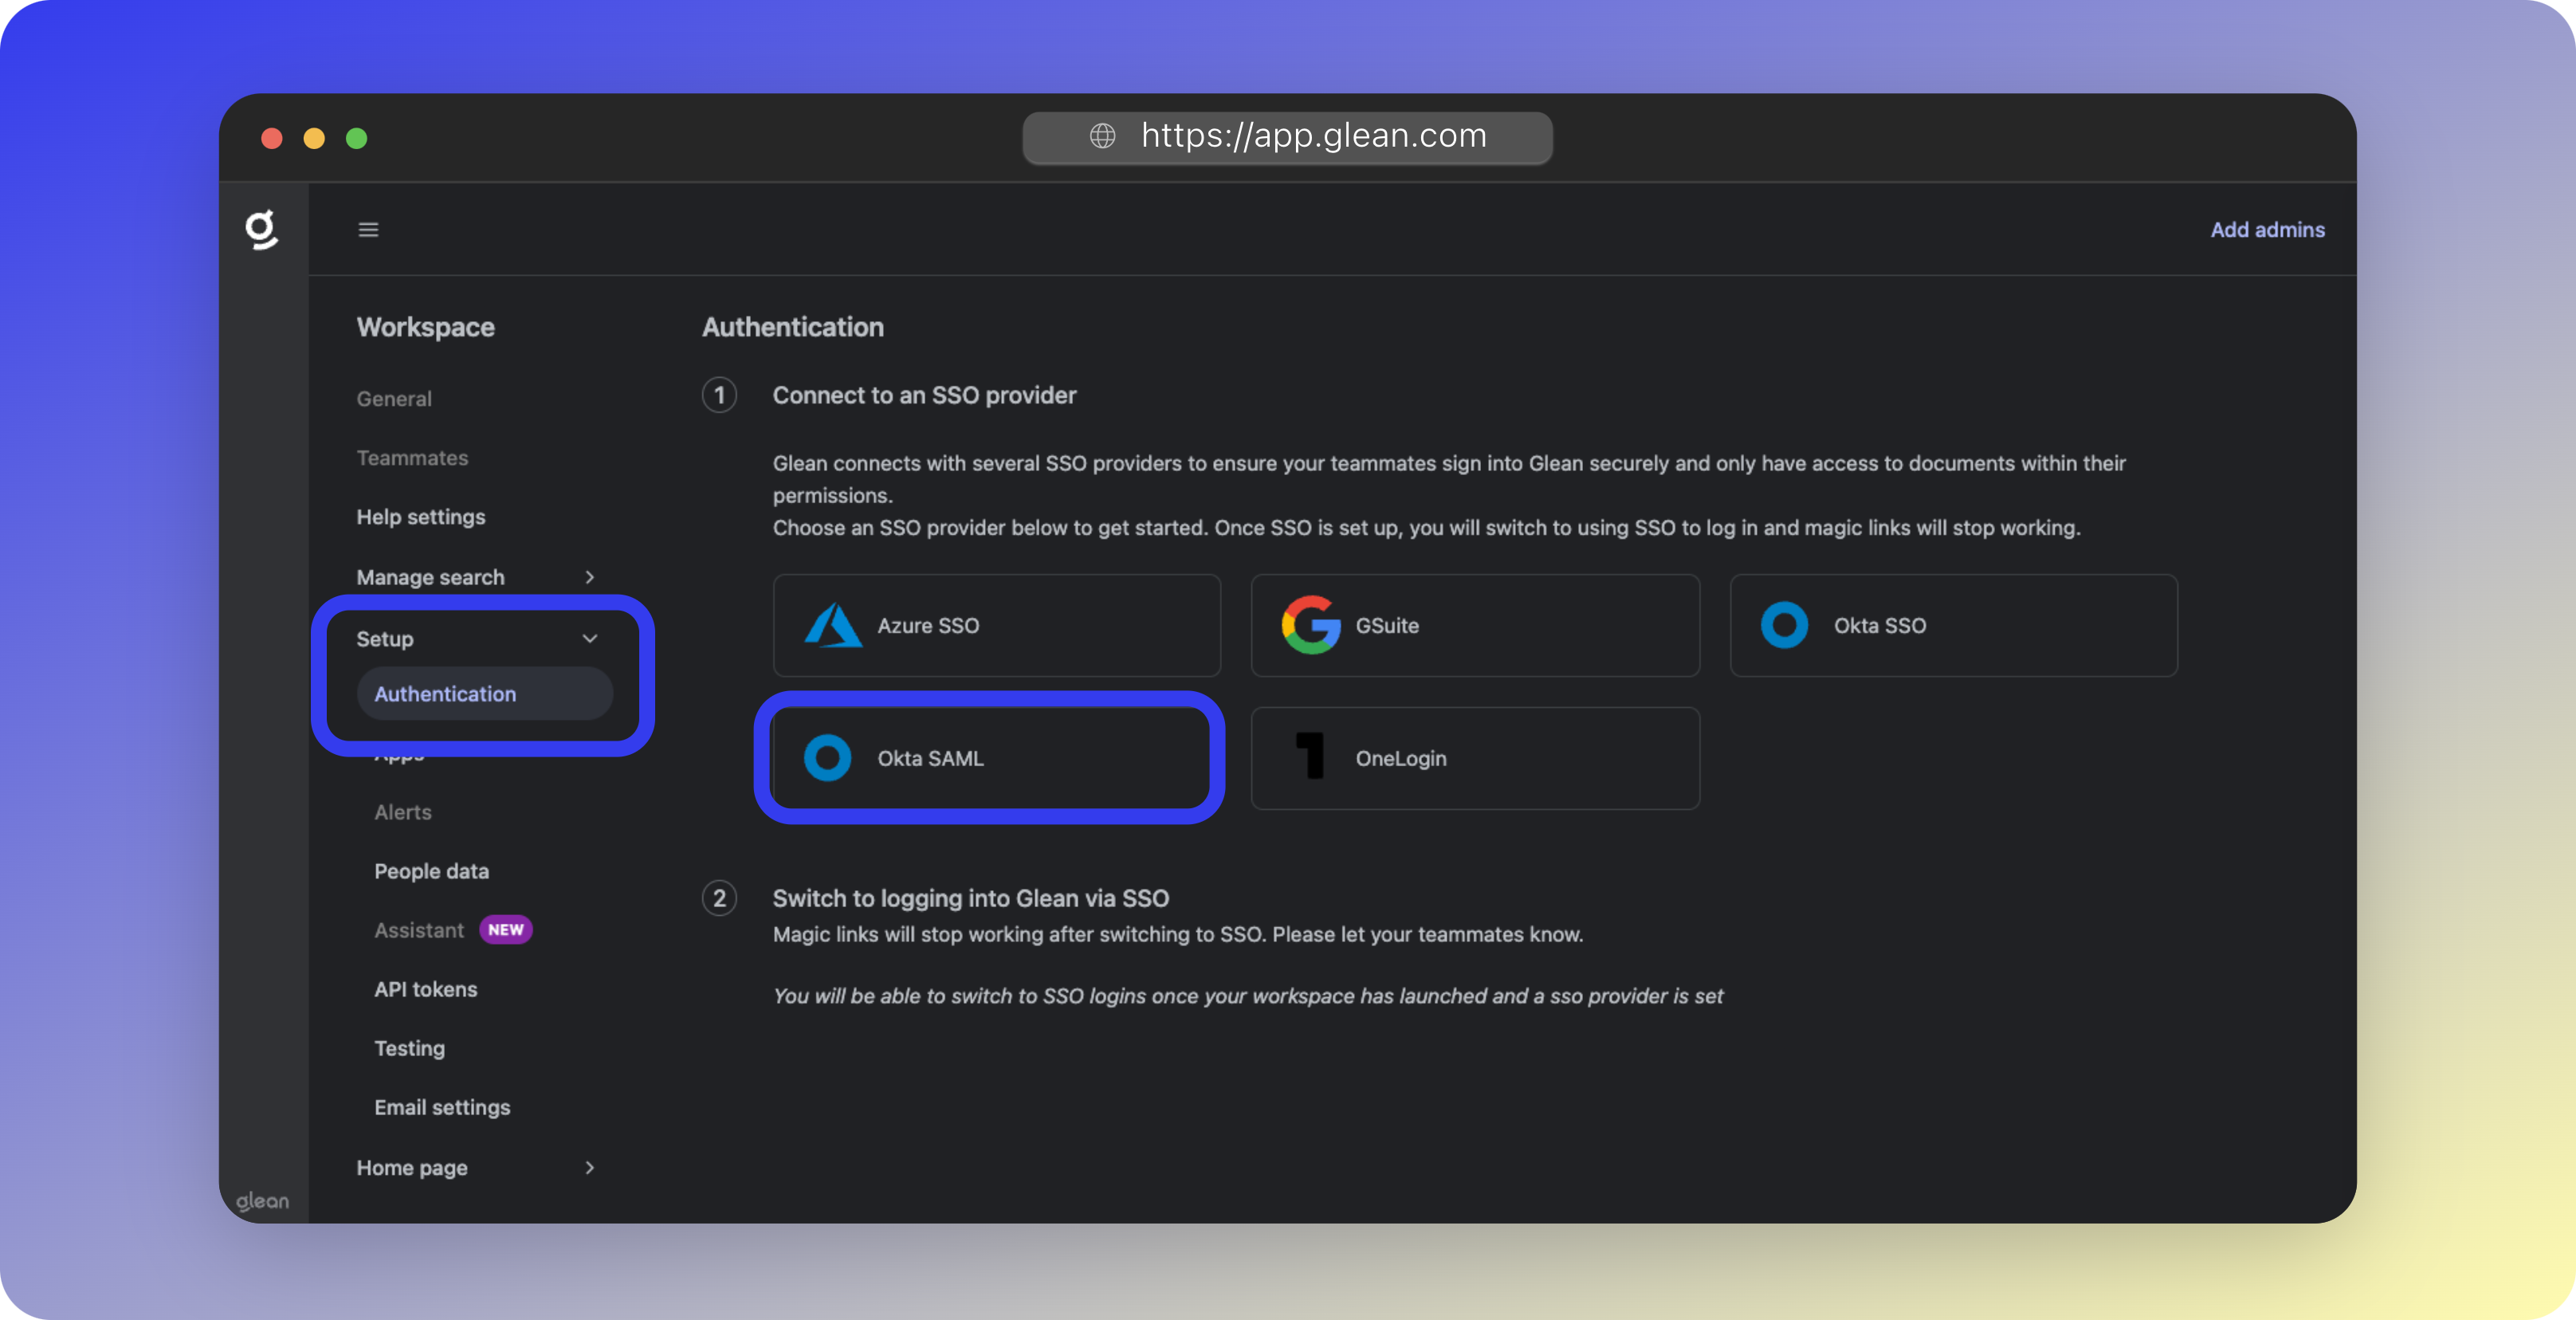
- Navigate to Workspace Settings > Setup > Authentication
- Select Okta SAML from the SSO Providers list
You can use this option for any SAML provider - not just Okta.
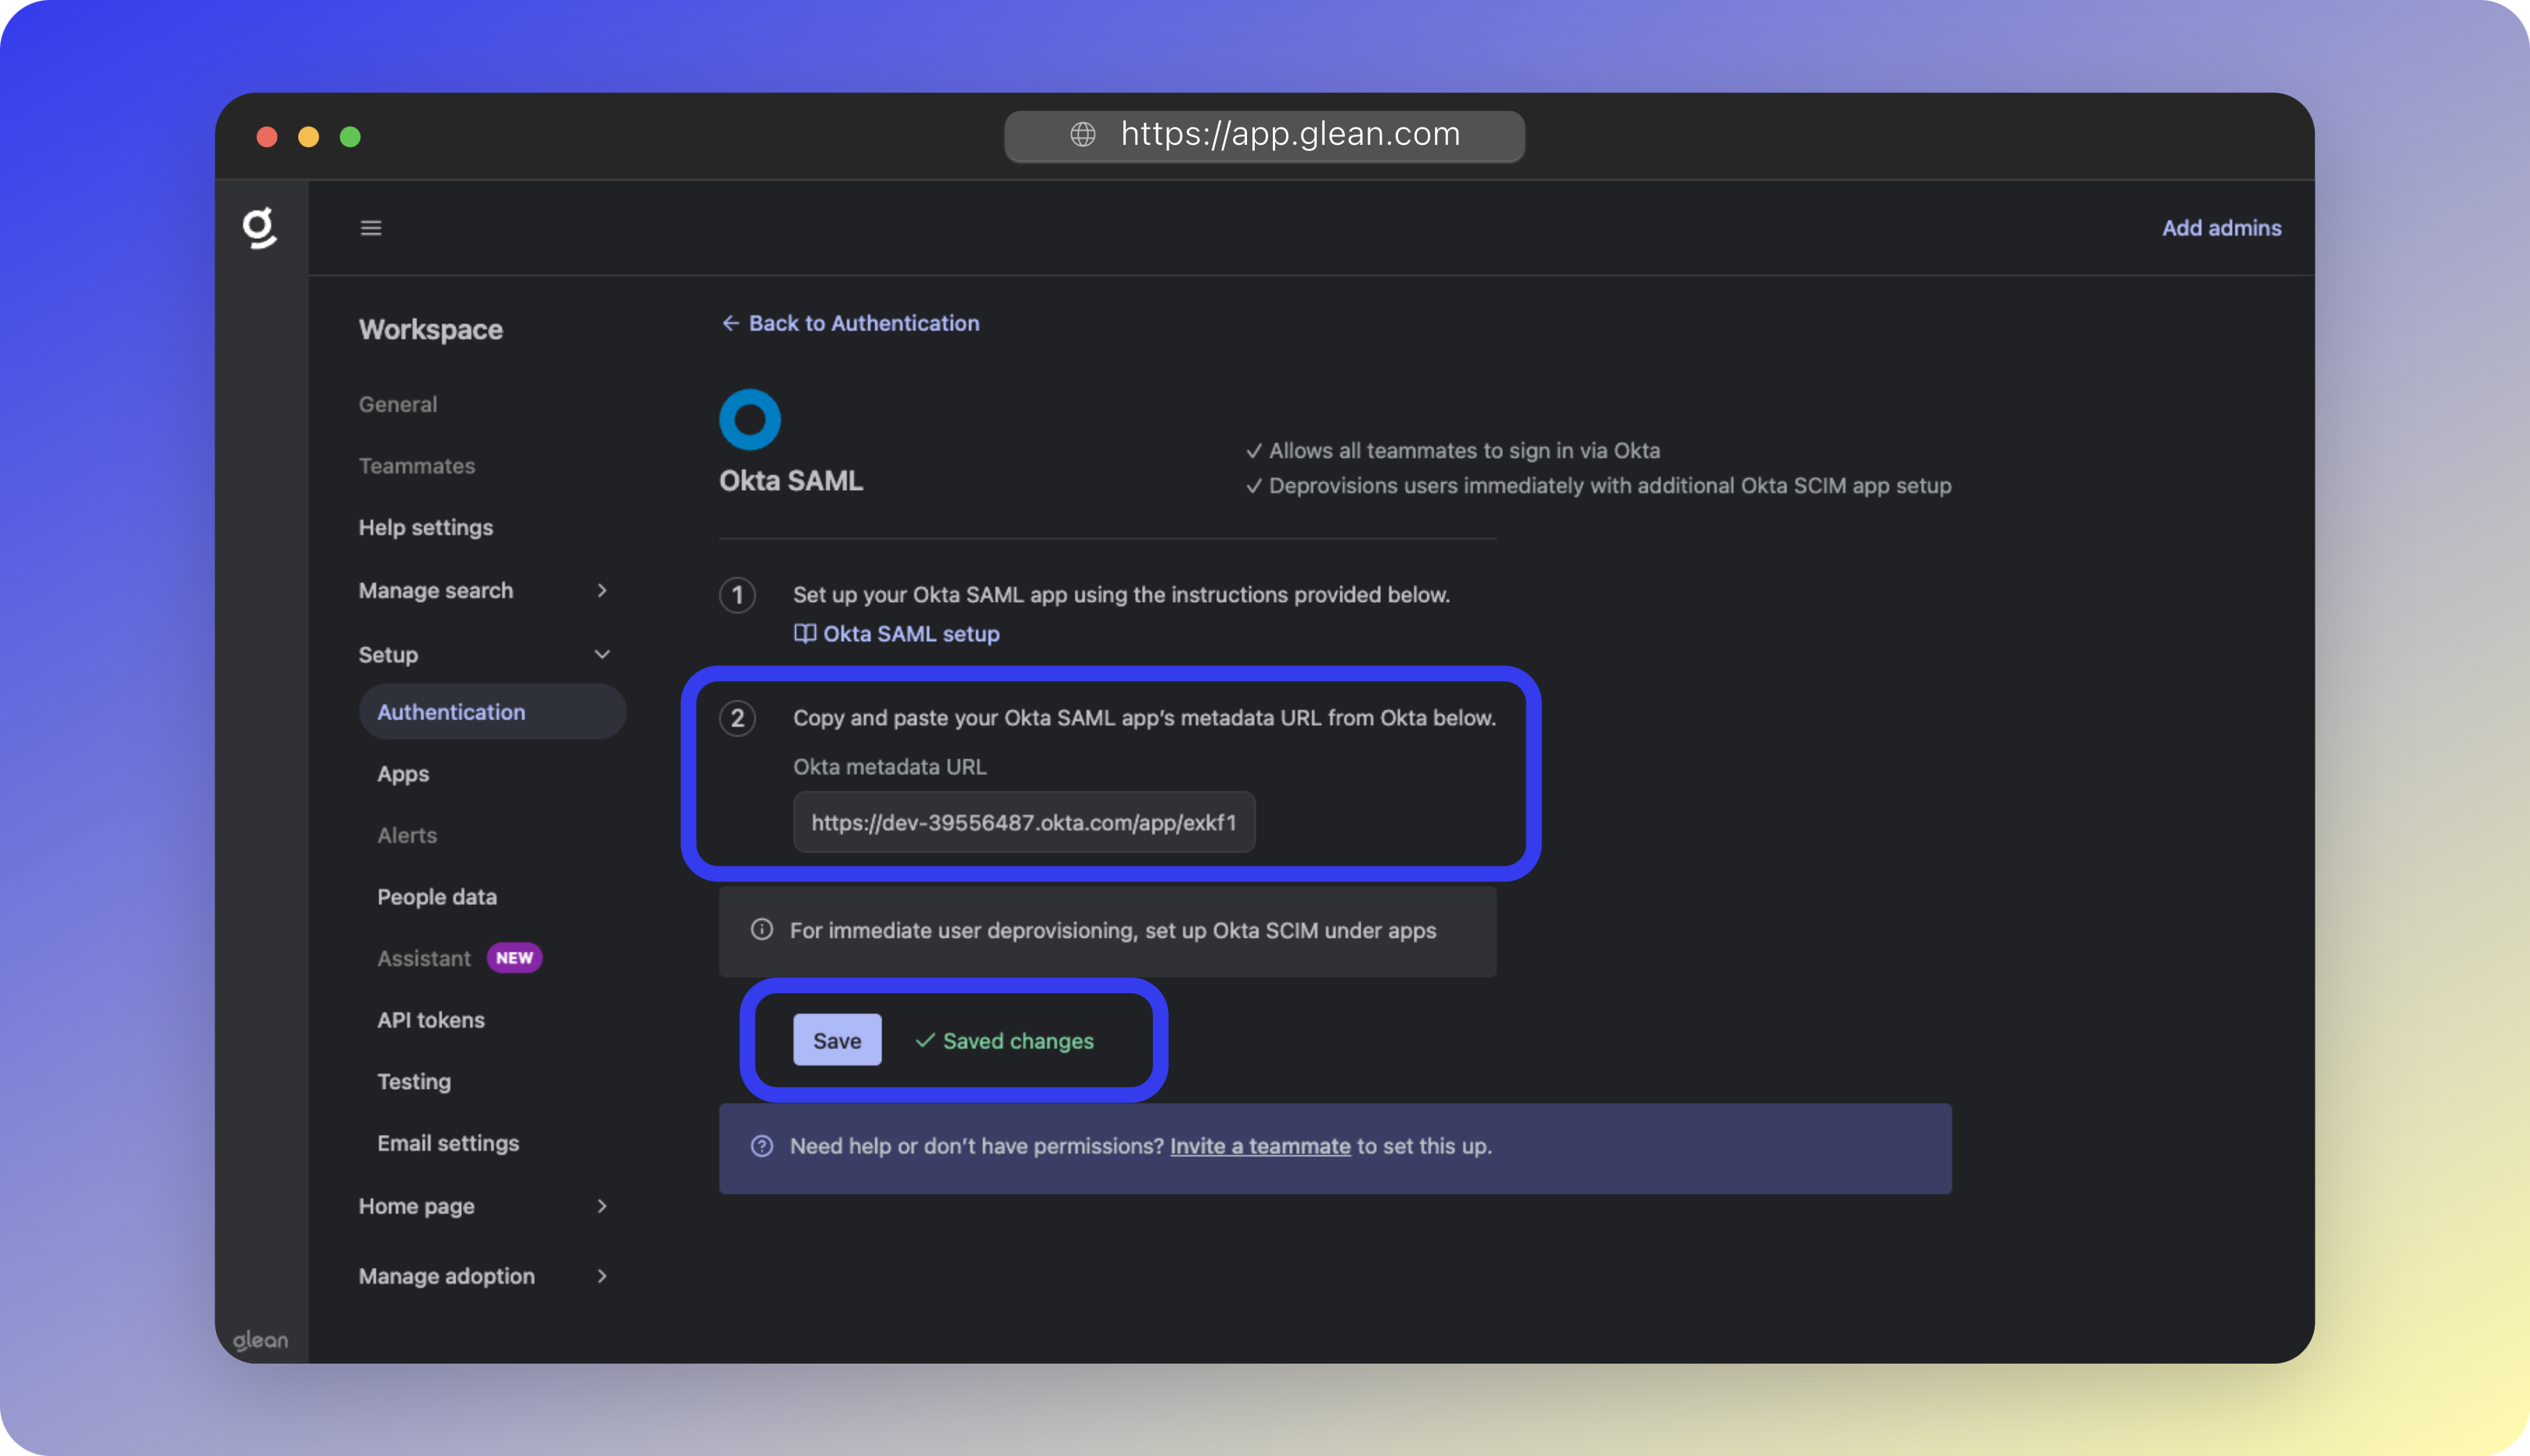
- Paste your SAML Metadata URL into the Okta metadata URL field
- Click Save
2
Activate SSO
- Return to Authentication Settings
- Click Switch to Okta SAML SSO
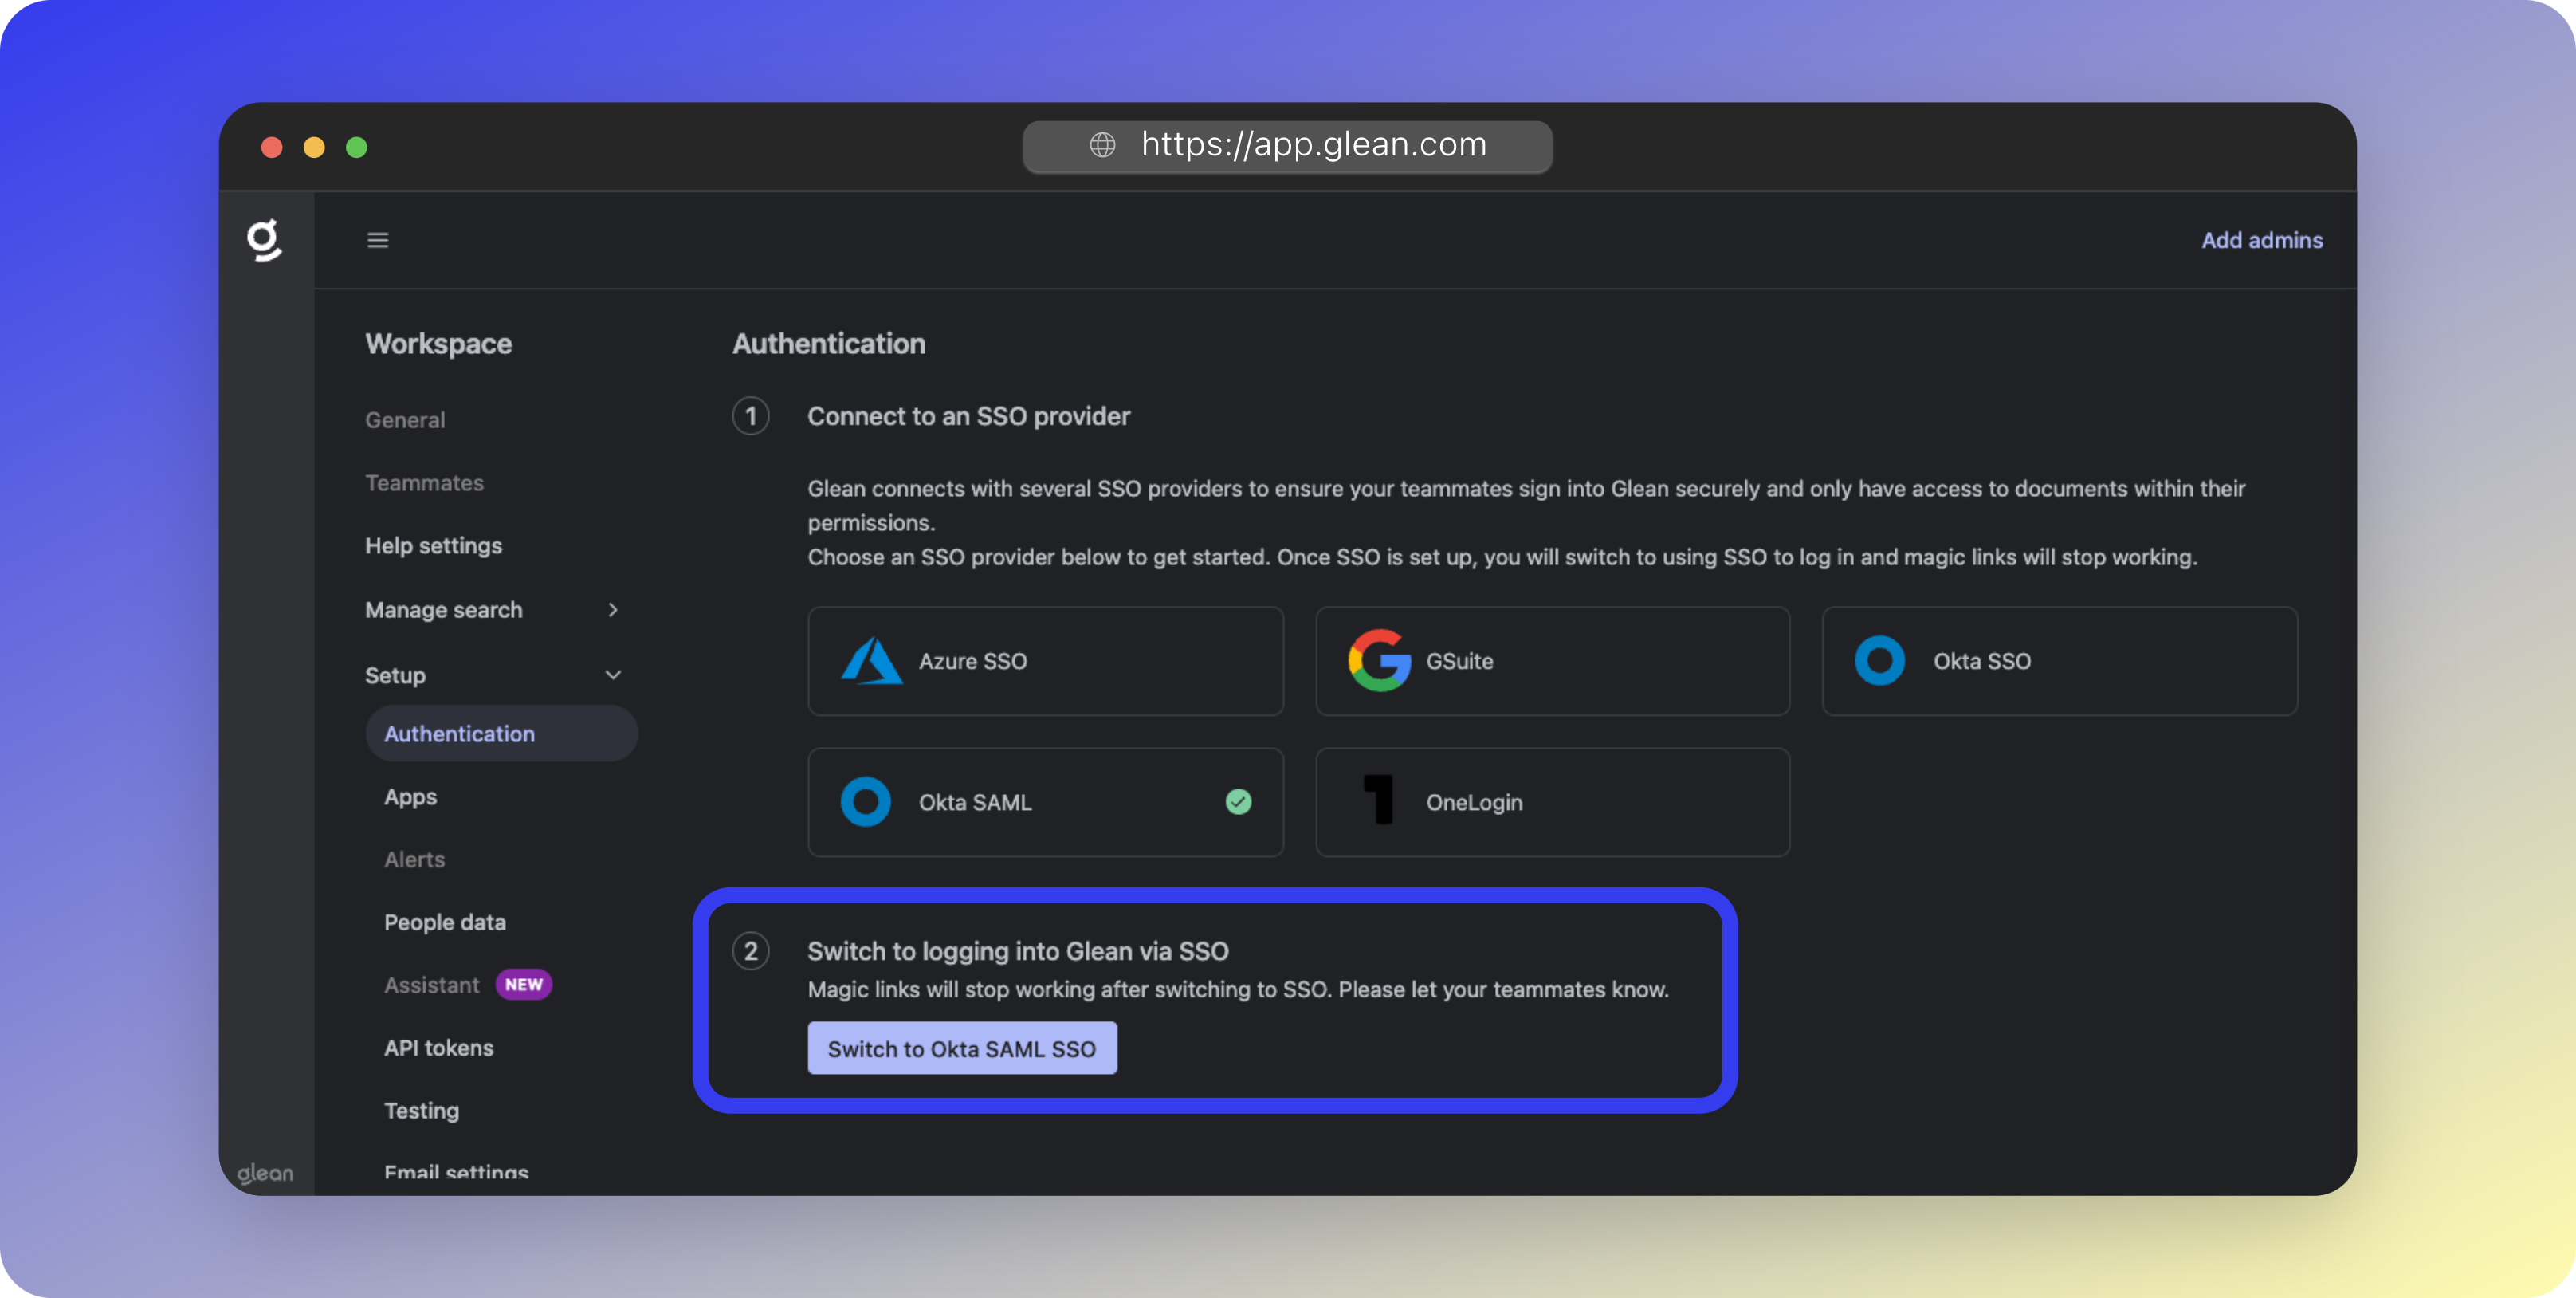
- Confirm the switch
- Verify the status shows as Connected
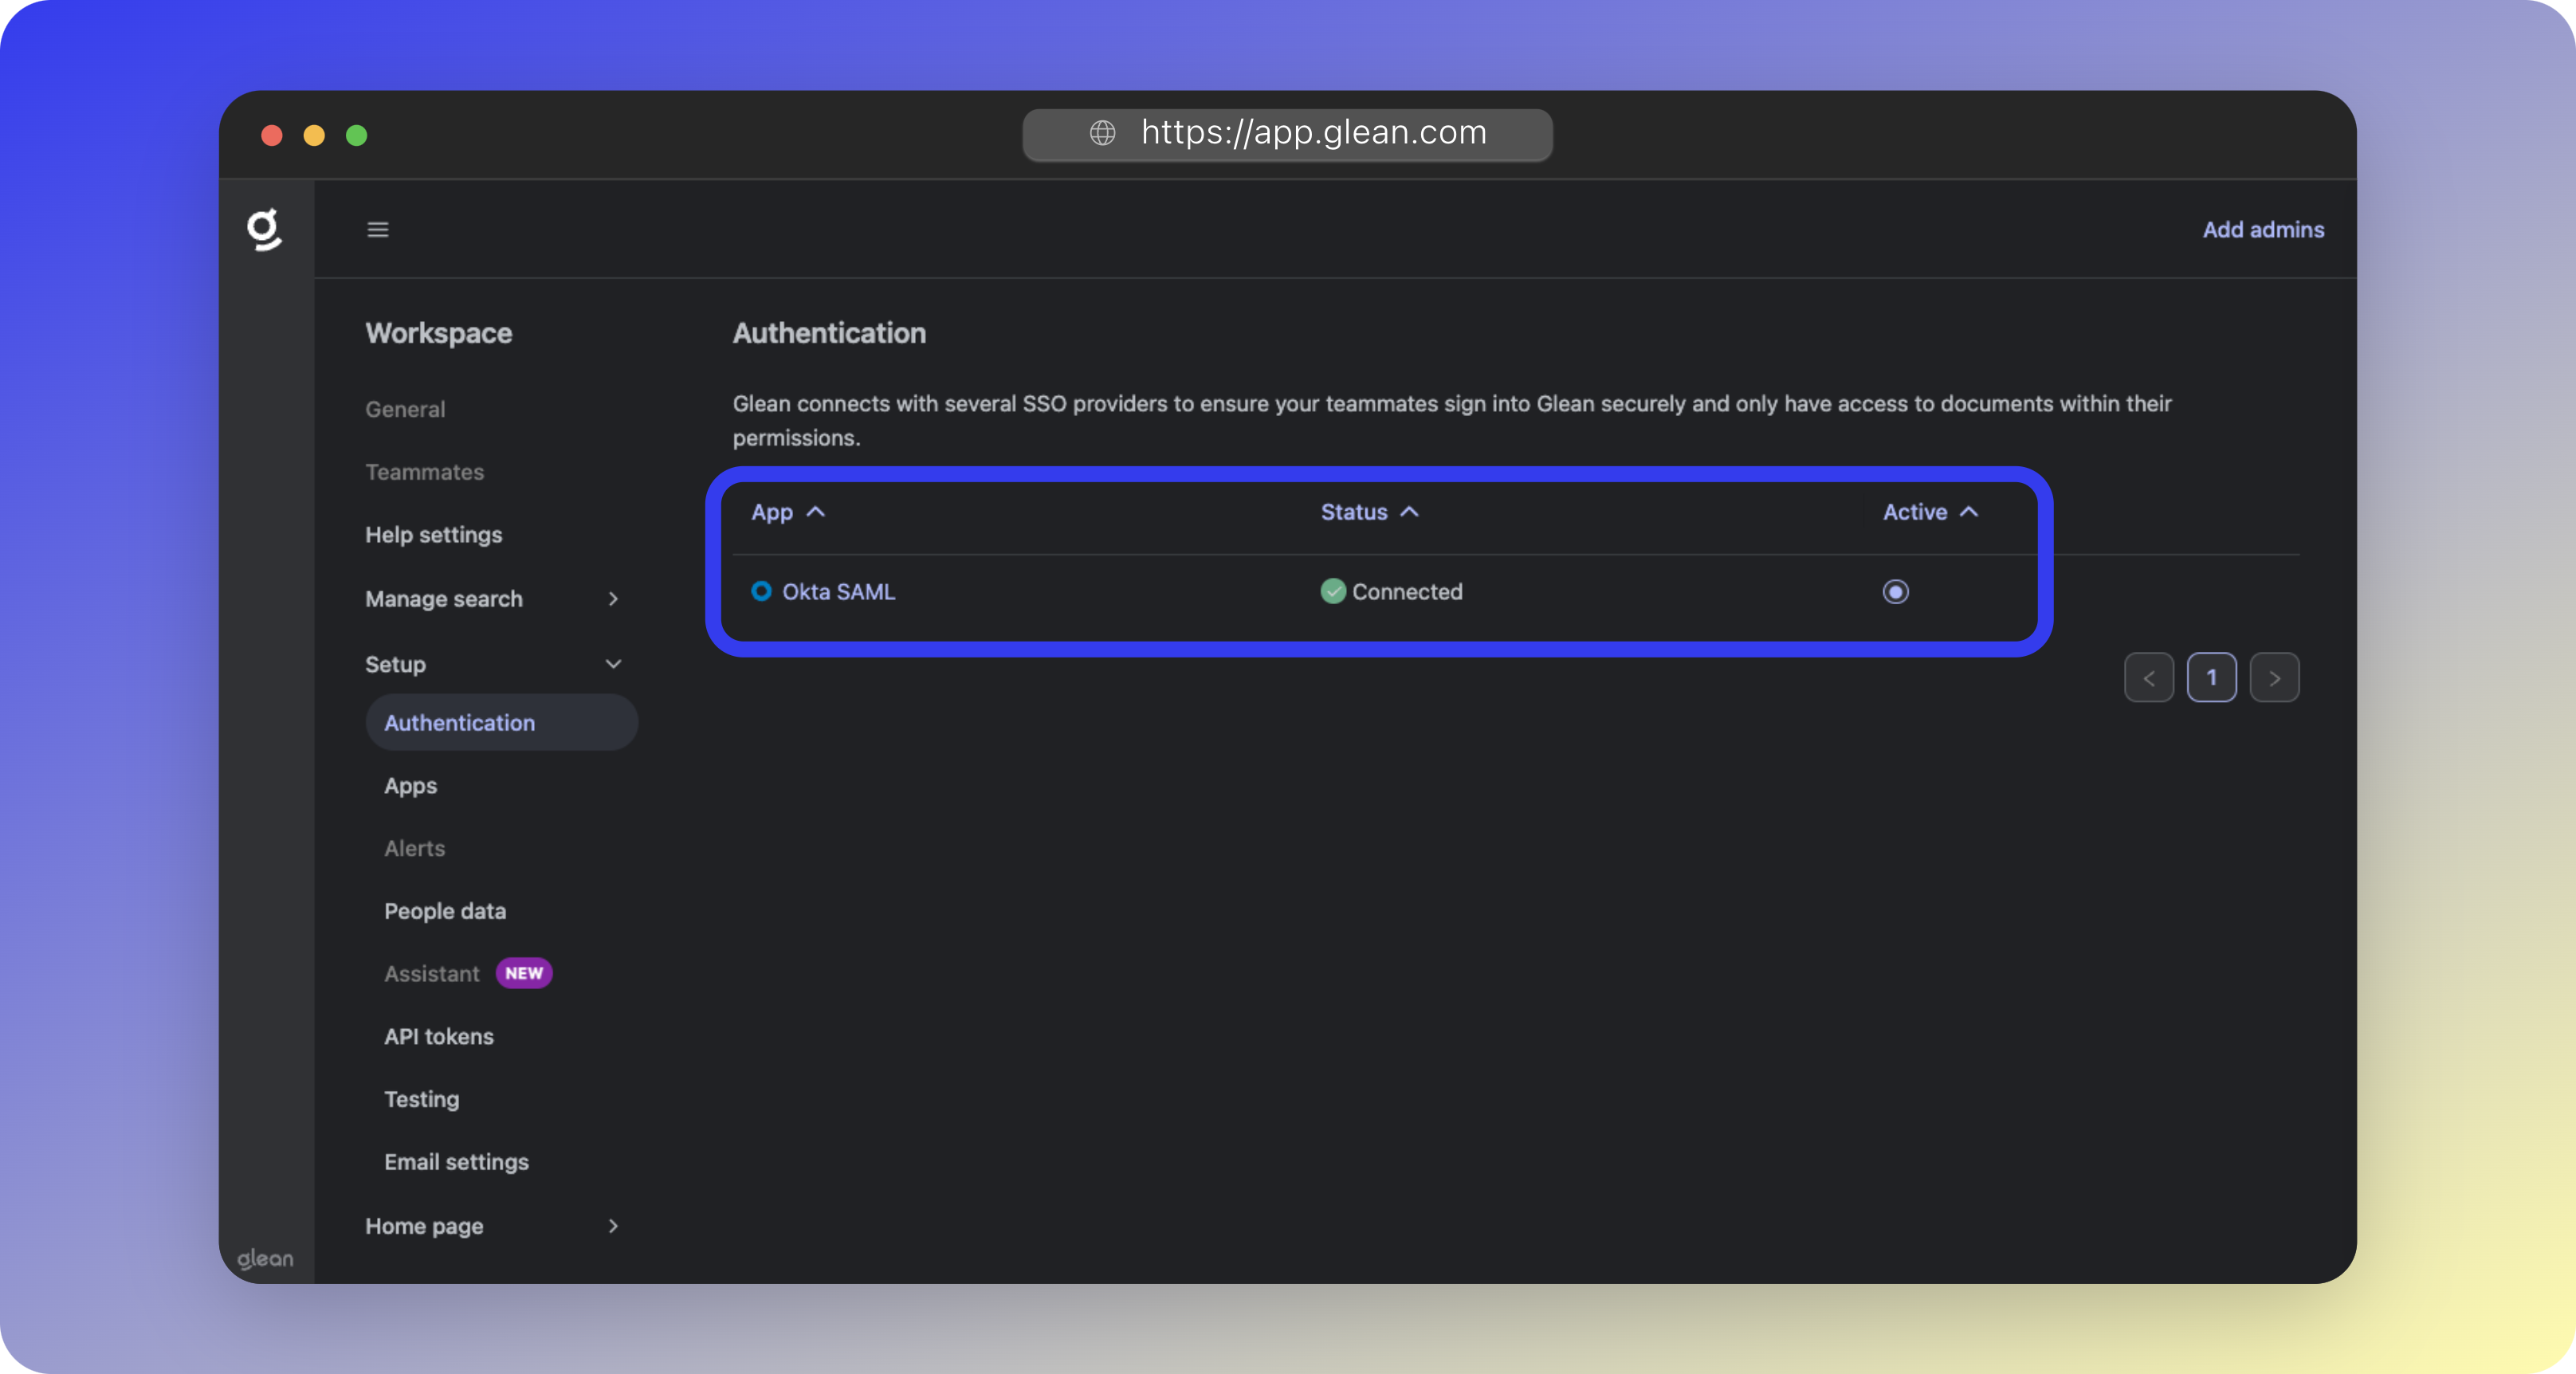
- If you completed SSO setup prior to workspace initialization, you can now safely replace the central Glean URLs in your SSO provider with the tenant URLs listed in the instructions above under Step 1.
If you don’t see the switch button, your Glean tenant may still be provisioning. You can proceed with connecting datasources and return later.
Testing the Configuration
To verify your SSO setup:- Open a new Incognito or Private Browsing window
- Navigate to https://app.glean.com
- Enter your work email and click Log In
- Verify successful redirection to your SSO provider
Test both SSO phases
Two key phases need testing:
- Glean to SSO provider redirect
- SSO provider back to Glean redirect