
Customized instructions for your tenant are available in the Glean UI at Workspace Settings > Setup > Authentication > Okta SAML
Prerequisites
Before beginning the setup process, ensure you have:
- An active Okta administrator account
- Access to your Glean admin account with Admin or Setup Admin roles
- Basic understanding of SAML 2.0, SCIM 2.0, and SSO concepts
Okta SAML Configuration
1
Application Setup
First, create a new Application in the Okta Admin Dashboard: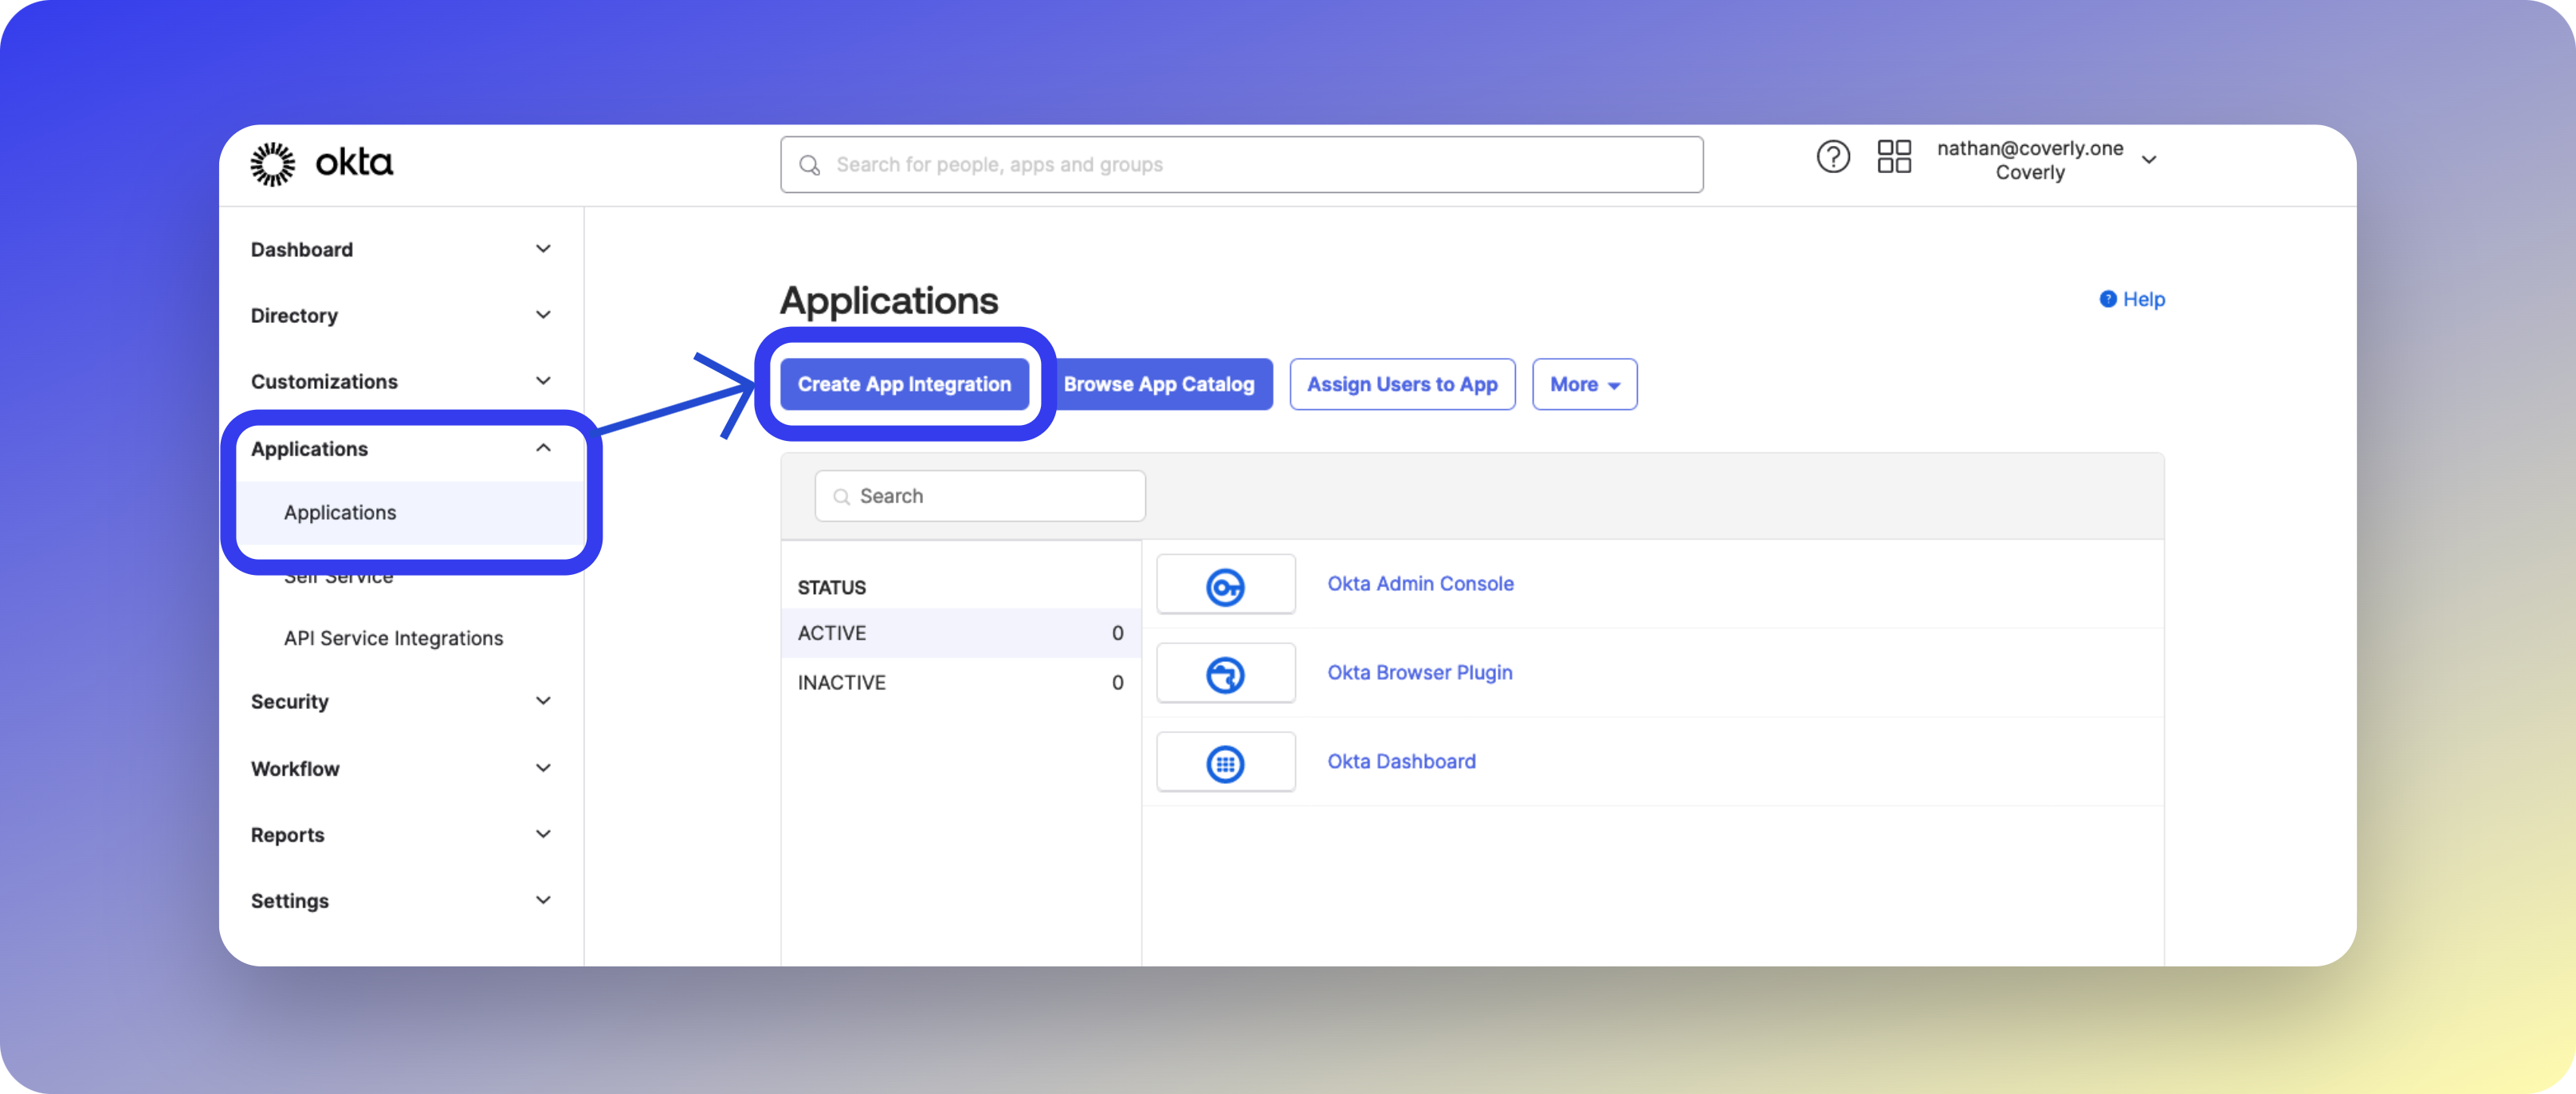
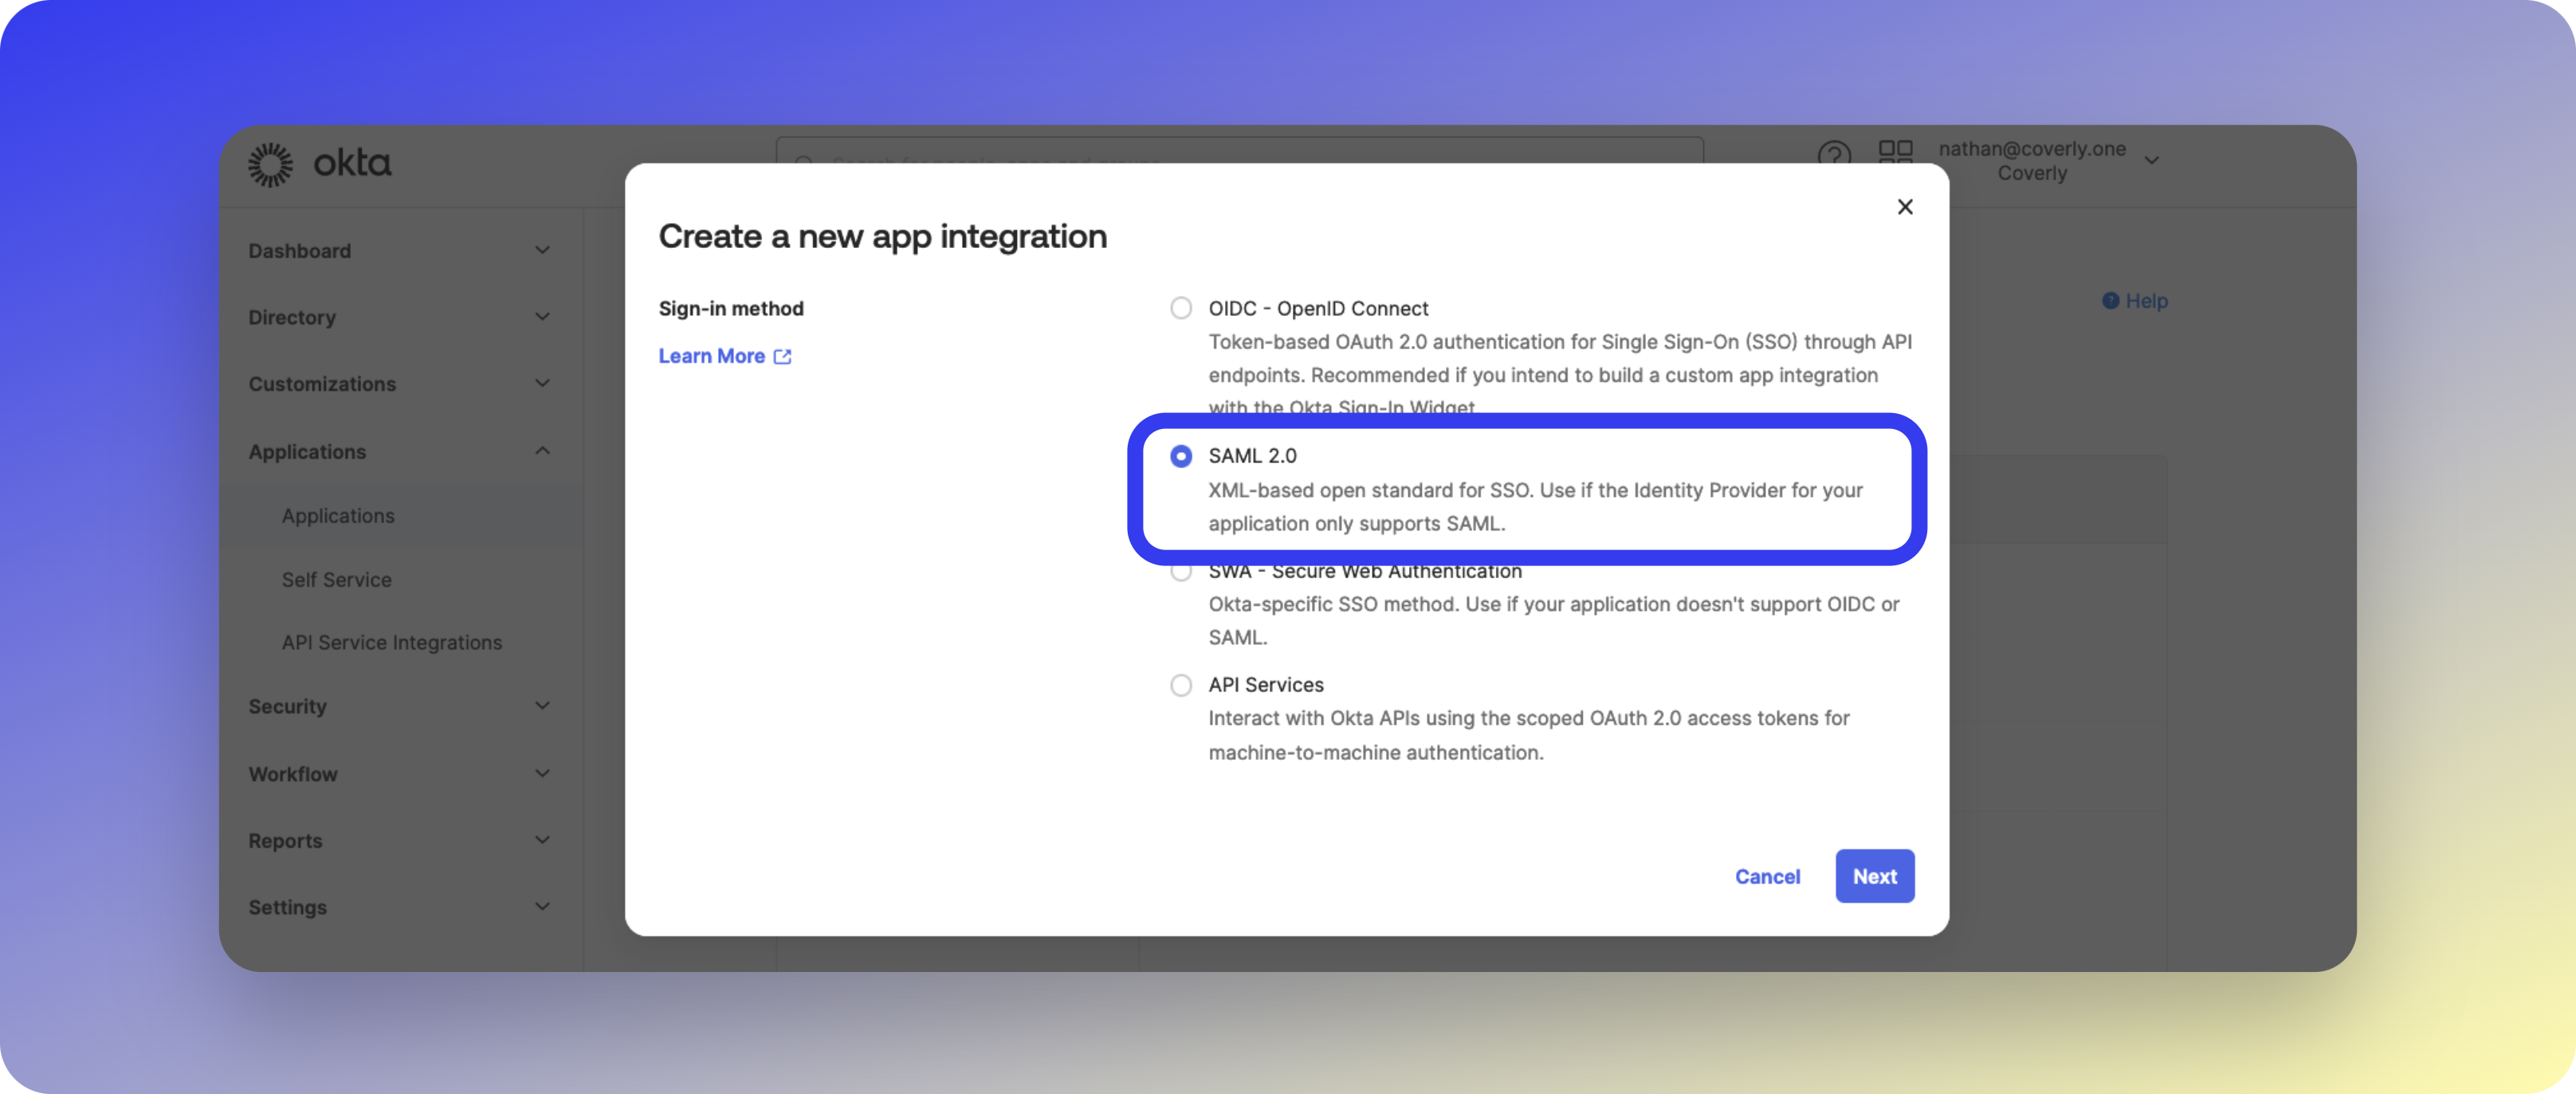
- Navigate to Applications > Applications
- Click Create App Integration
- Select SAML 2.0 and click Next


2
Configure General Settings
Set the following values: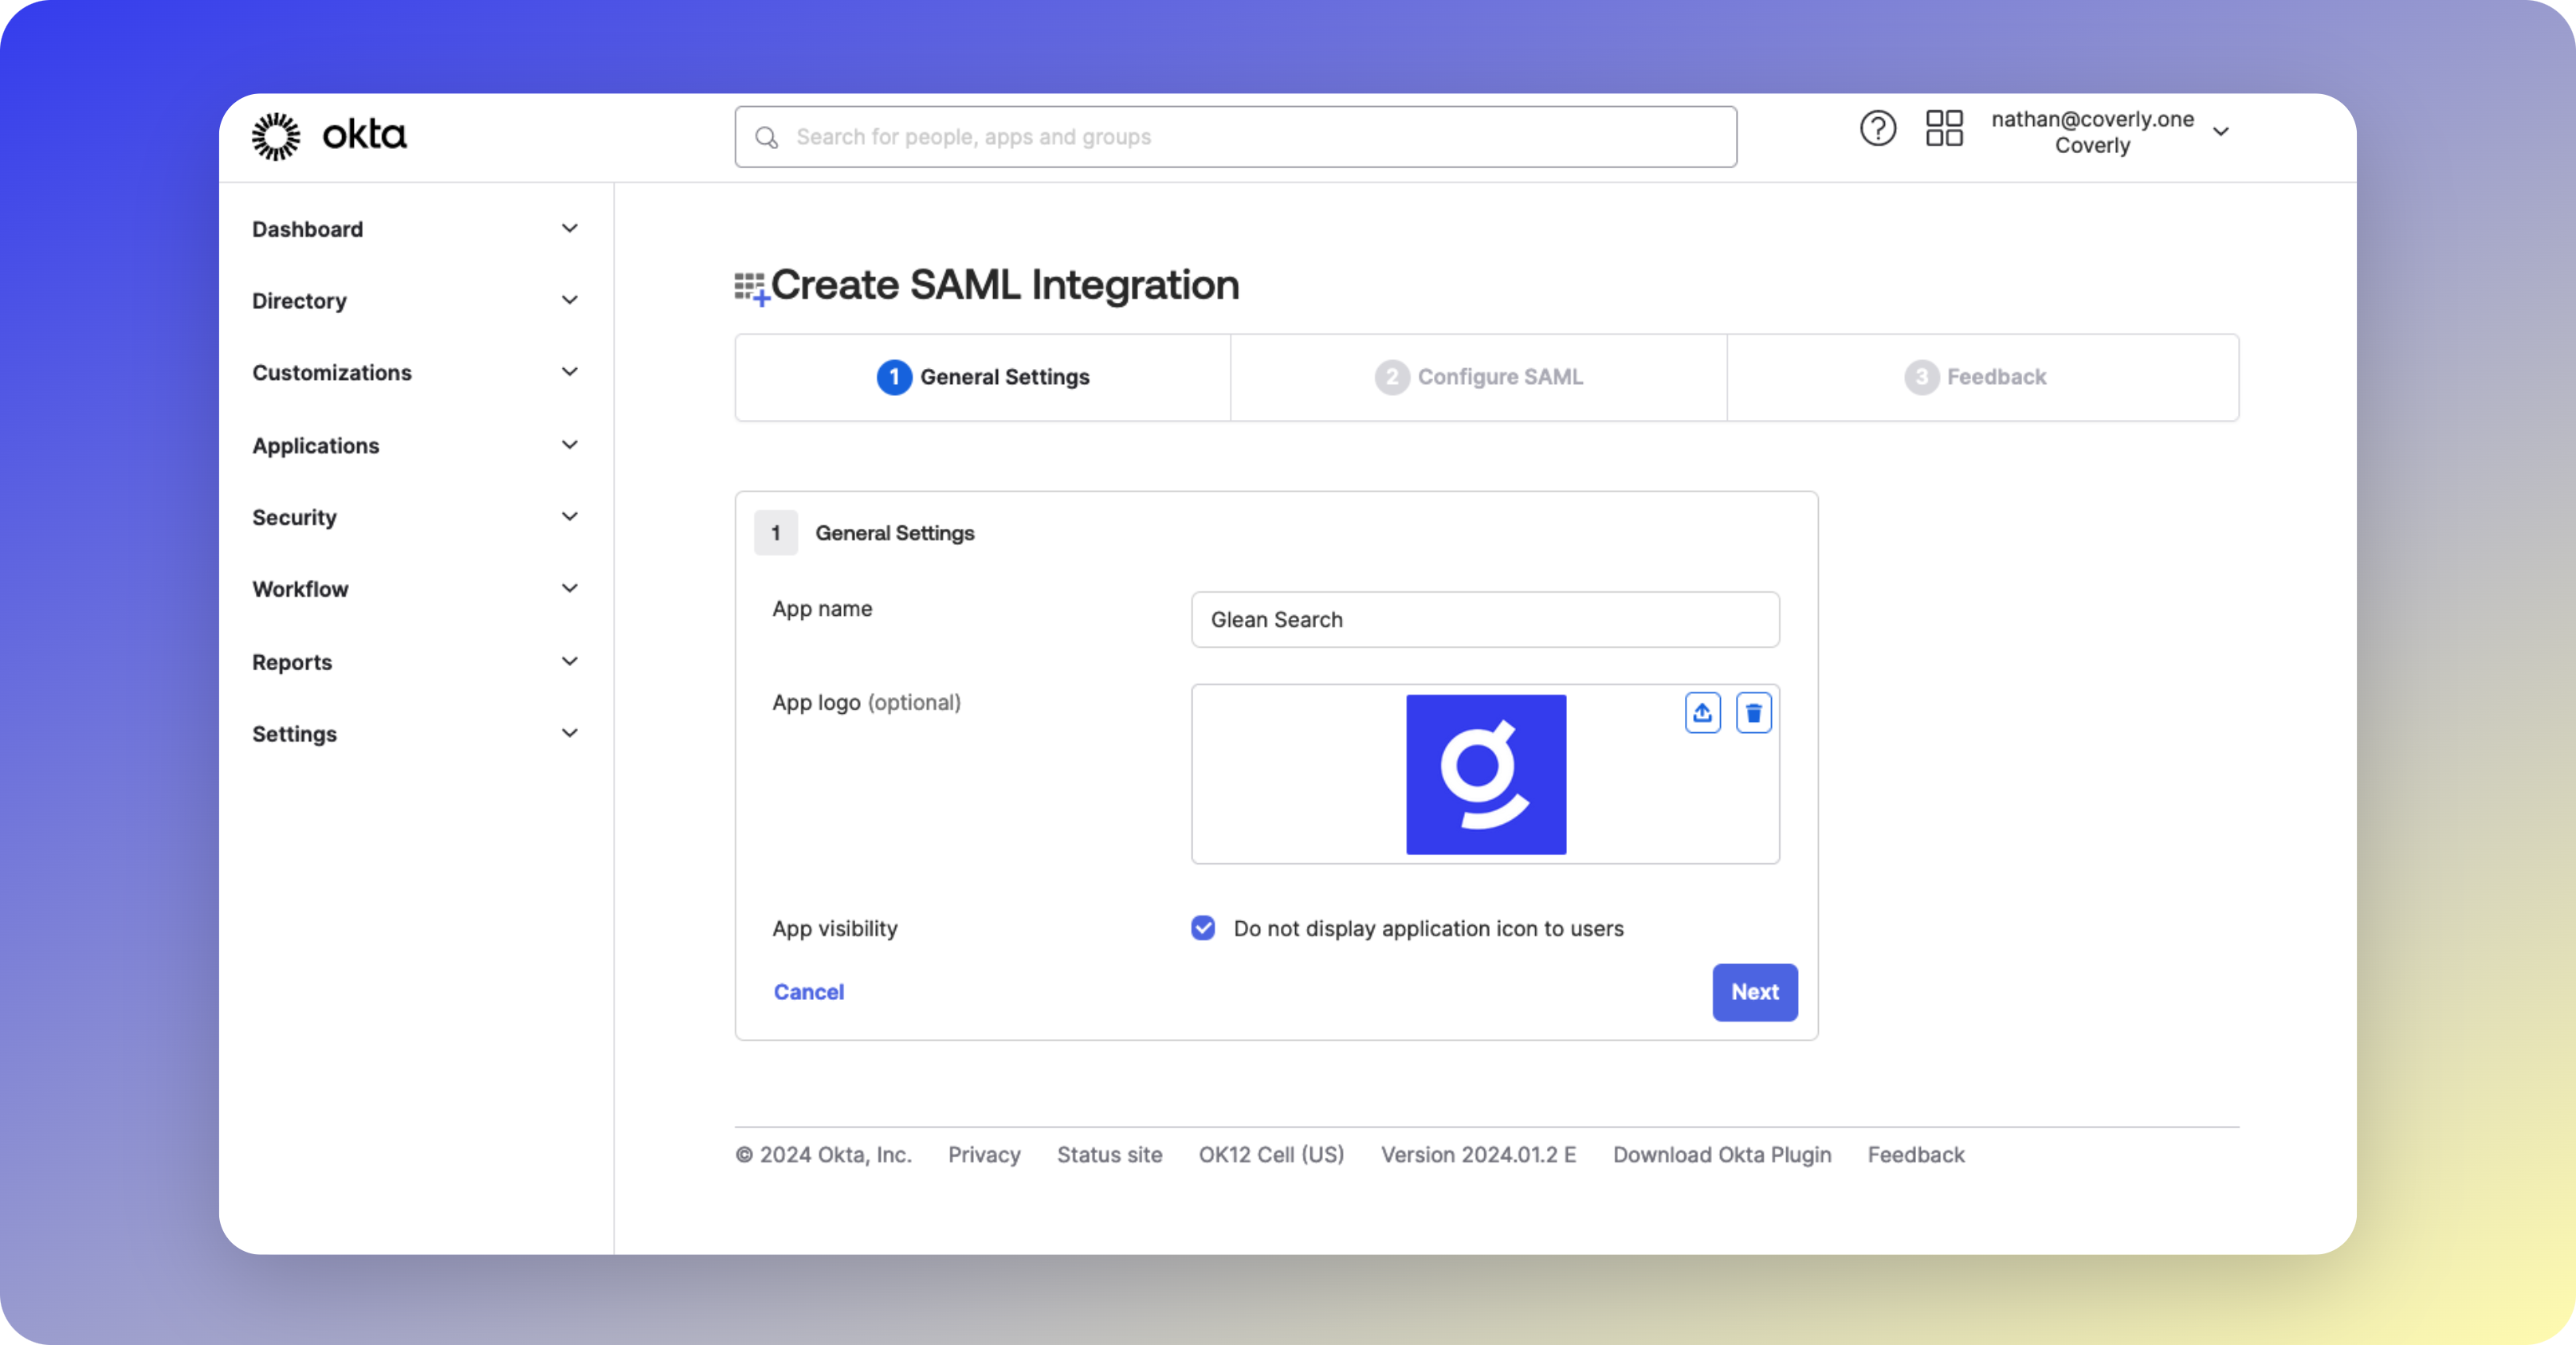
Glean SearchDownload the Glean icon
Check Do not display application icon to users

Glean doesn’t support IdP initiated SSO. To include a Glean tile in the Okta App Library, create a Bookmark App linking to
https://app.glean.com3
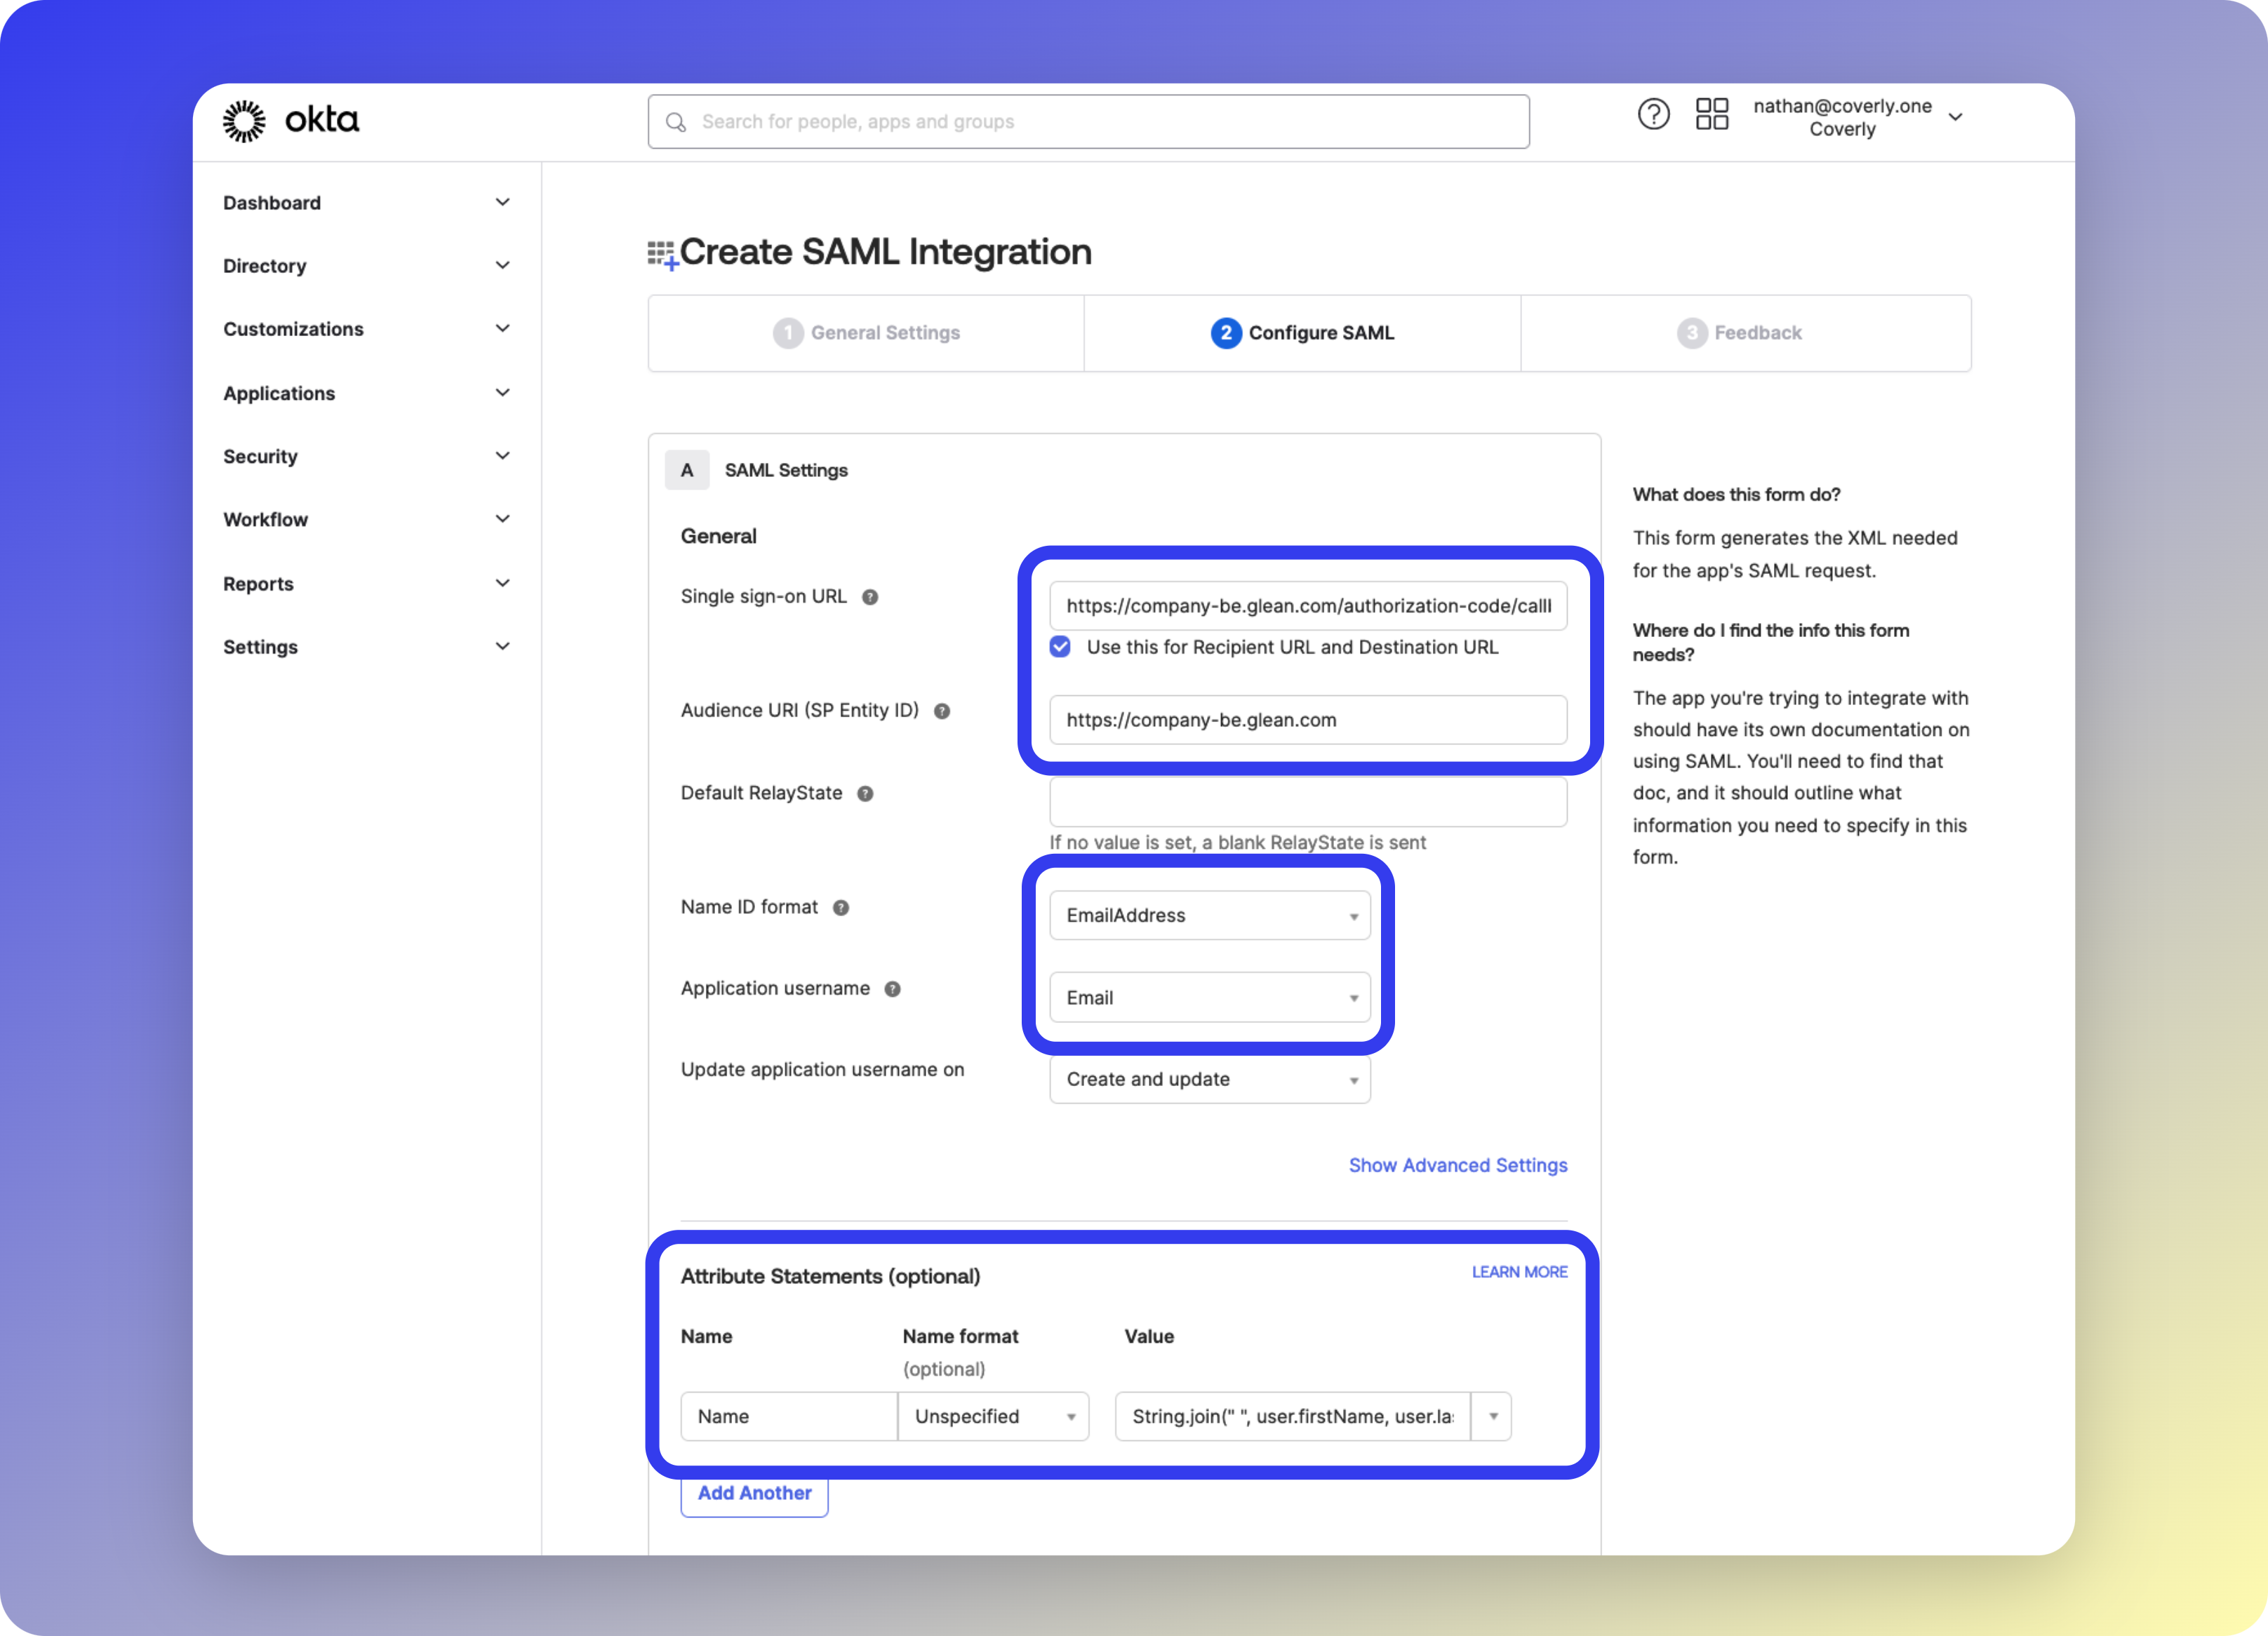
Configure SAML Settings
You’ll need your tenant ID and/or tenant backend domain (format:
tenant_name-be.glean.com). Contact Glean support if unsure.| Field | Value |
|---|---|
| Single sign-on URL | https://tenant_name-be.glean.com/authorization-code/callback |
| Use this for Recipient URL and Destination URL | ✓ |
| Audience URI (SP Entity ID) | https://tenant_name-be.glean.com |
| Default RelayState | Leave empty |
| Name ID format | EmailAddress |
| Application username | Email |
| Update application username on | Create and update |
| Name | Name format | Value |
|---|---|---|
Name | Unspecified | String.join(" ", user.firstName, user.lastName) |
4
Complete Okta Setup
- Select I’m an Okta customer adding an internal app
- Skip remaining sections and click Finish

5
Copy the Metadata URL
Under the Sign On tab, copy the Metadata URL for use in Glean.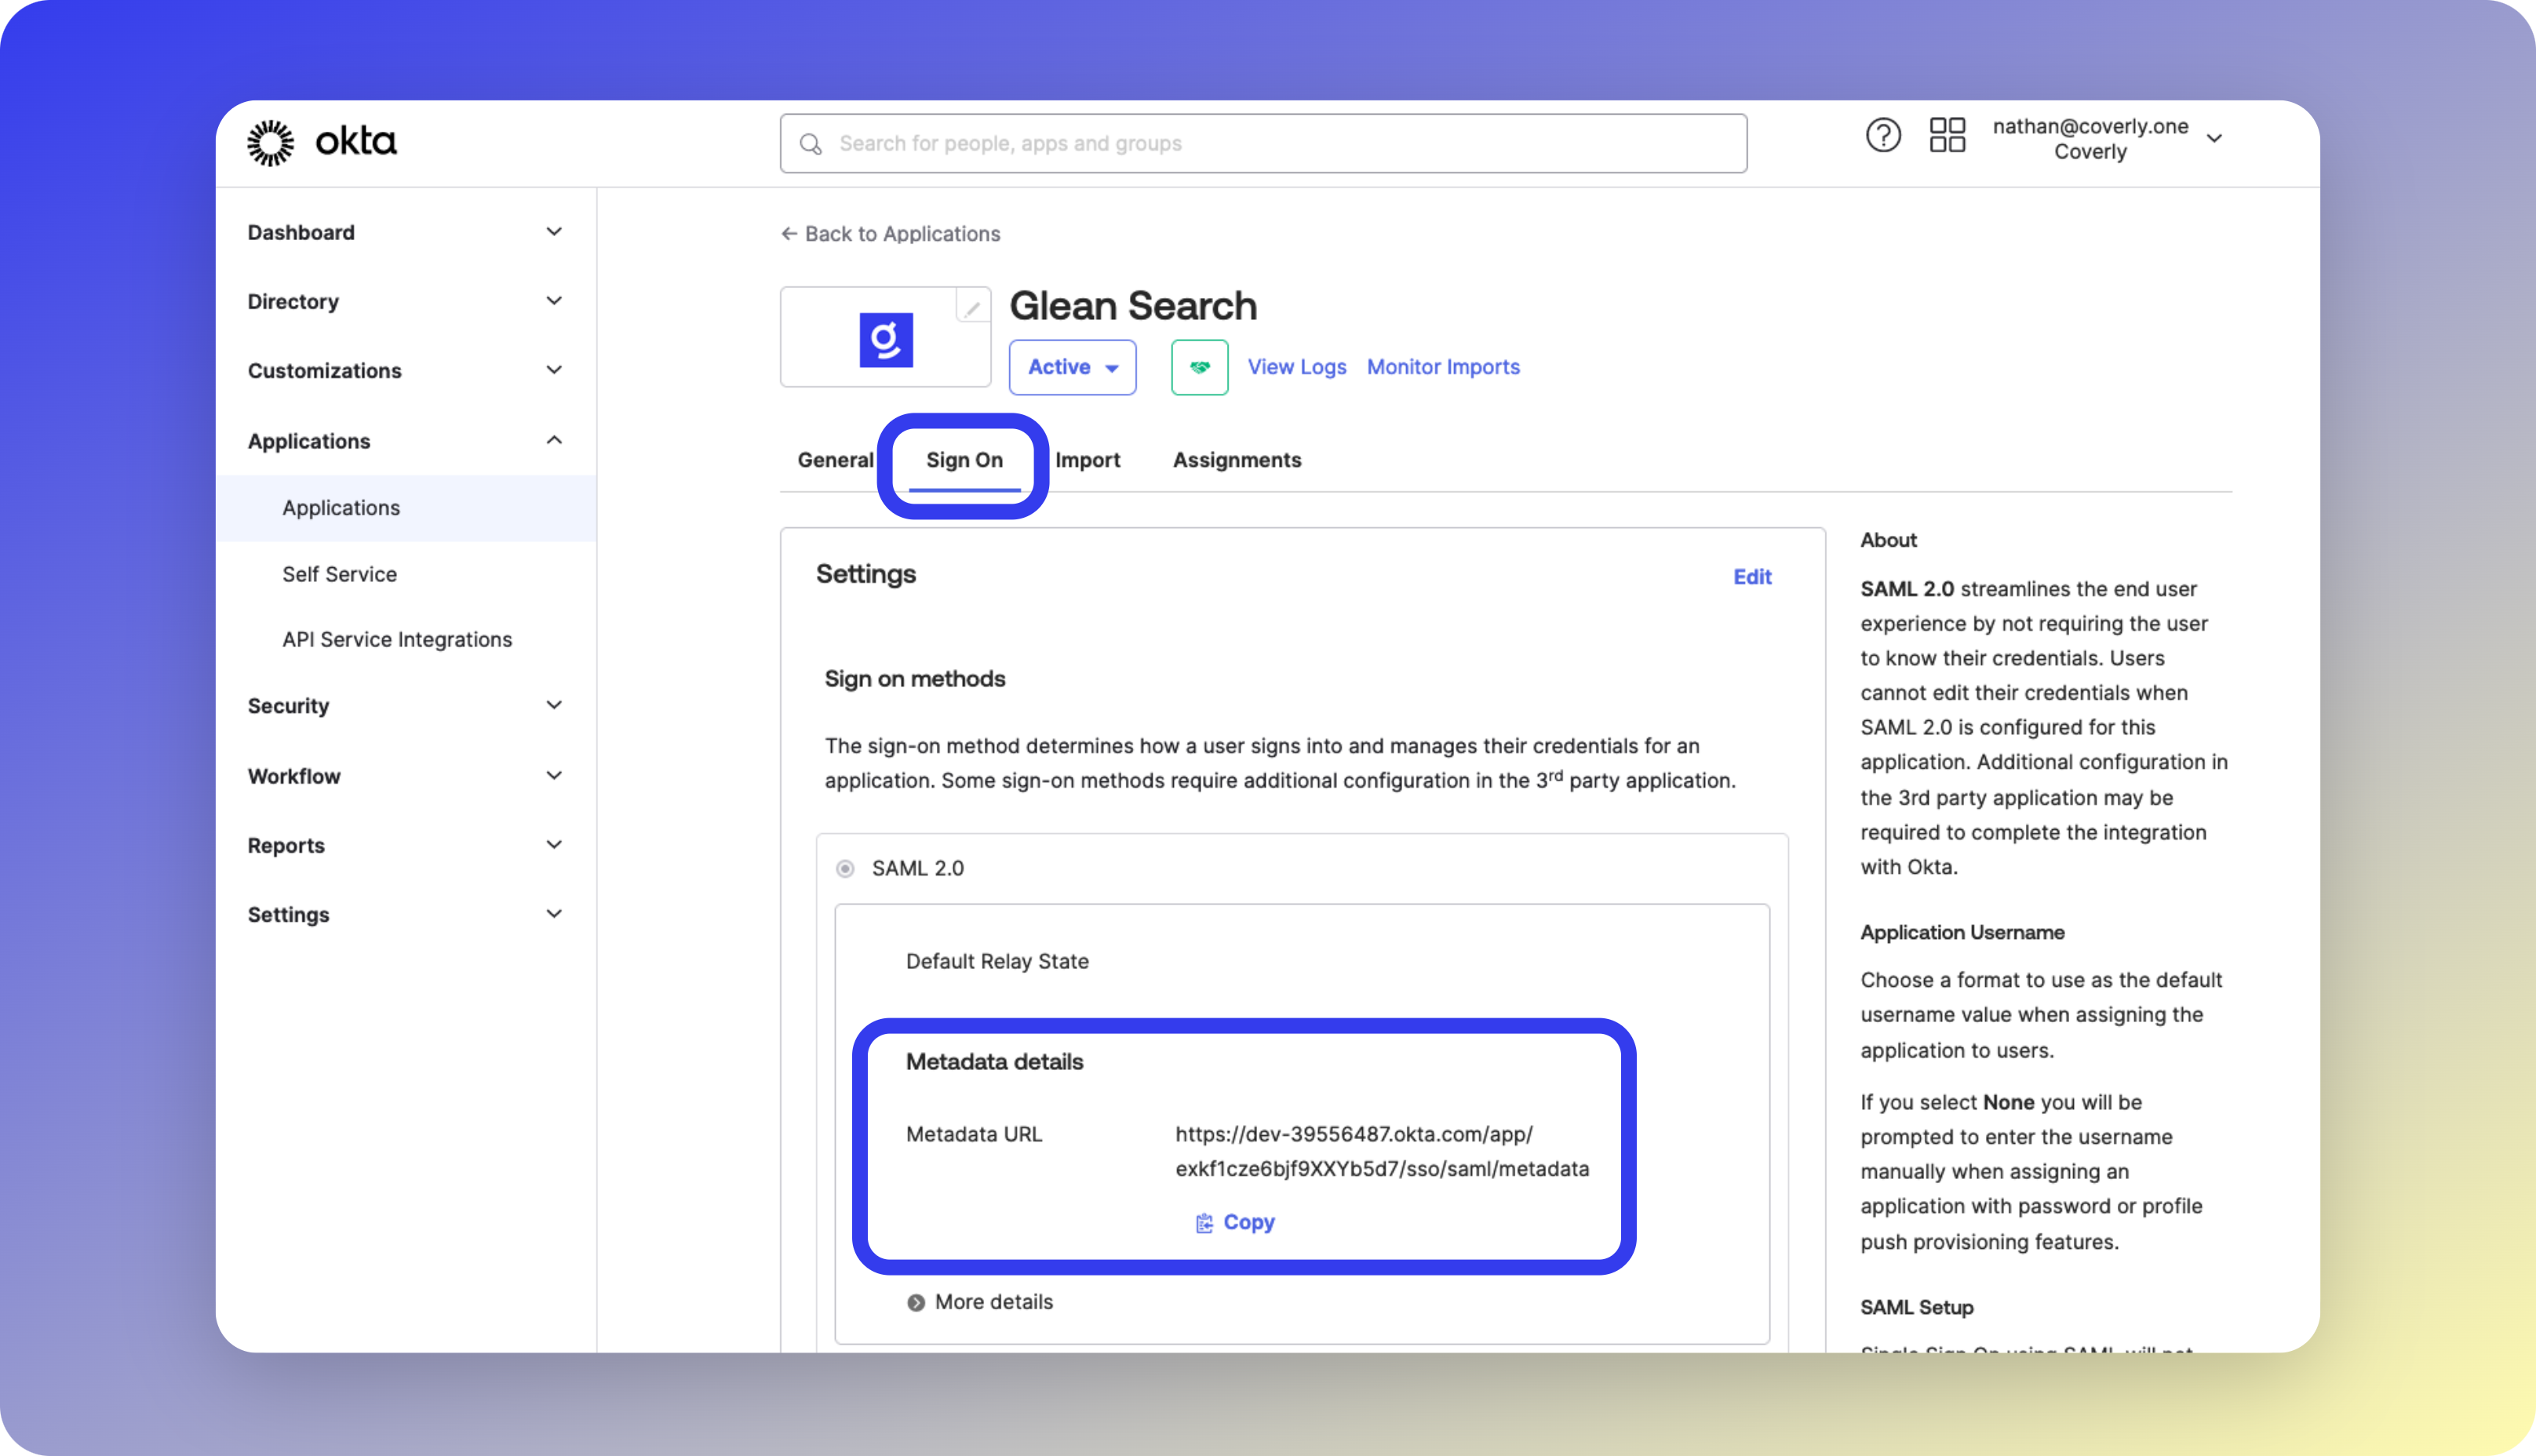

6
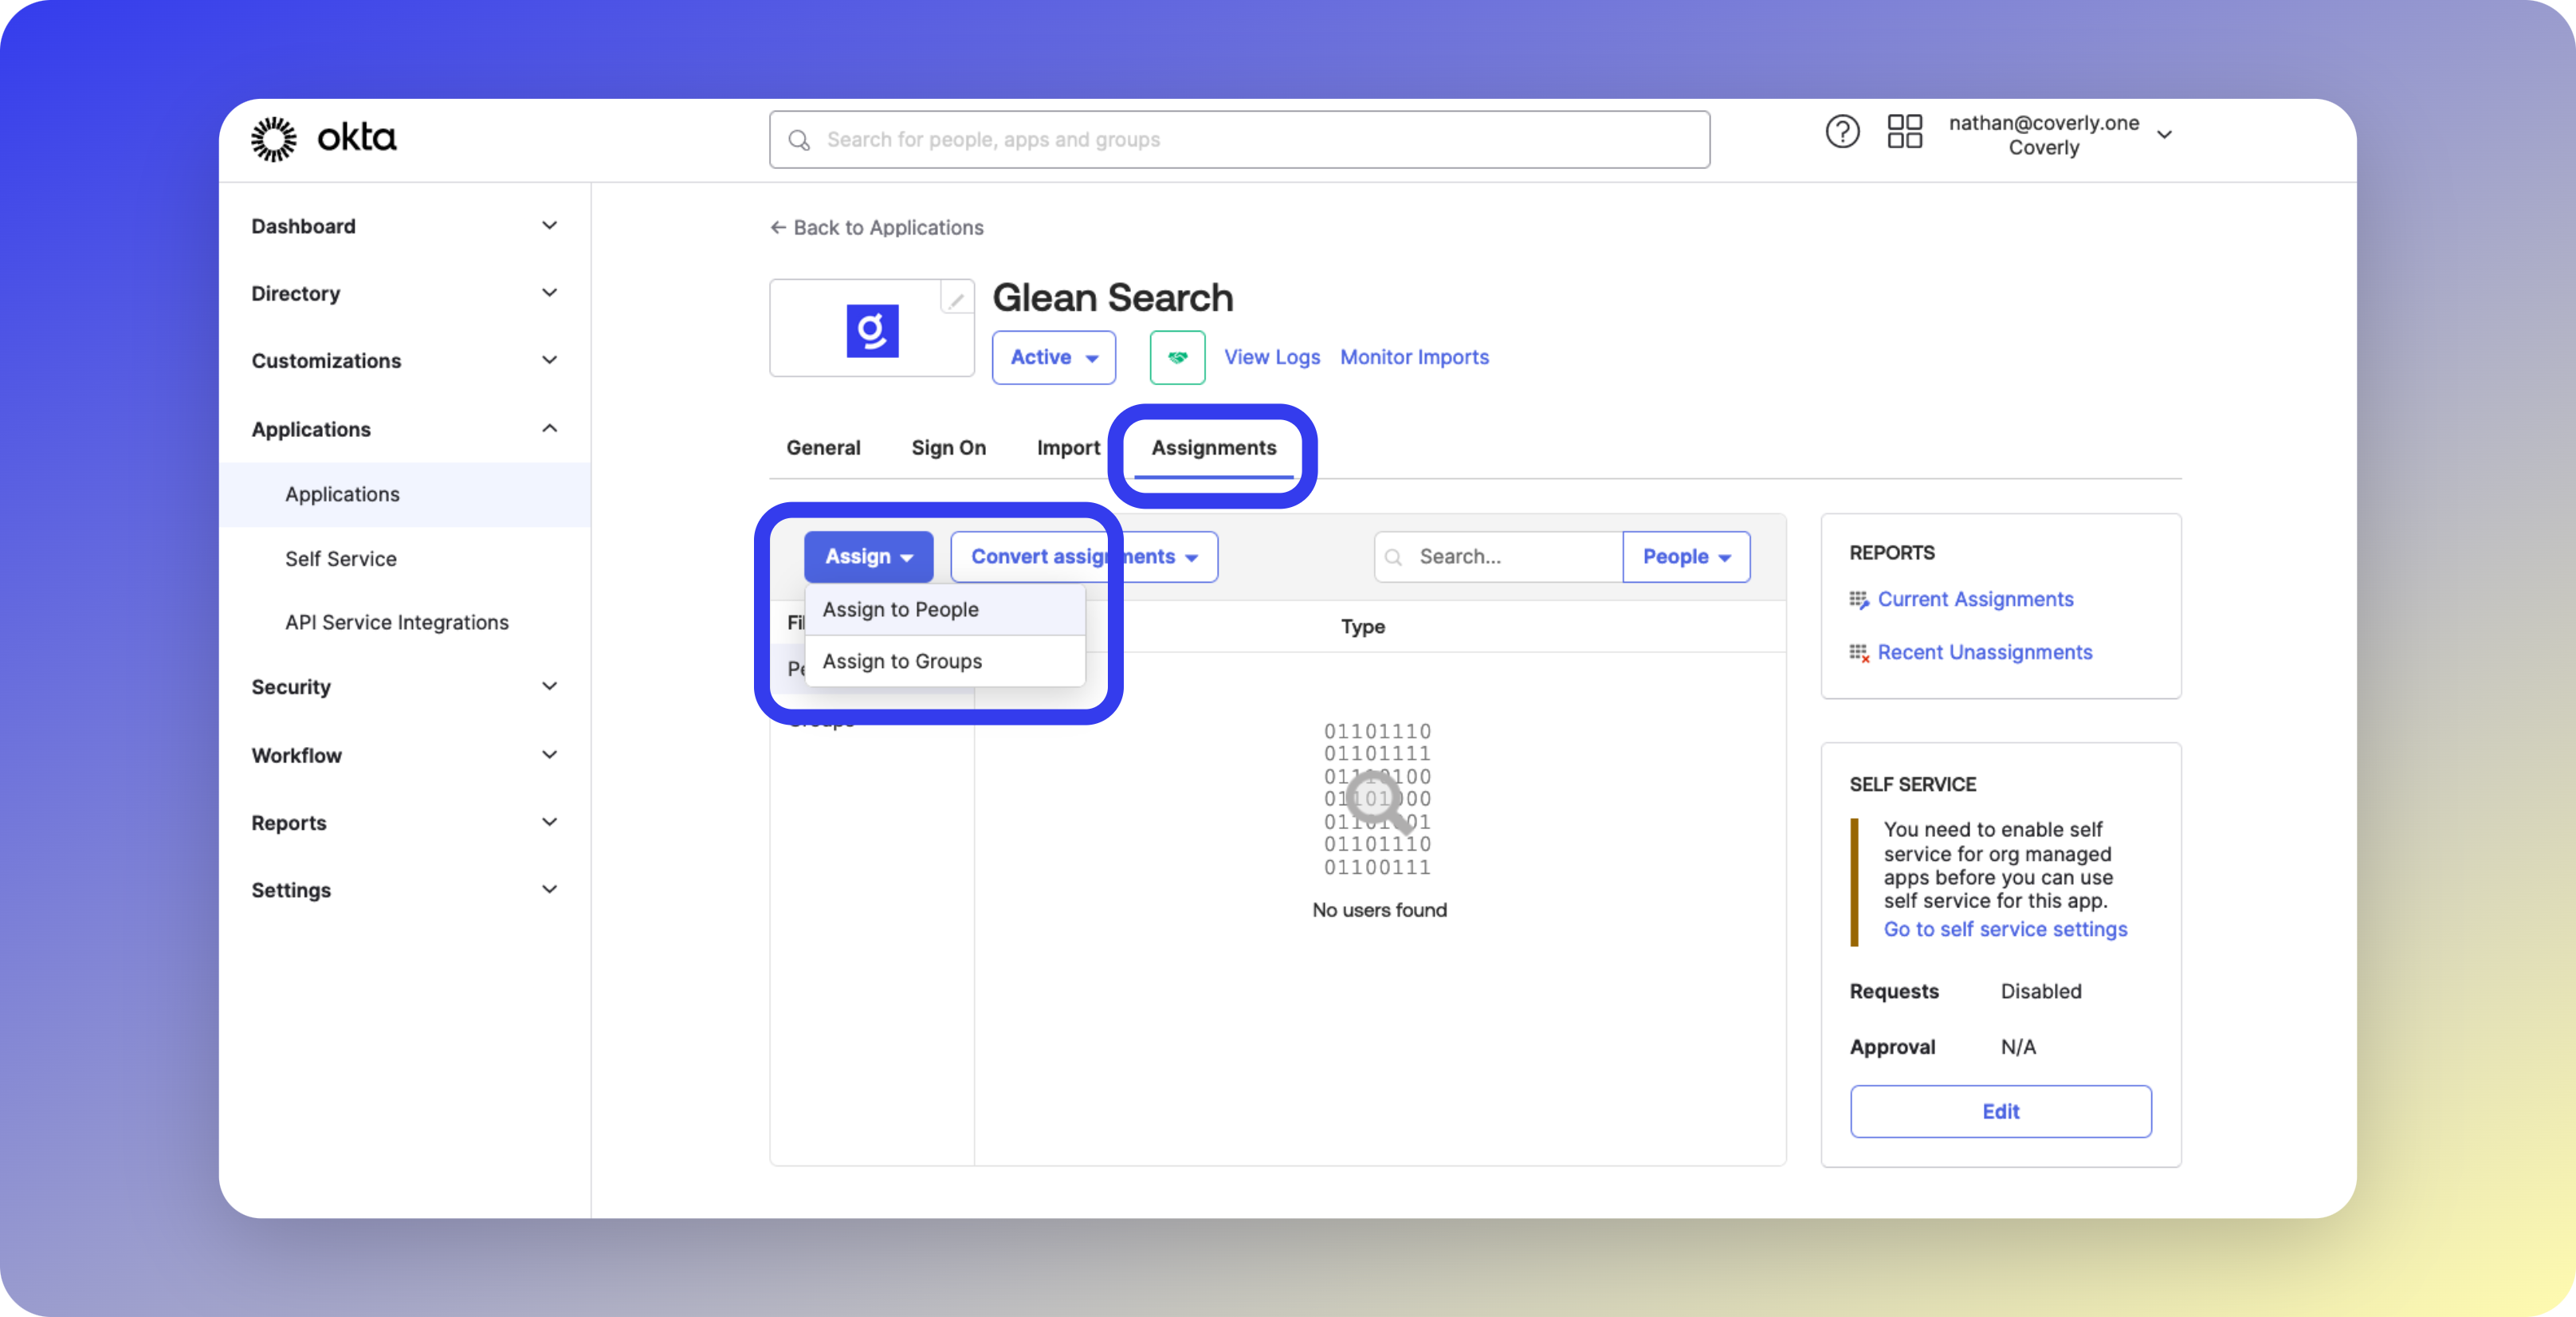
Assign Users & Groups
Users must be assigned to access Glean via SSO. We recommend creating a dedicated group (e.g.,
Glean Users).- Select the Assignments tab
- Click Assign
- Choose Assign to People or Assign to Groups
Glean SAML Configuration
1
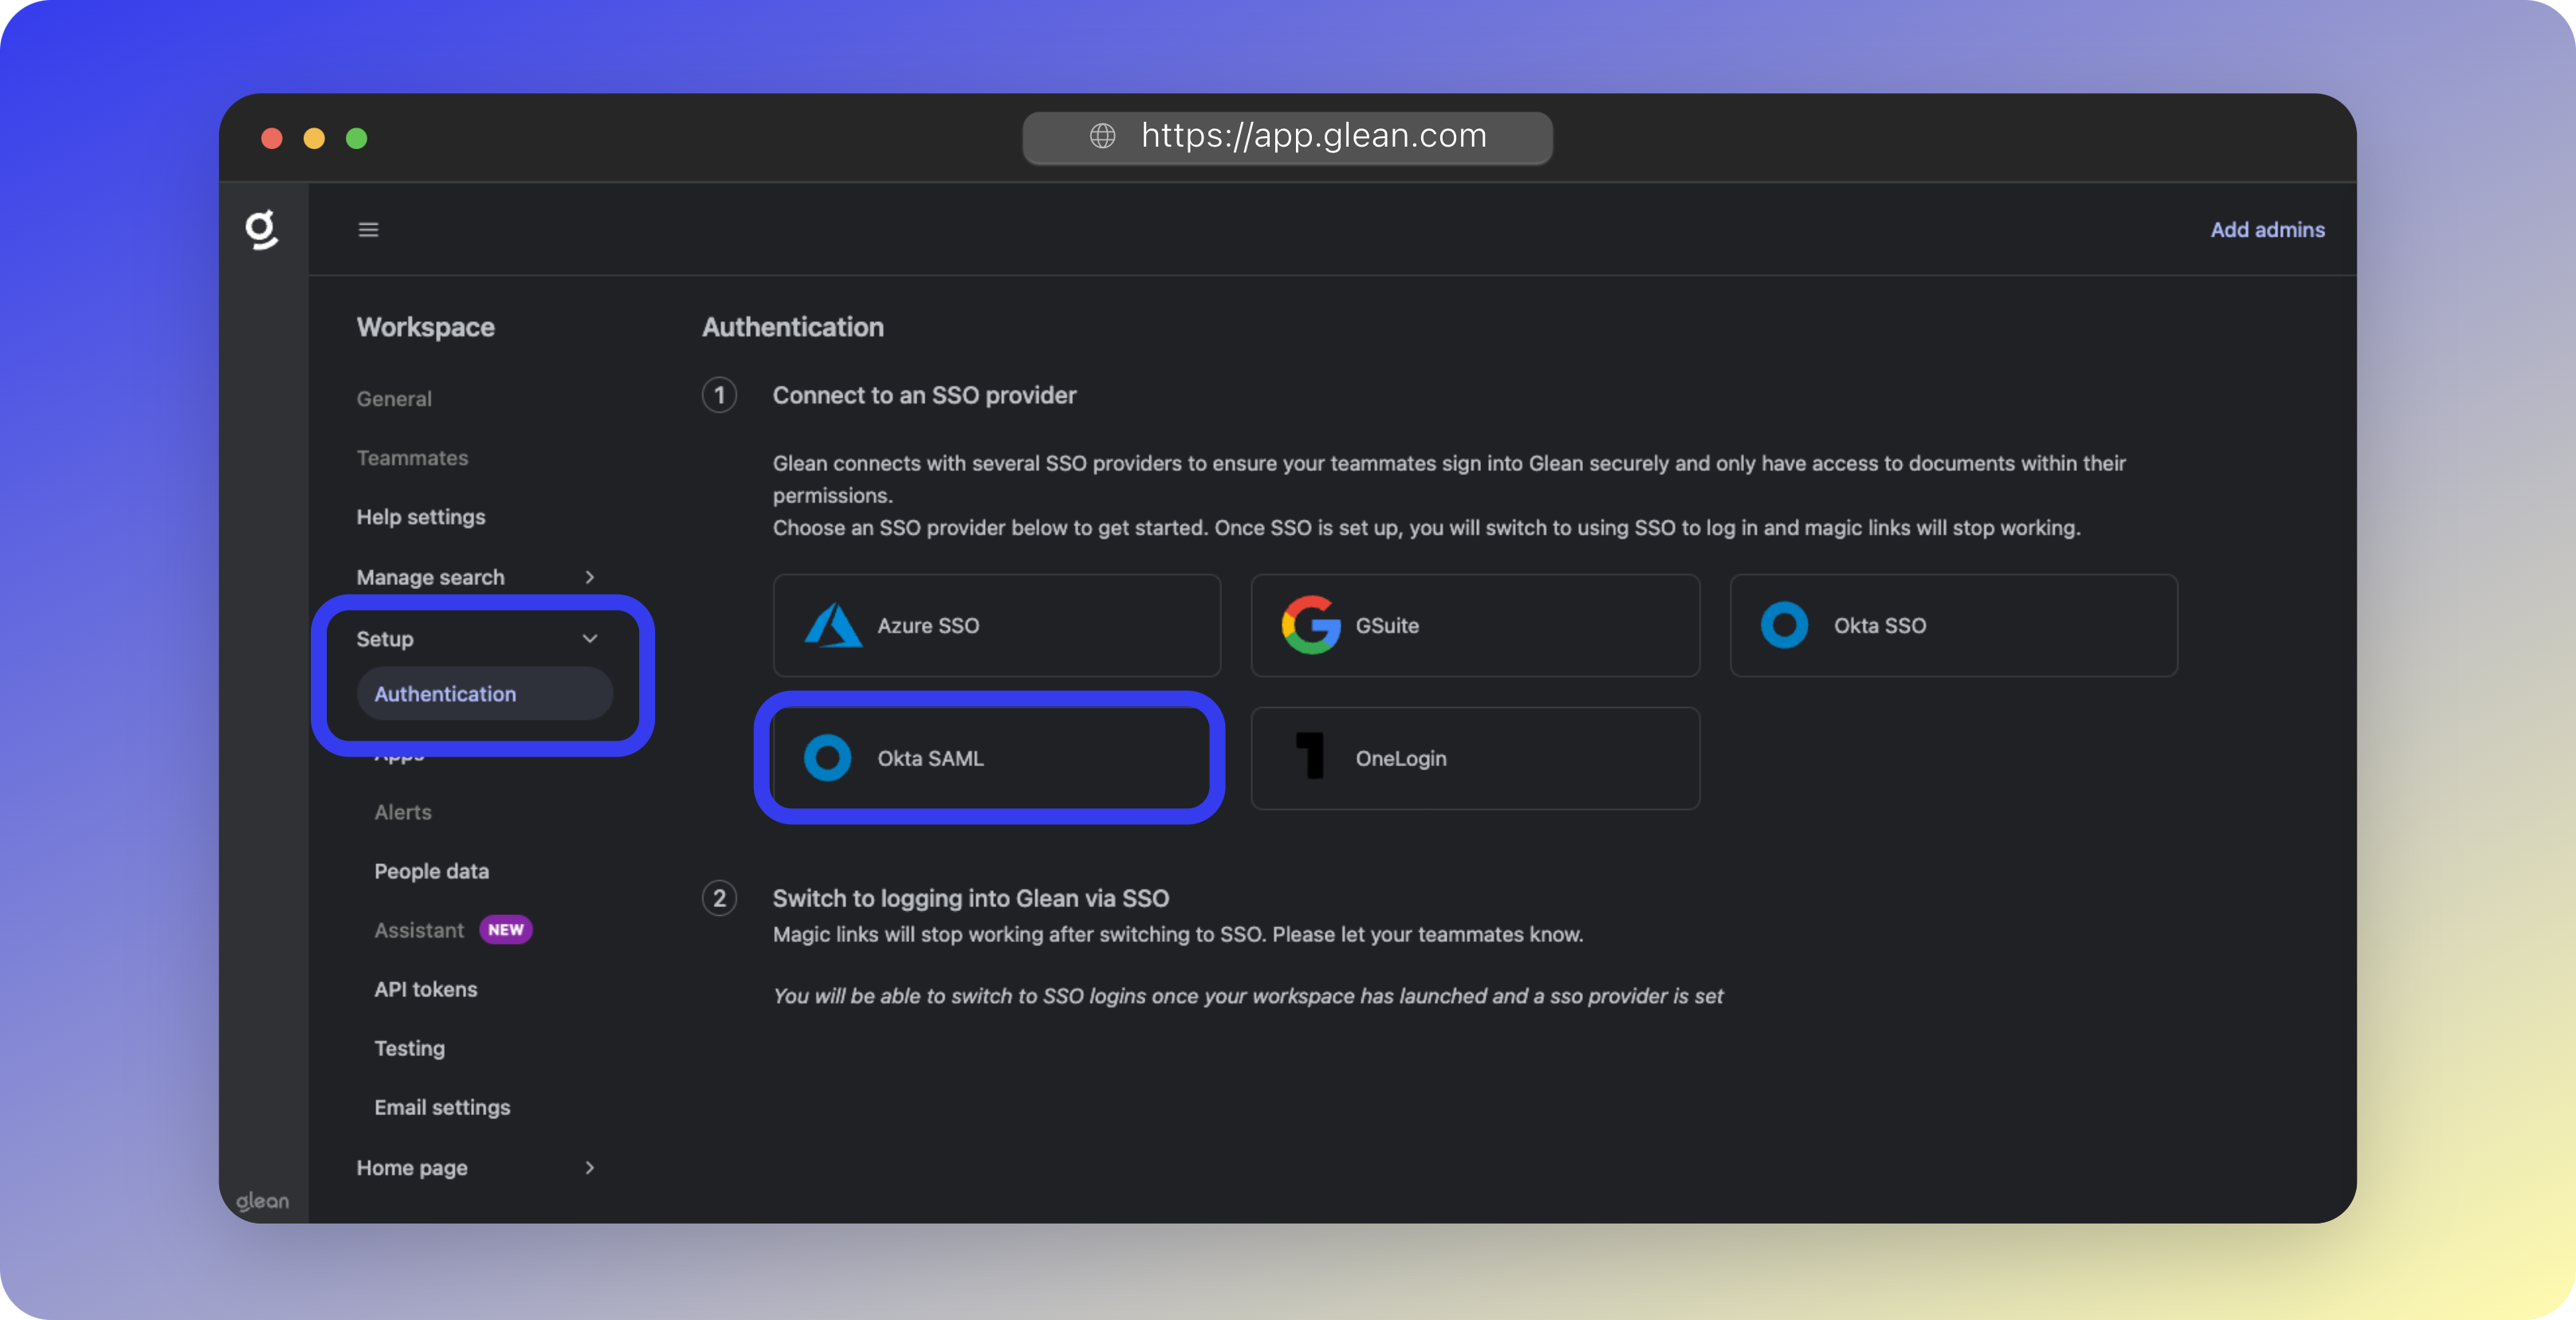
Configure Okta SAML
- Navigate to Workspace Settings > Setup > Authentication
- Select Okta SAML
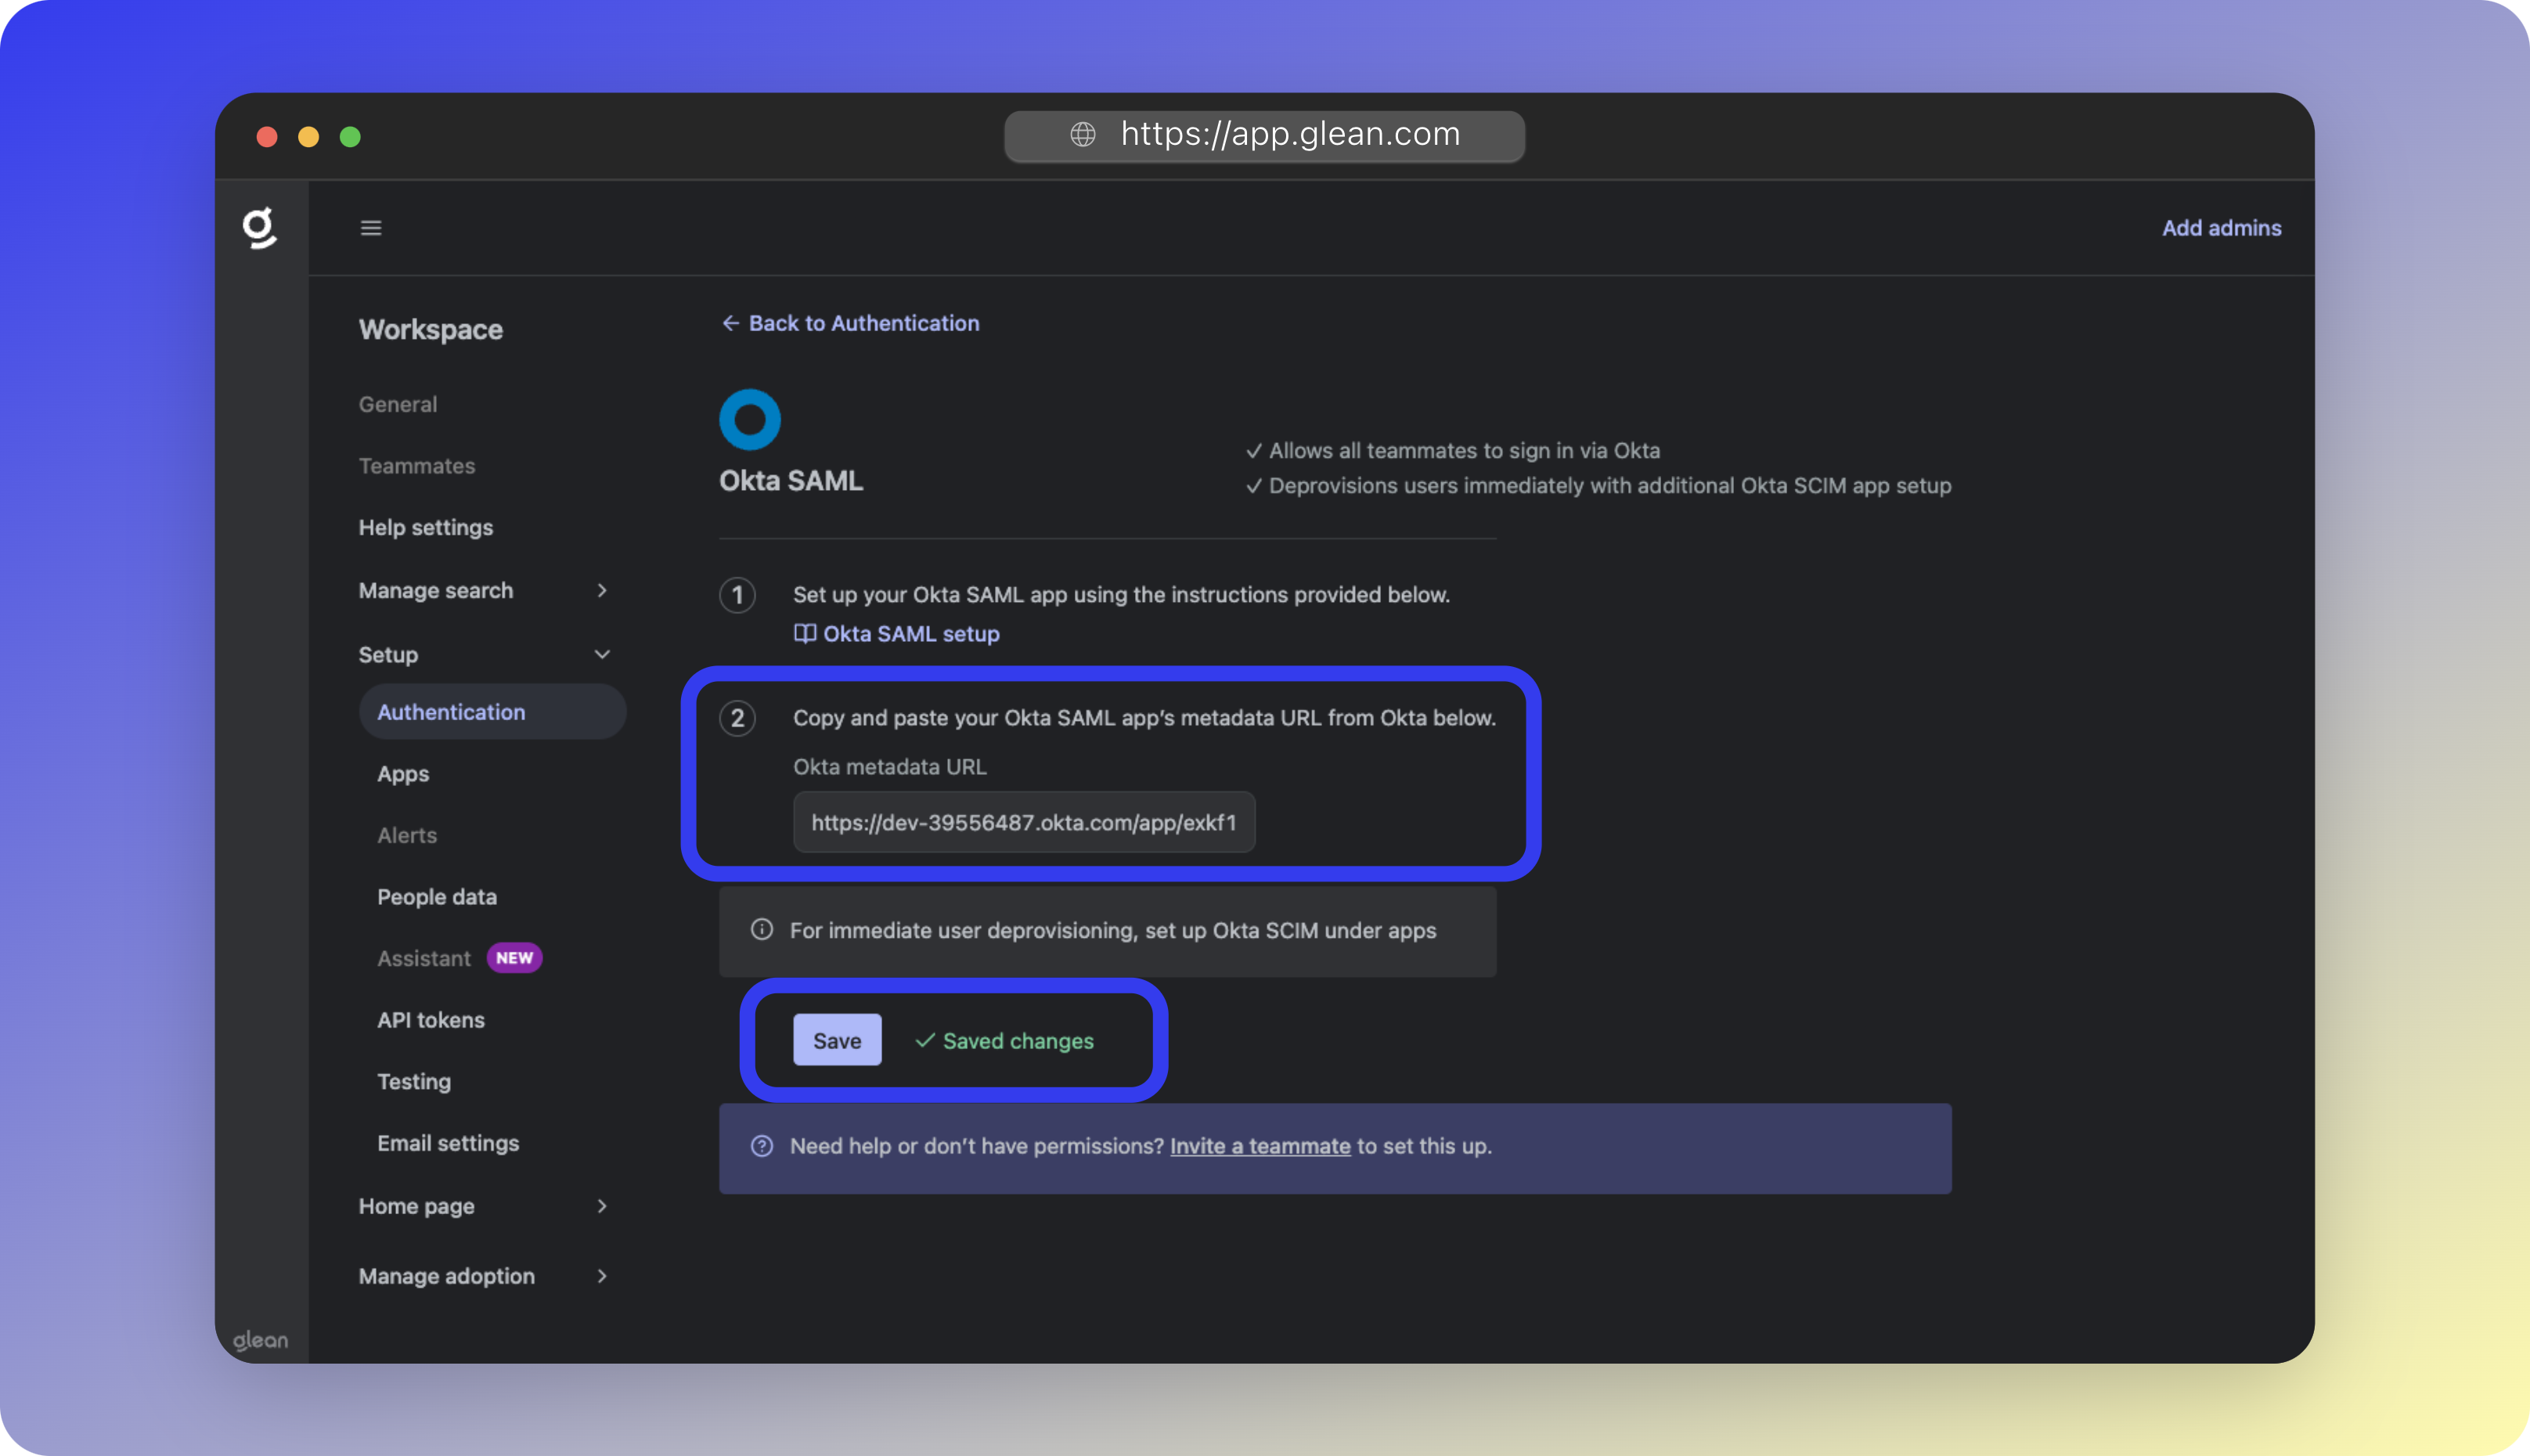
- Paste the Okta Metadata URL
- Click Save
2
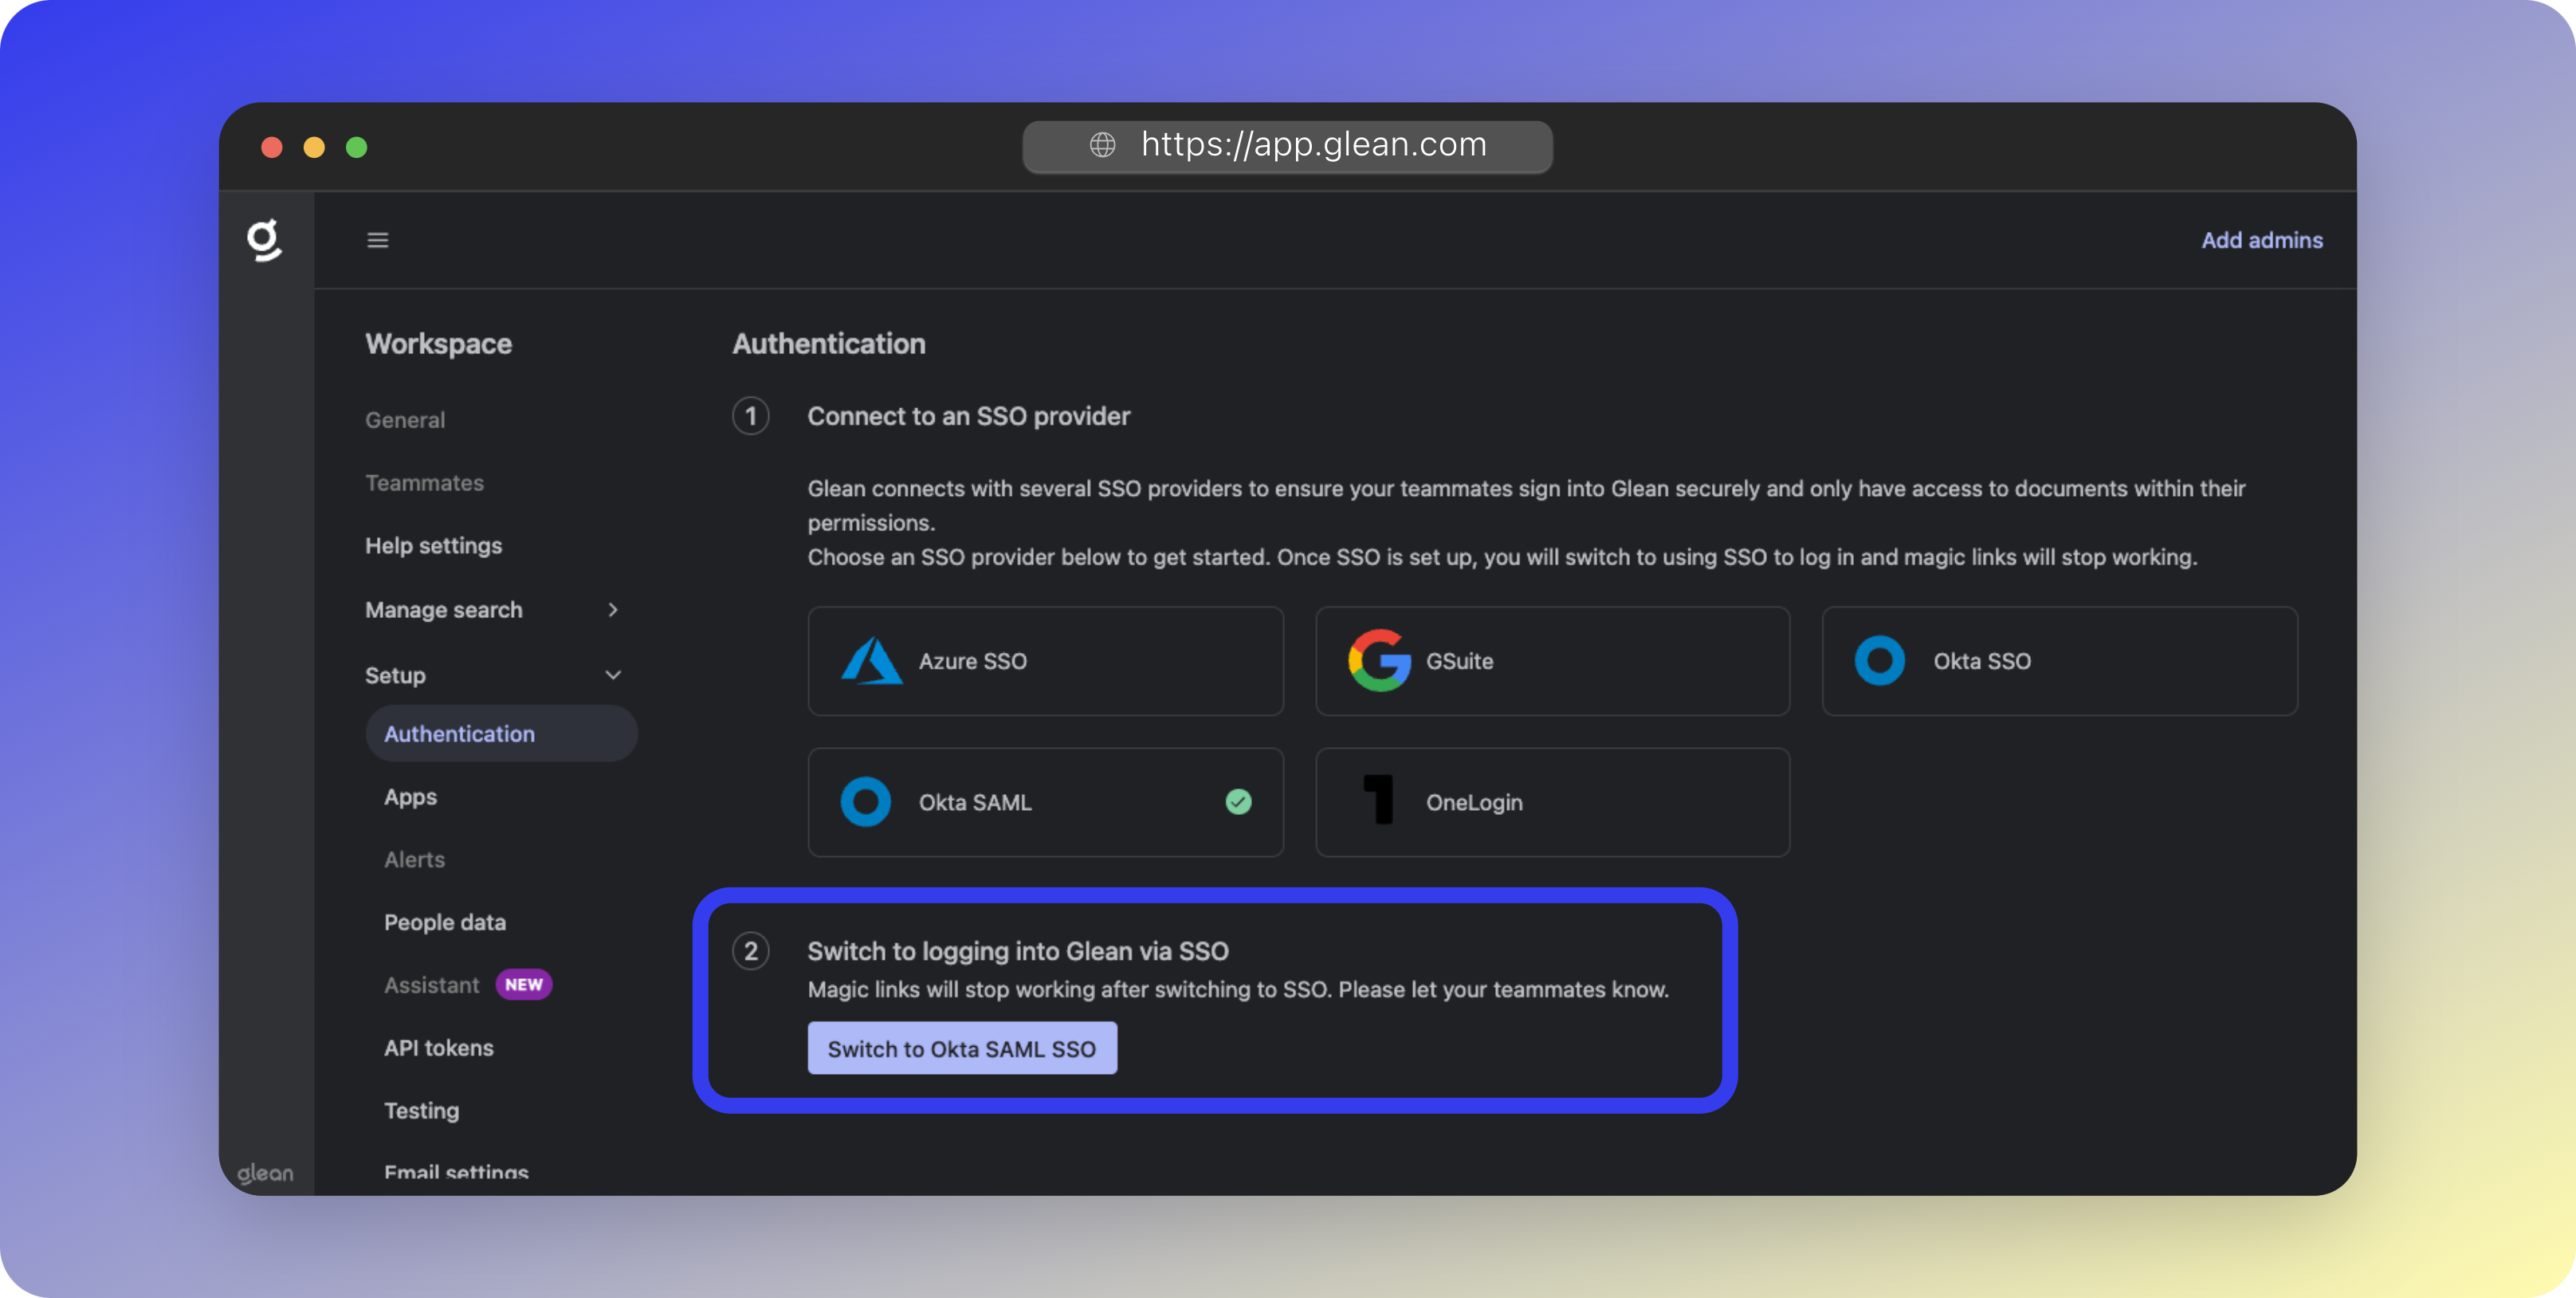
Activate SSO
- Return to Authentication Settings
- Click Switch to Okta SAML SSO
- Confirm the switch
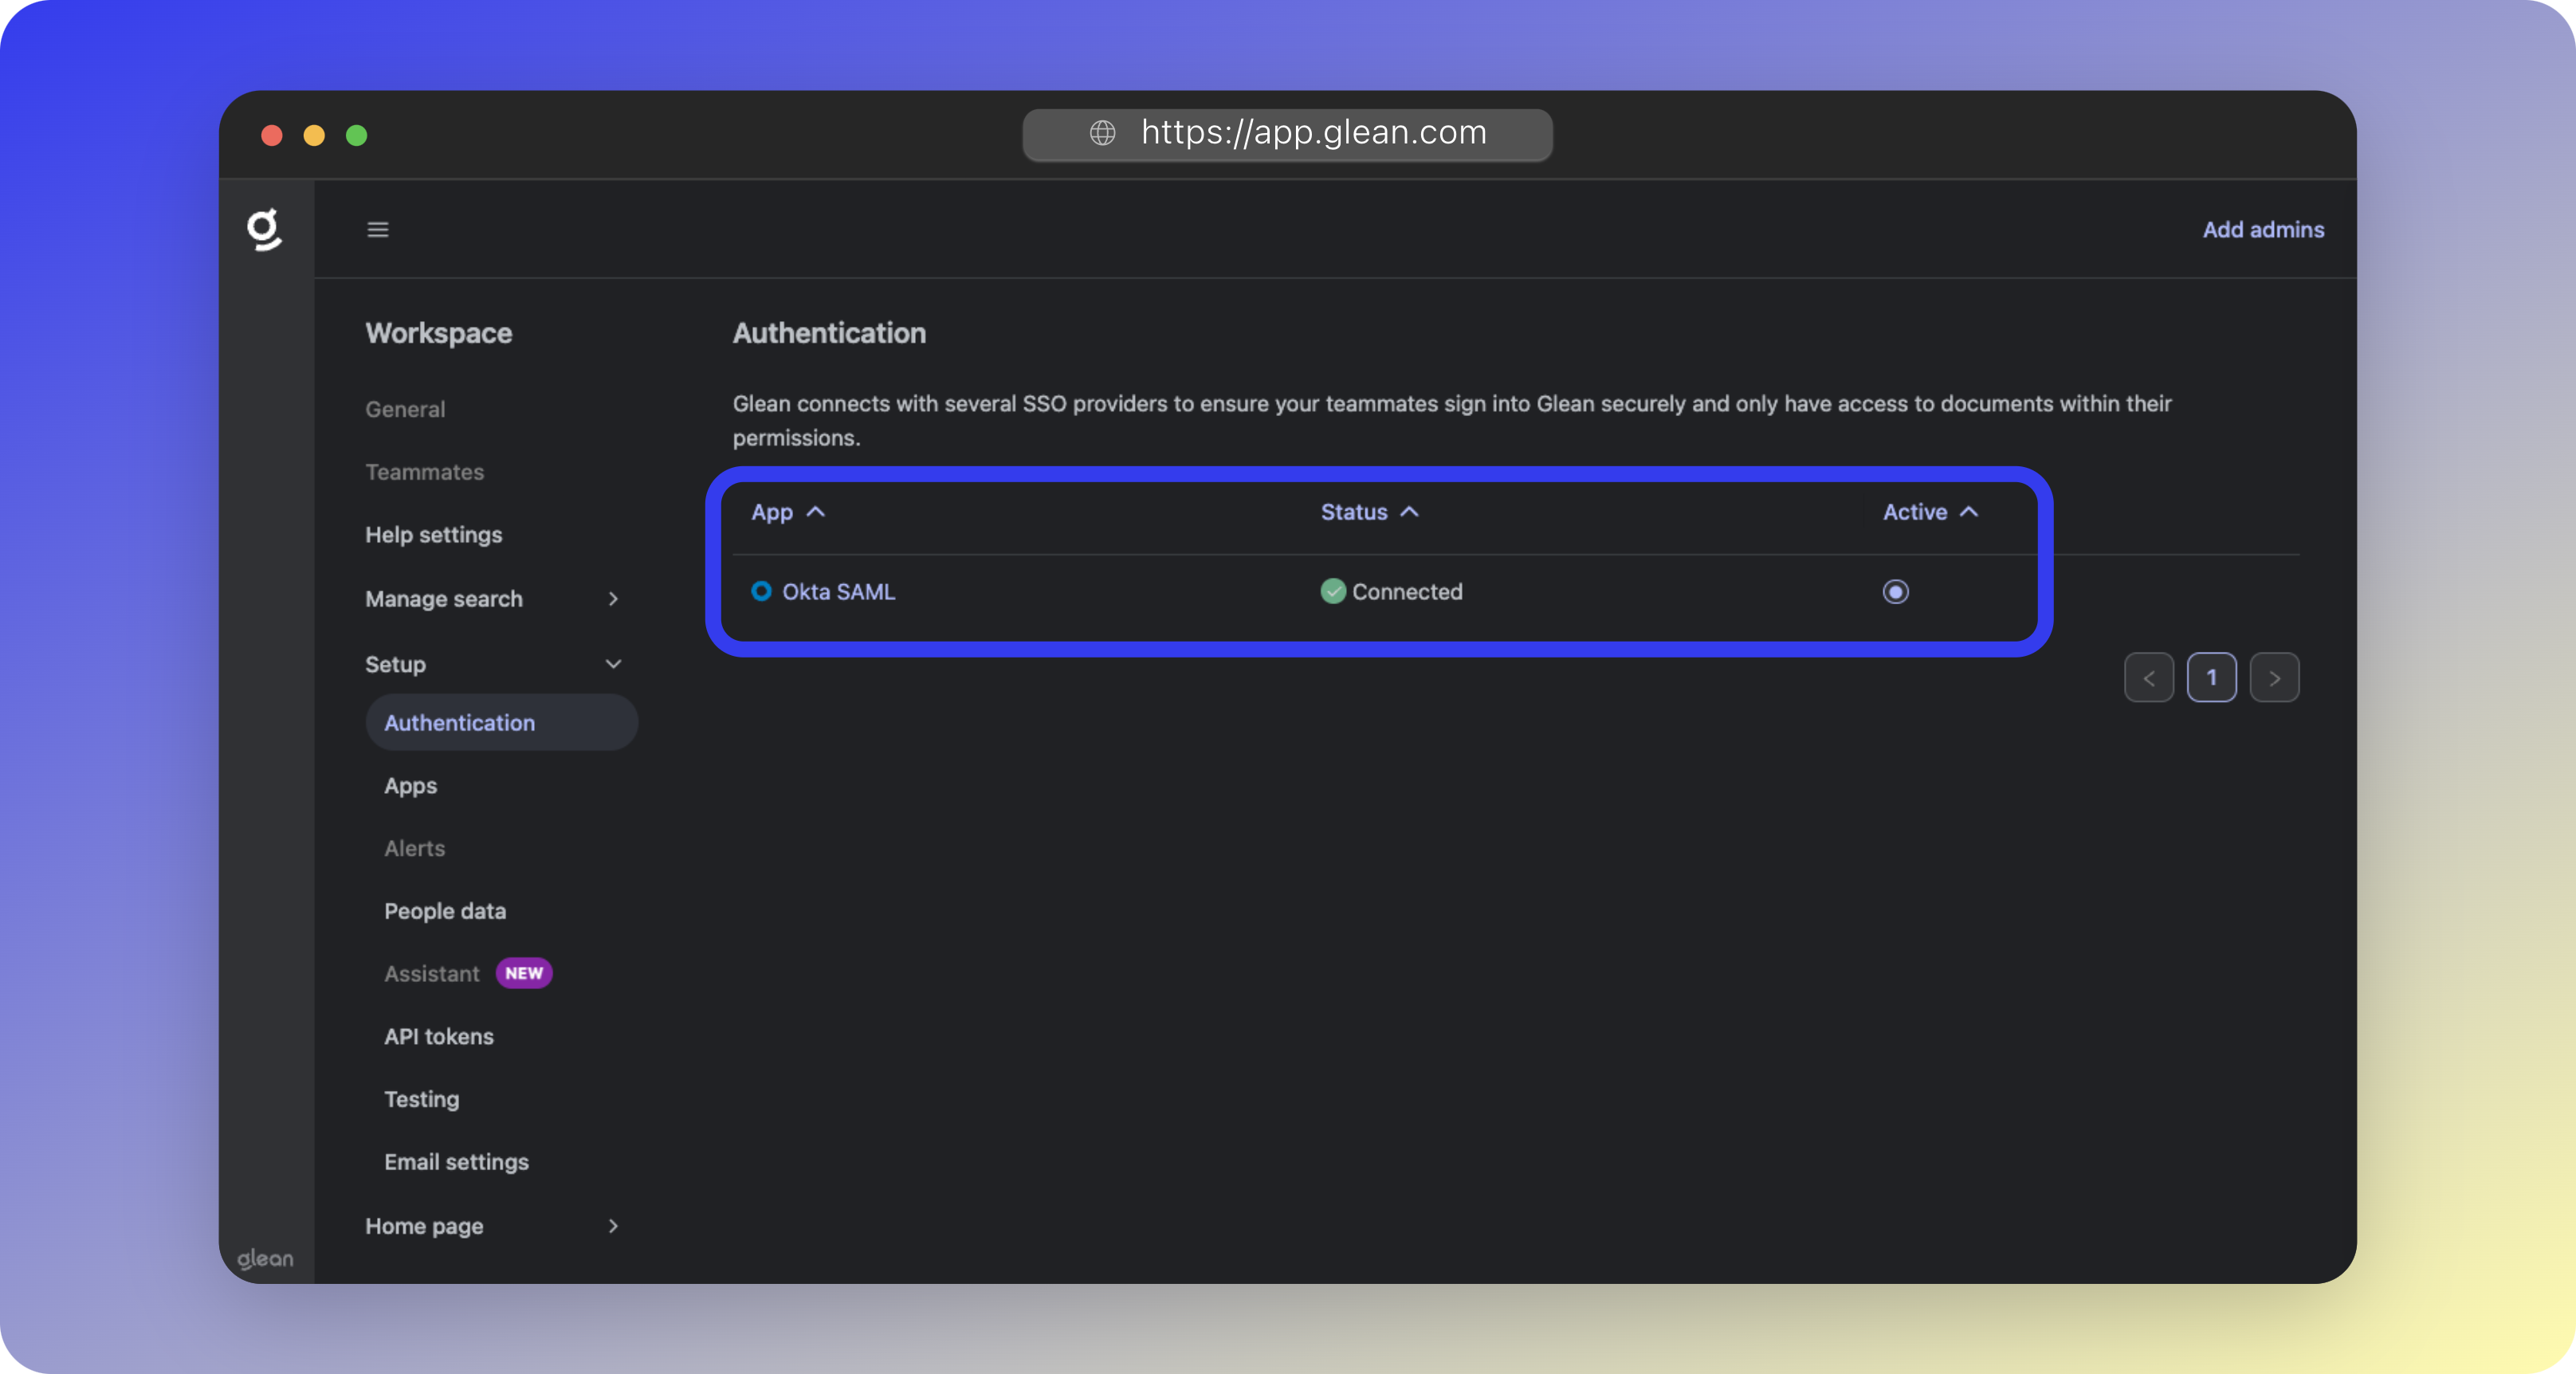
- Verify Okta SAML shows as Connected
If the switch button isn’t visible, your Glean tenant may still be provisioning. You can proceed with connecting datasources and return later.
(Optional) SCIM Provisioning
Glean supports user deprovisioning via SCIM 2.0. When configured, users removed from Okta are immediately logged out of Glean rather than waiting for session expiration.1
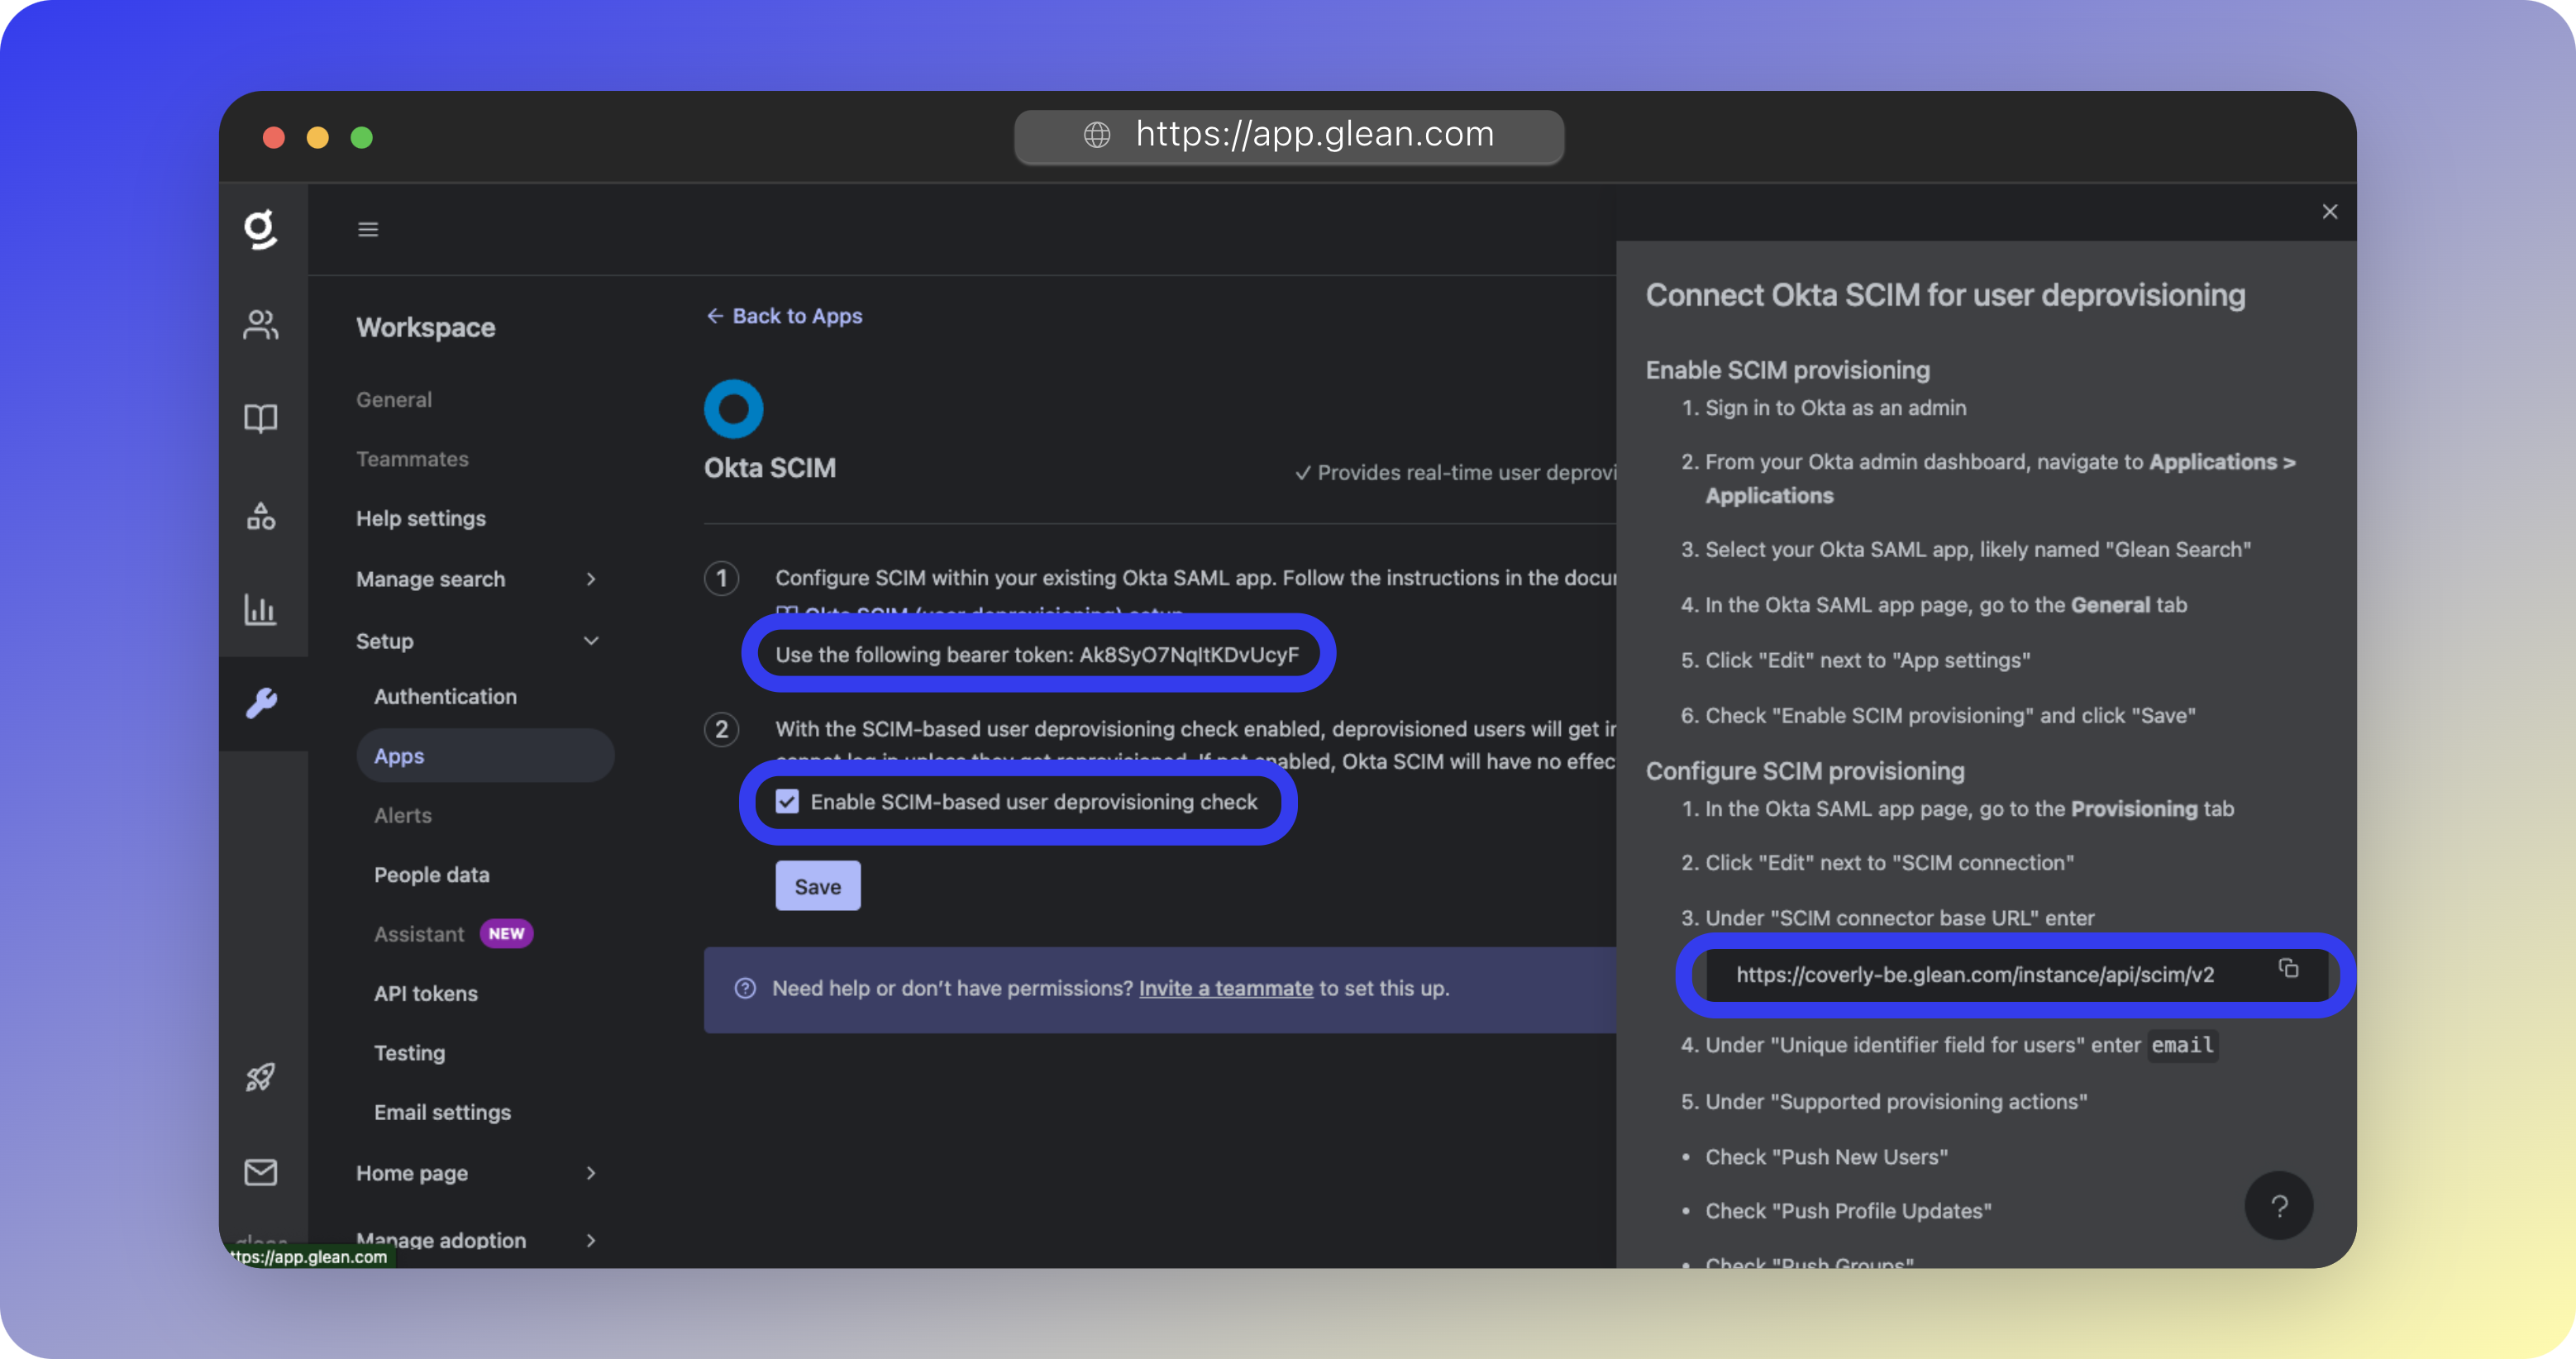
Configure Glean
- Go to Workspace Settings > Setup > Apps
- Add Okta SCIM
- Copy the bearer token
- Note the SCIM connector base URL (format:
https://tenant_id-be.glean.com/instance/api/scim/v2) - Click Enable SCIM-based useqr deprovisioning check
2
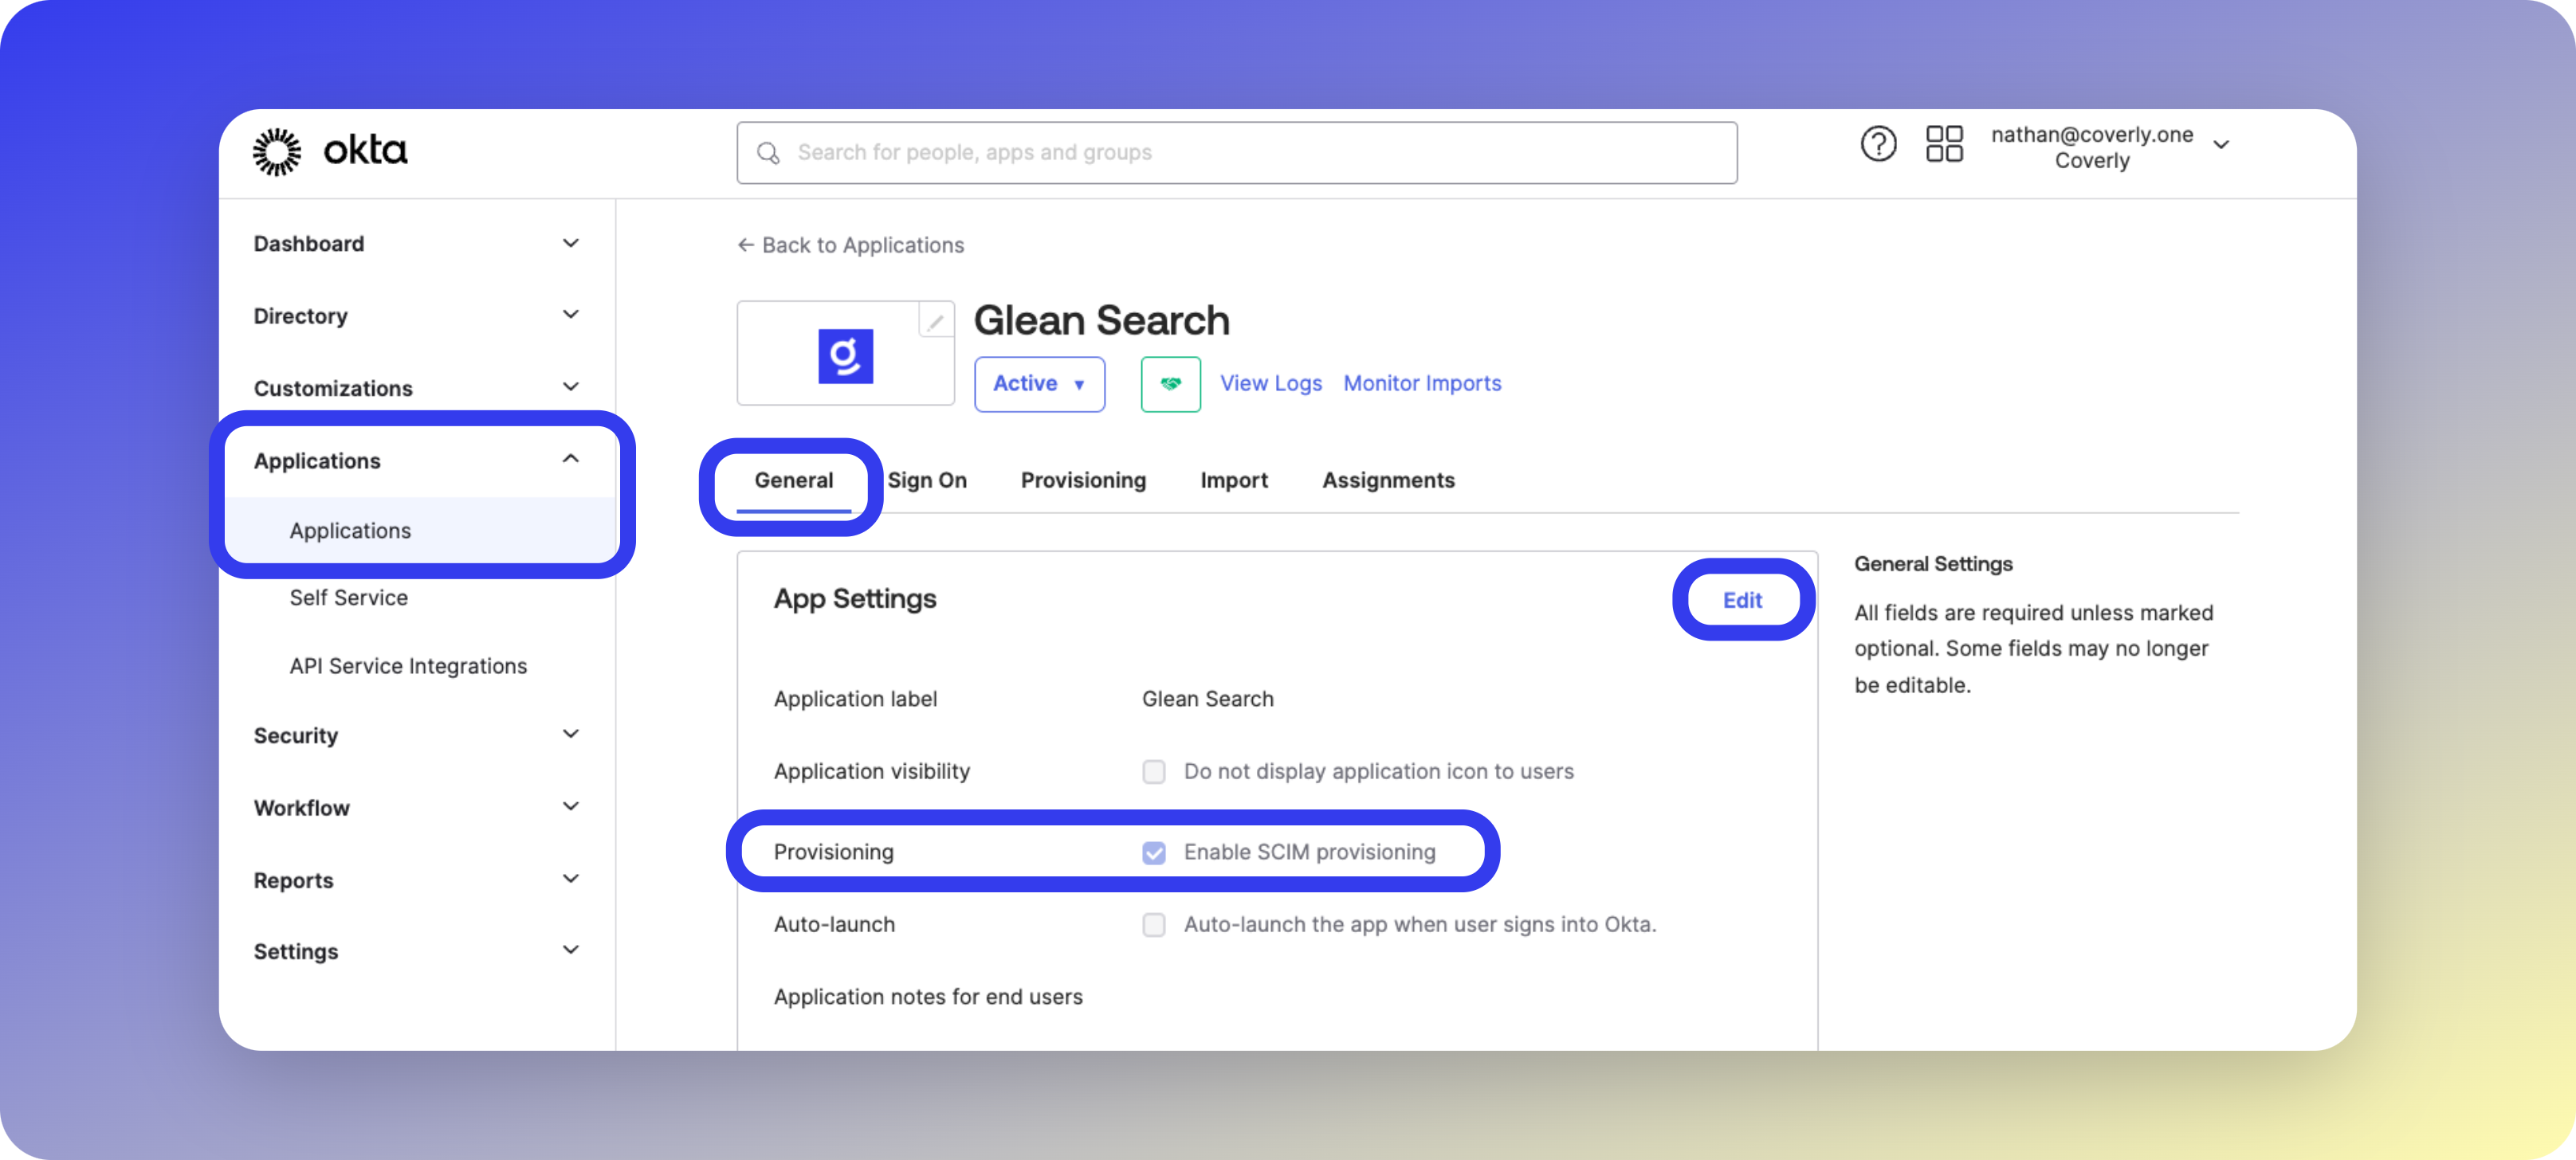
Configure Okta SCIM
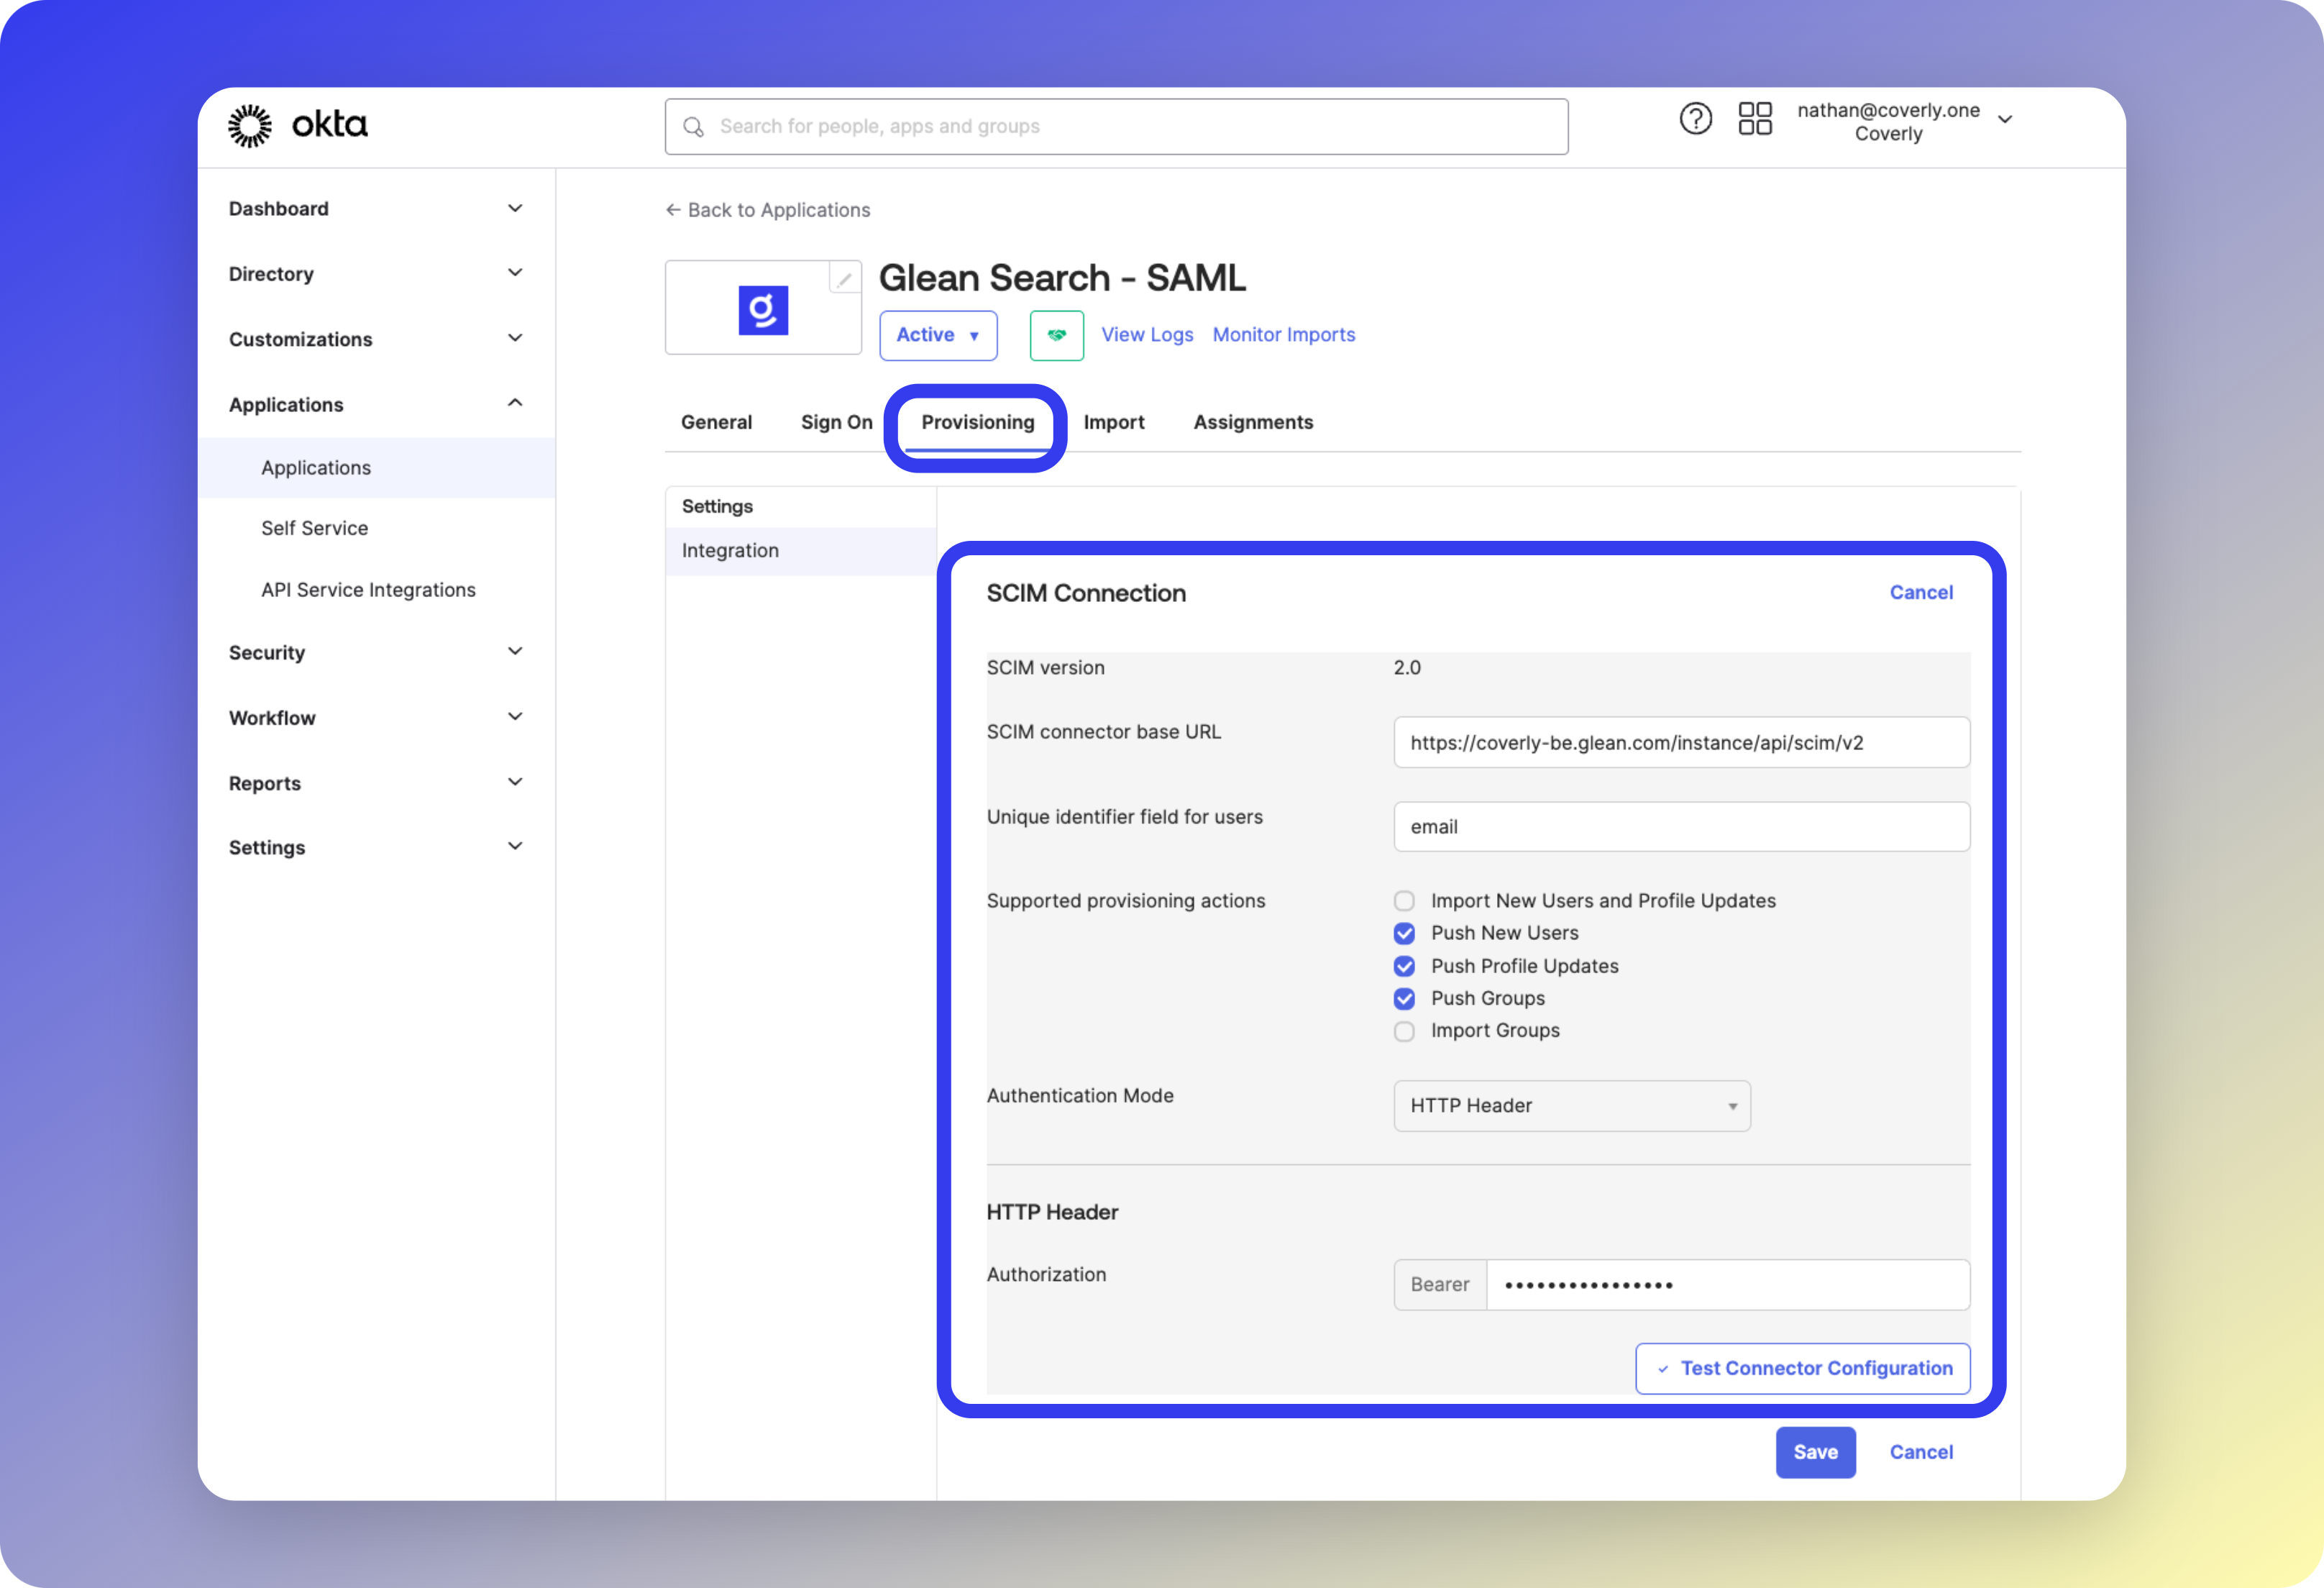
- In your Okta admin dashboard, select the Glean Search app
- Enable SCIM provisioning under App Settings
- Configure the Provisioning tab with:
- SCIM connector base URL from Glean
- Unique identifier:
email - Enable all provisioning actions
- Authentication: HTTP Header with Bearer Token
- Test the connection
3
Configure Provisioning
Enable the following options: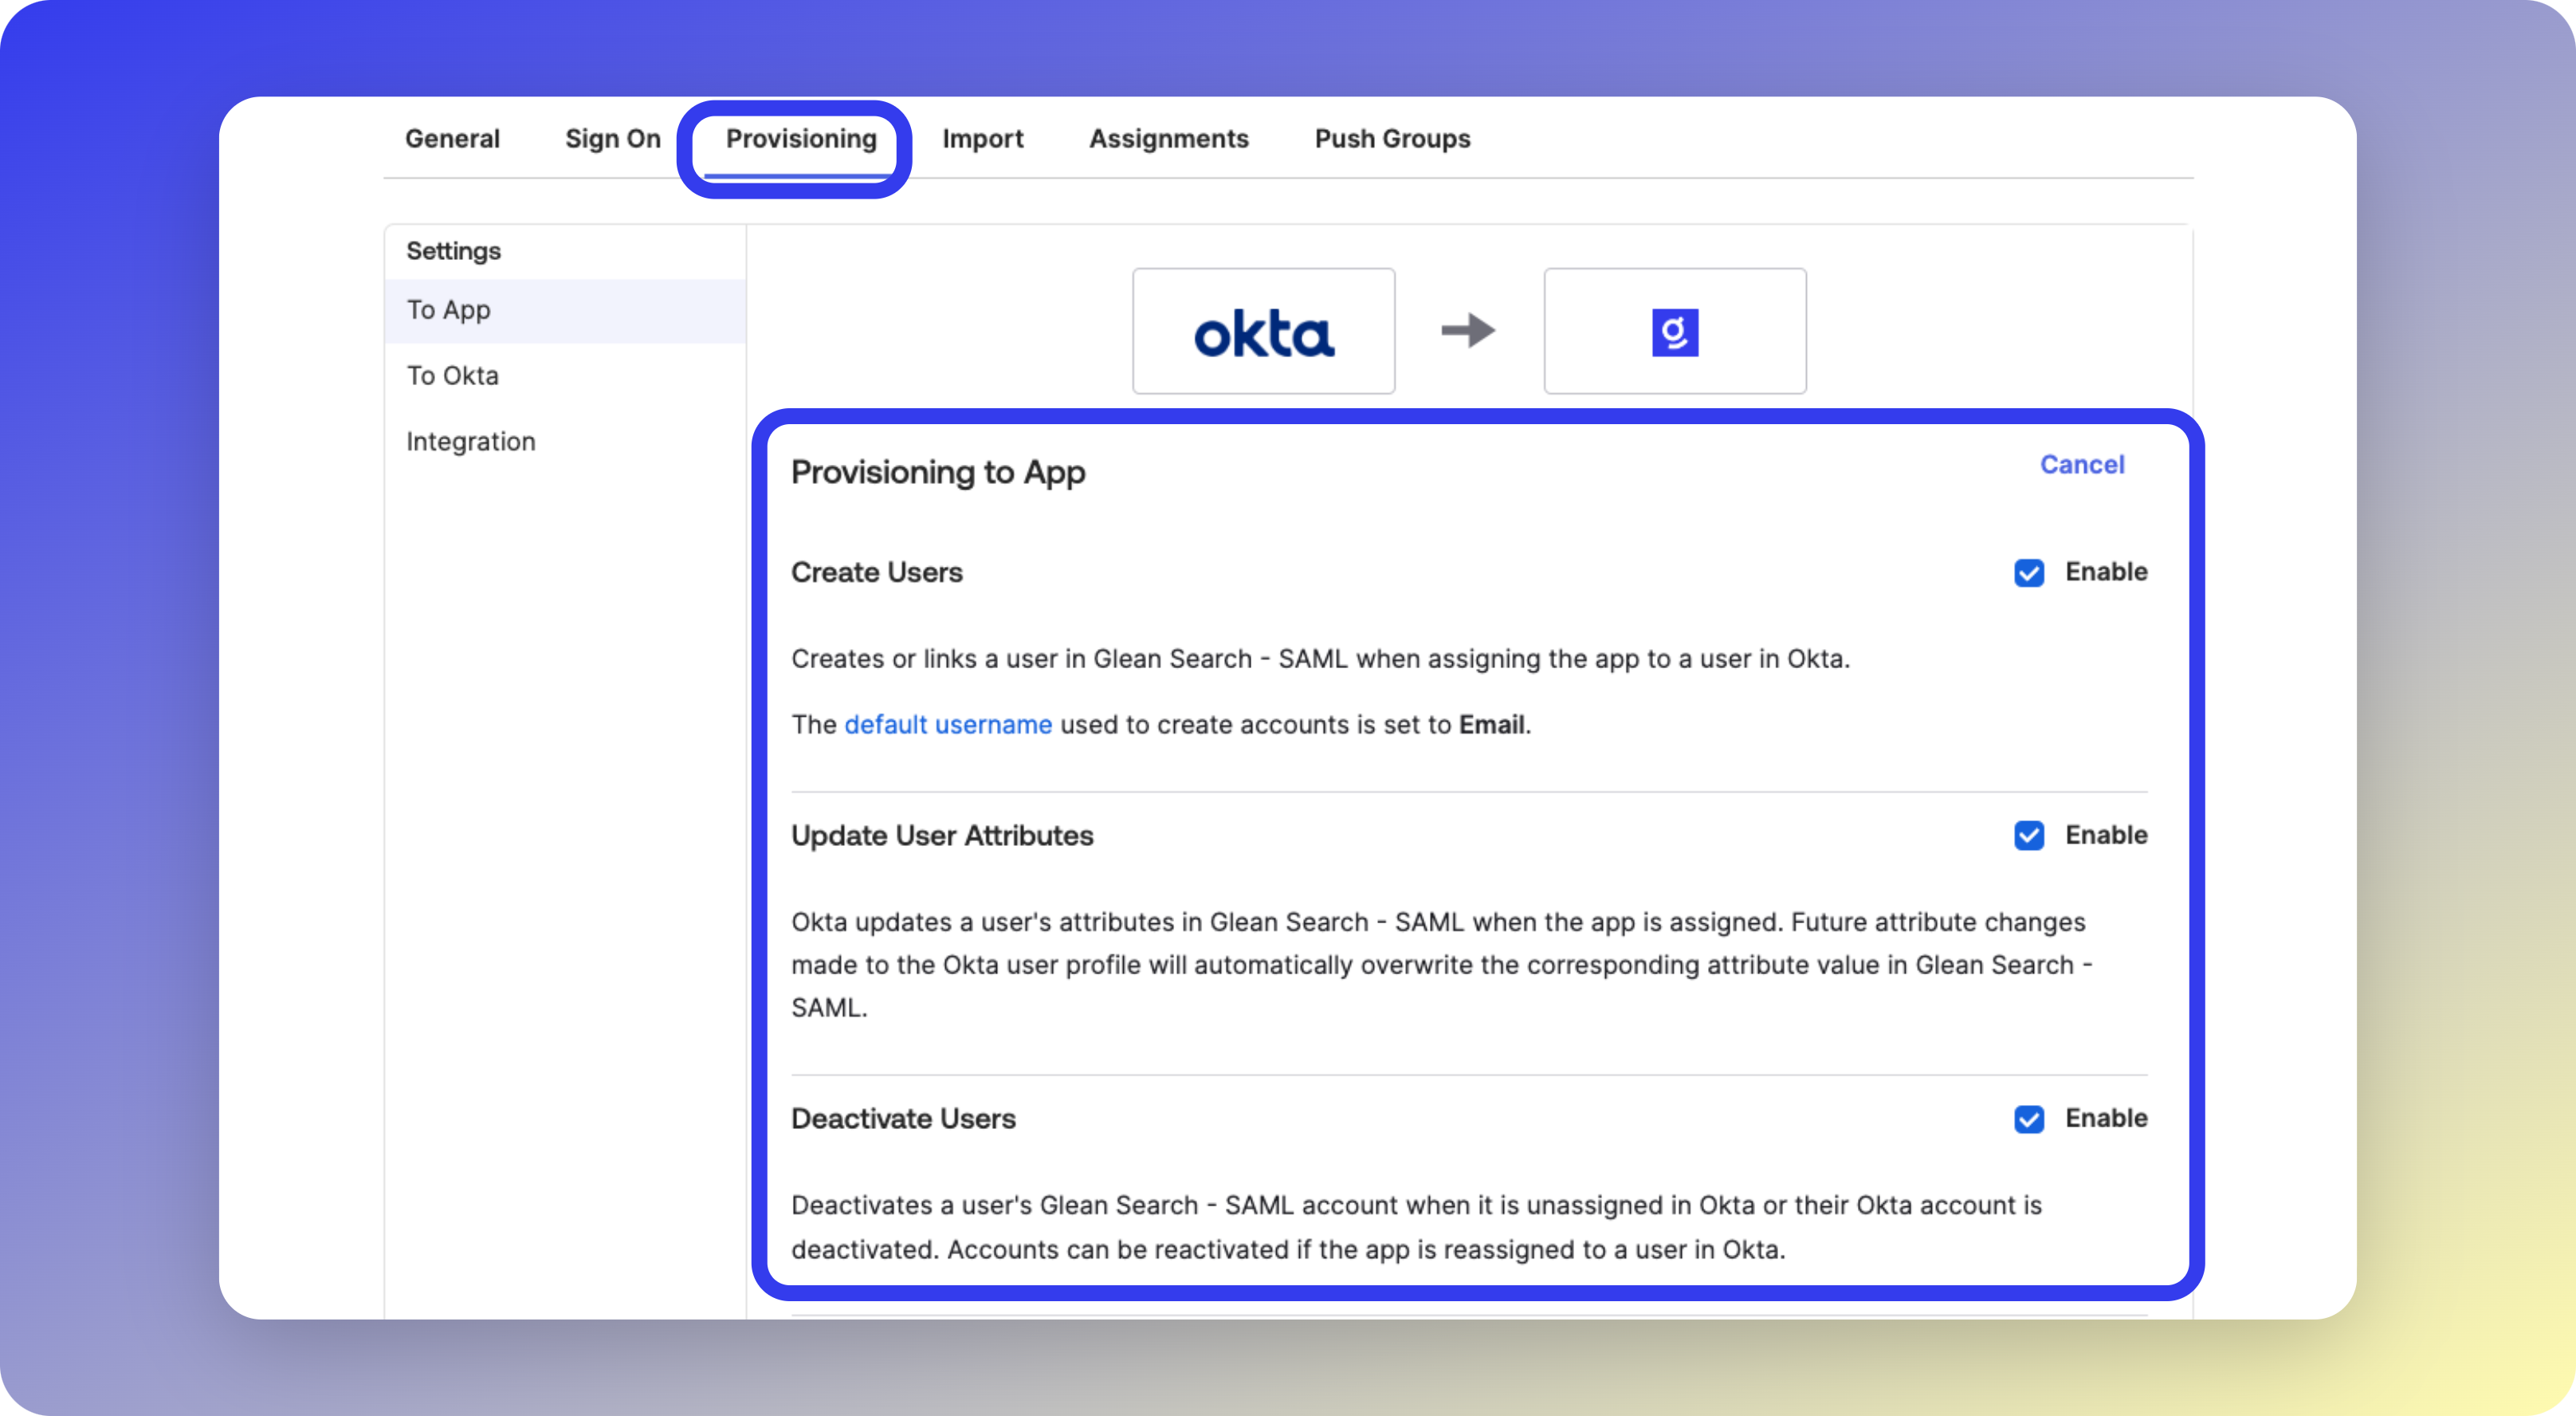
- Create Users
- Update User Attributes
- Deactivate Users

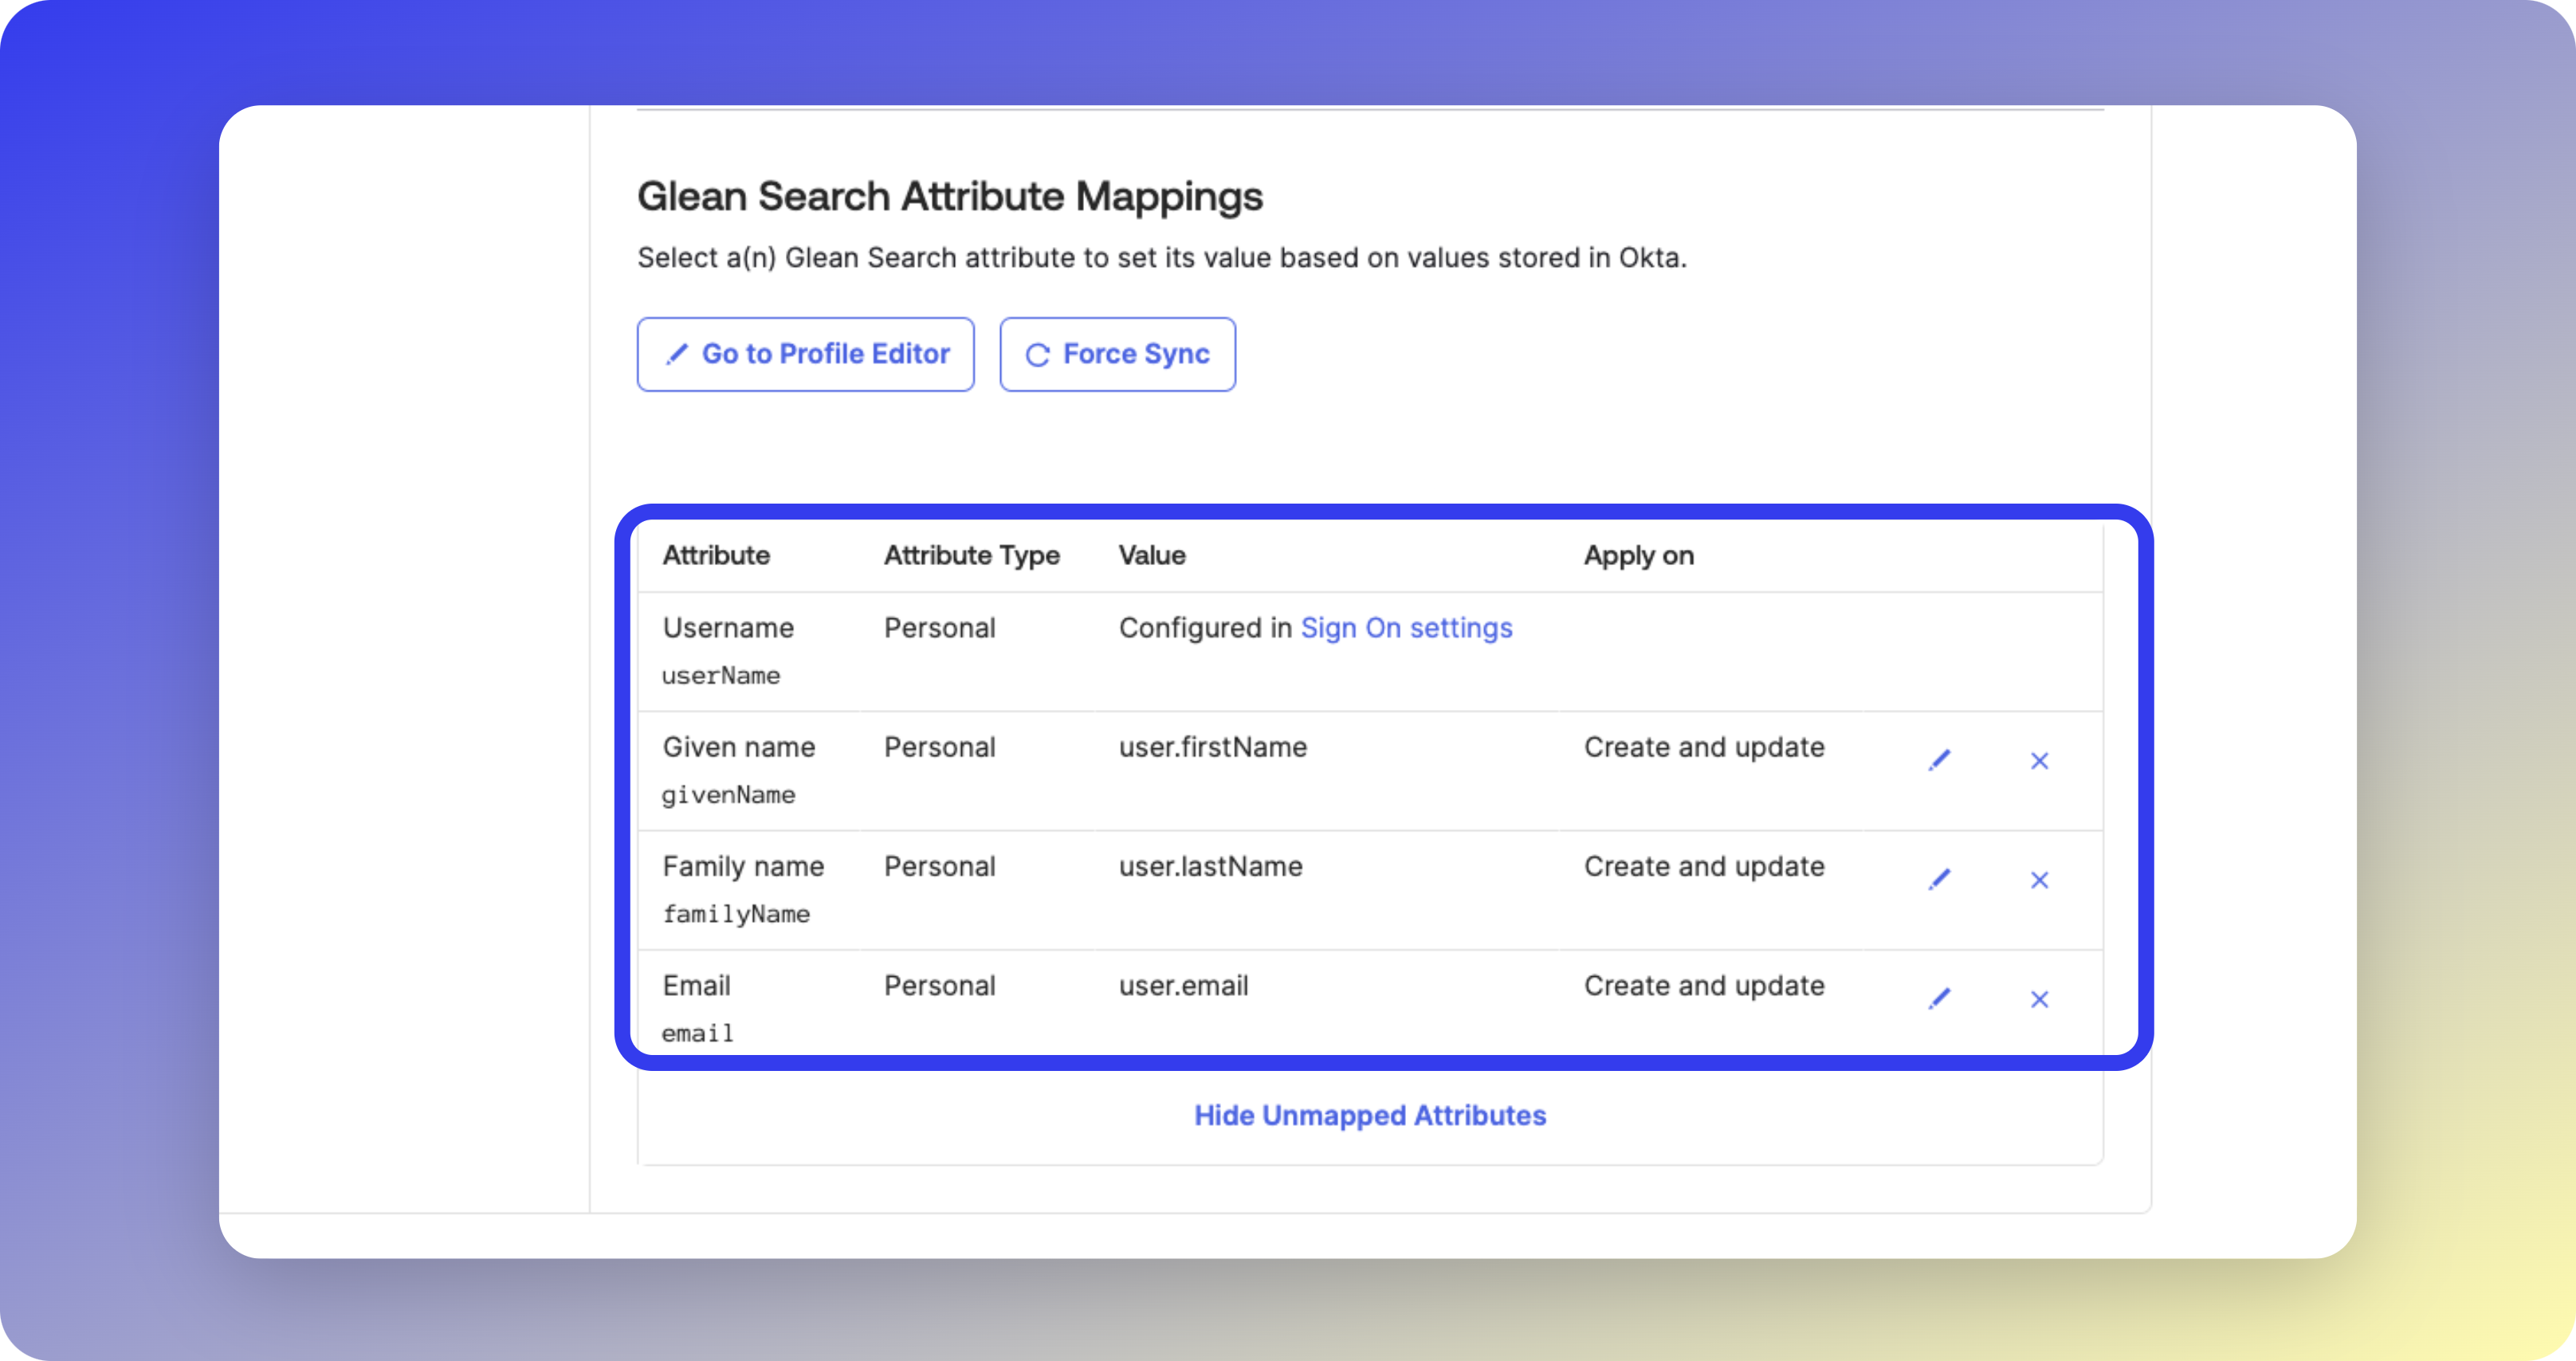
- Username
- Given name
- Family name
- Manager
- Department

4
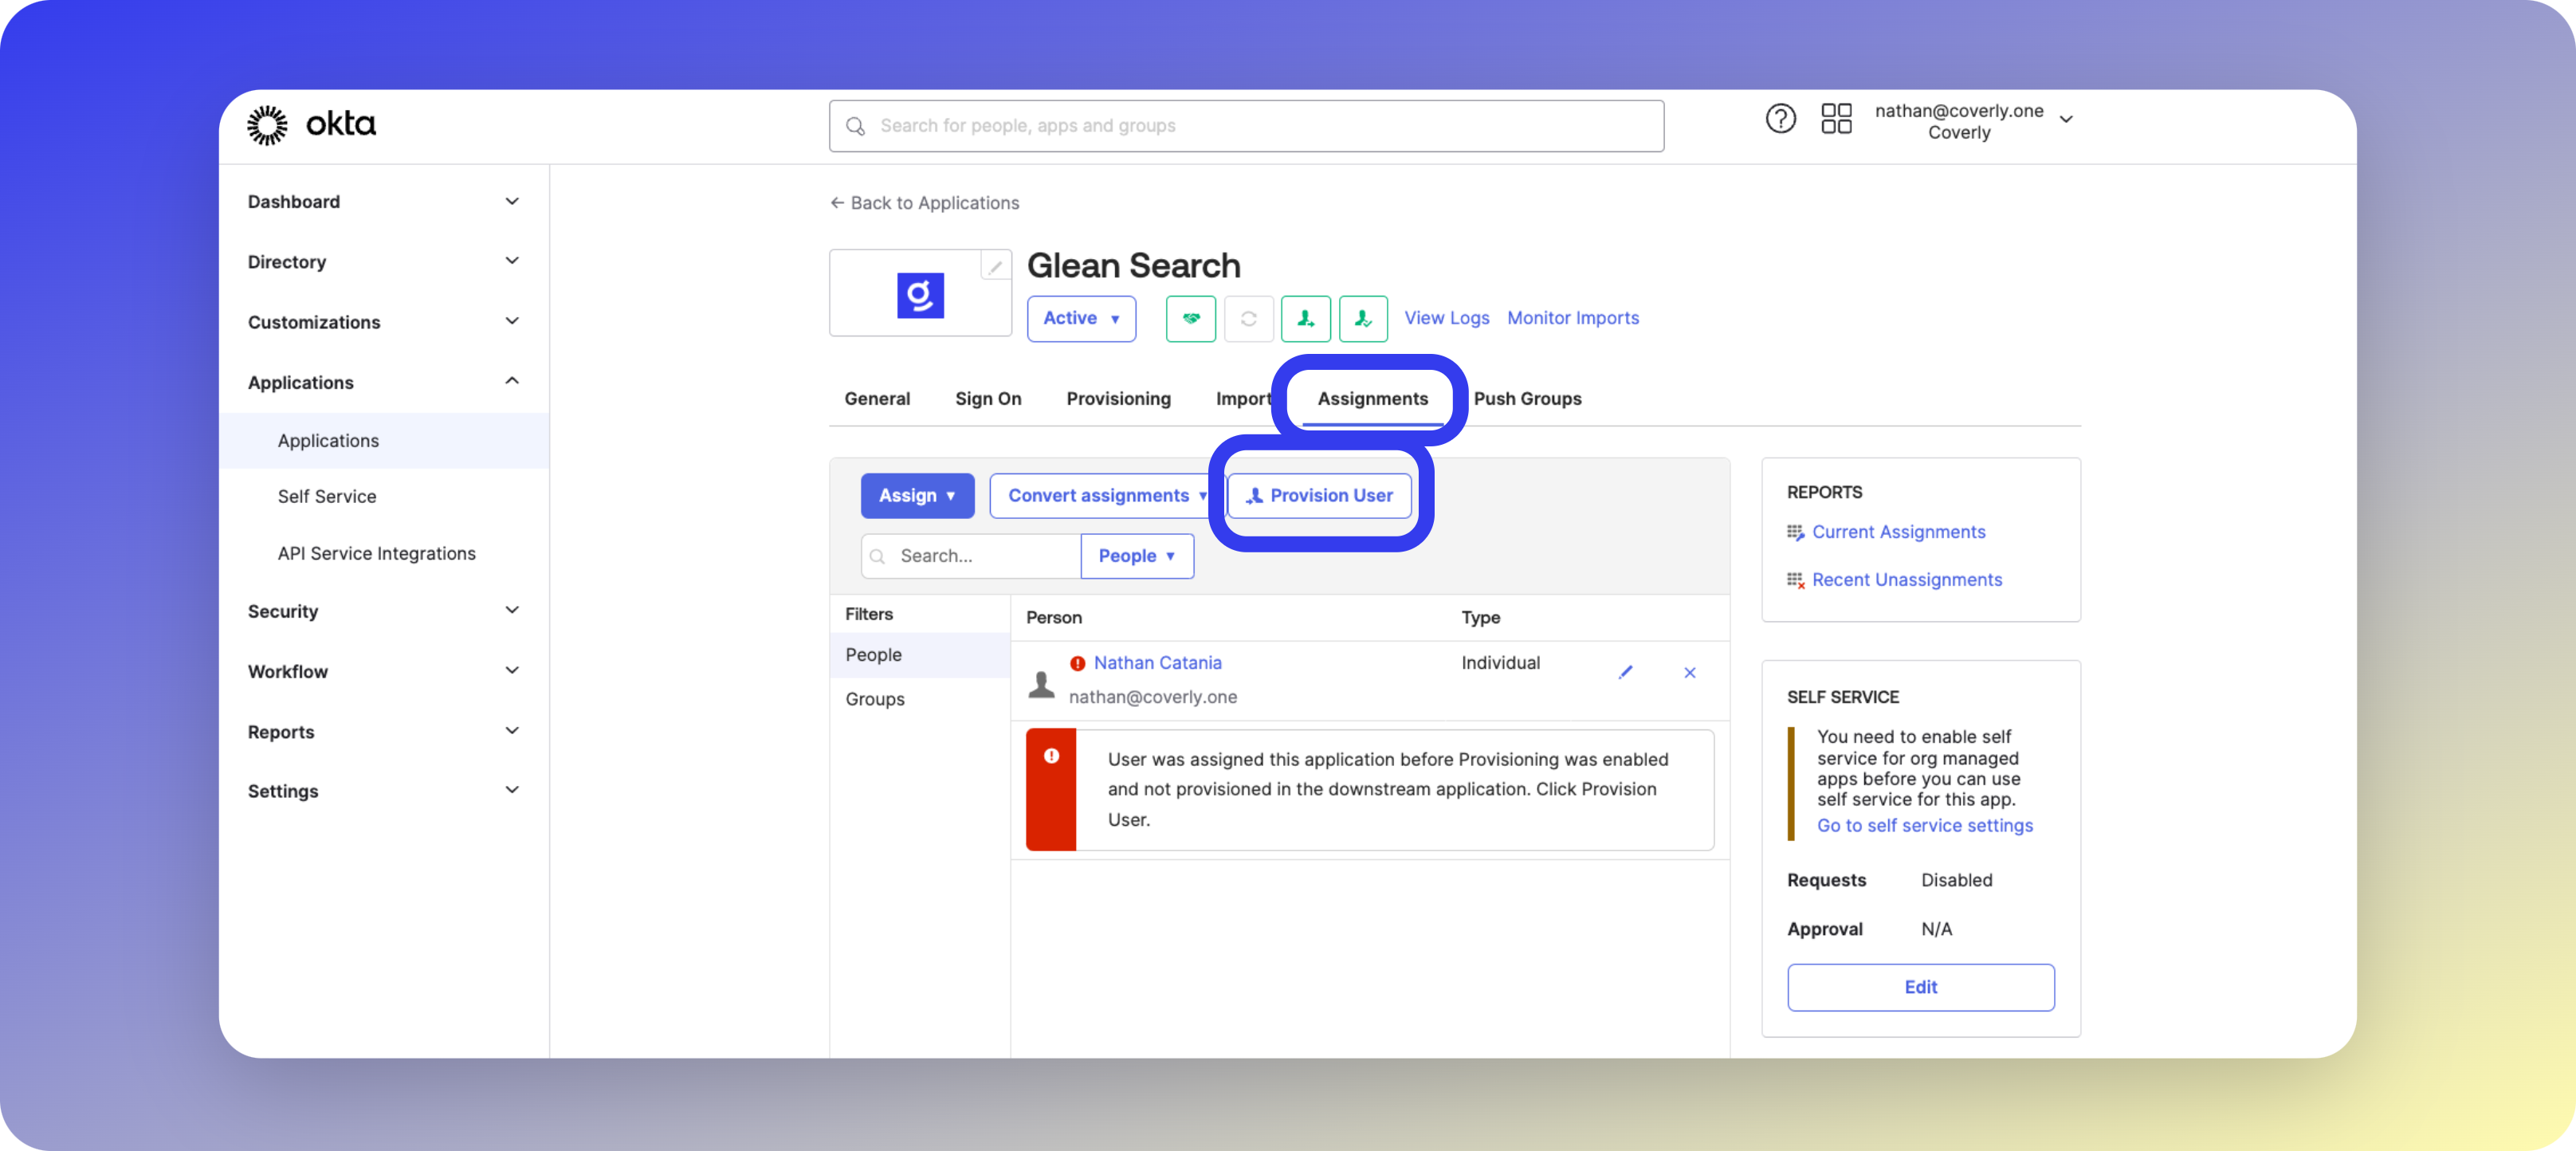
Complete Configuration
- Push initial users via the Provision User button
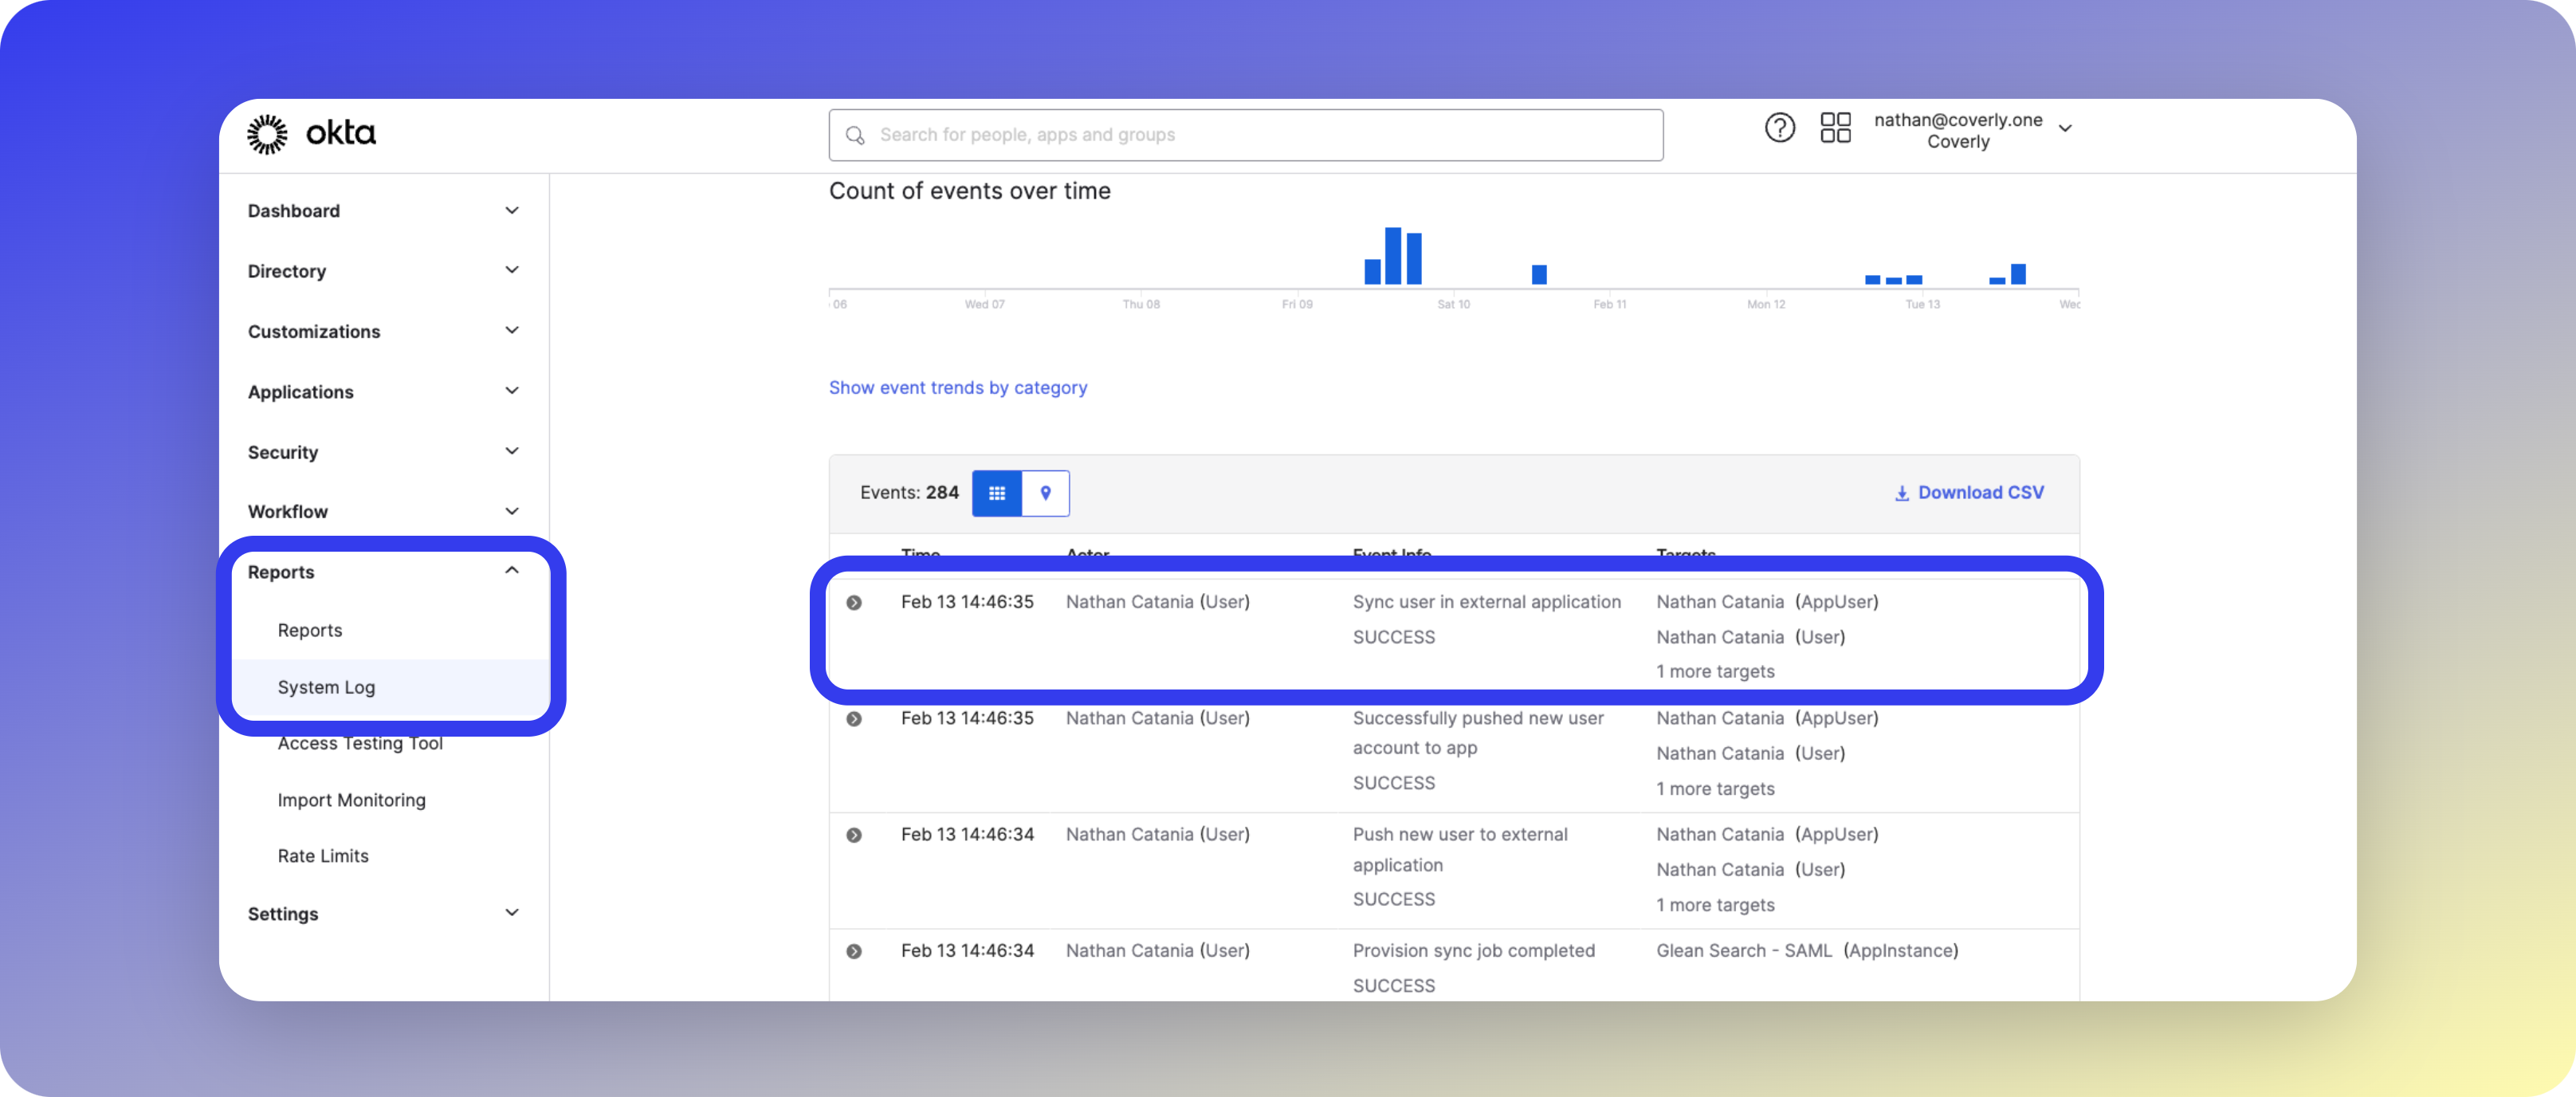
- Verify SCIM events in Okta’s System Log
5
Configure Glean
- Return to the Okta SCIM page
- Click Save
Testing the Configuration
Test Glean to Okta
- Open a new Incognito/Private window
- Navigate to https://app.glean.com
- Enter your work email and click Log In
- Verify successful redirection to Okta
Troubleshooting: Redirect to Okta fails
Troubleshooting: Redirect to Okta fails
If redirection fails:
- Create a new Okta application
- Carefully follow the configuration steps
- Contact Glean support if issues persist
Test Okta to Glean
Attempt to sign in through Okta and verify successful redirection back to Glean.Common Issues
Common Issues
- User not assigned: Ensure user is assigned to the Glean Search app
- Redirect fails: Verify Single Sign-On URL and Audience URI
- Login fails: Check Name ID format, Application username, and Attribute Statements
- Domain issues: Ensure all authentication domains are approved by Glean
Test SCIM Provisioning
Verify SCIM configuration by checking:- Bearer Token and SCIM URL accuracy
- Enabled provisioning options
- User/group assignments
- System logs for successful sync events
Error: Empty SCIM users
Error: Empty SCIM users
If you see “Found empty SCIM users!”:
- Verify Okta configuration
- Confirm user synchronization
- Retry saving the Glean configuration