- Search Databricks with SQL
- Search Databricks with Genie
Databricks Actions are not available in Glean Assistant chat.
Action Pack setup instructions
Note on Databricks URLs needed for Setup
- The host URL is the same URL that is used to login into Databricks instance. The formats differ for AWS, GCP, Azure, as given below:
- AWS:
https://<databricks-instance-id>.cloud.databricks.com/ - GCP:
https://<databricks-instance-id>.gcp.databricks.com/ - Azure:
https://adb-<databricks-instance-id>.<number>.azuredatabricks.net/
- AWS:
- To get the Genie Space Id- when you have the Genie Space open in the Databricks UI, you can get the Genie Space Id from the URL.
https://<databricks-instance-id>.cloud.databricks.com/genie?rooms/<genie-space-id>/o=<anothernumber>
How to Set up Databricks Action Packs
- Open Glean Settings page
- Go to Platforms > Actions
- Click on Add button for creating a new action
- Click on the Databricks Actions box
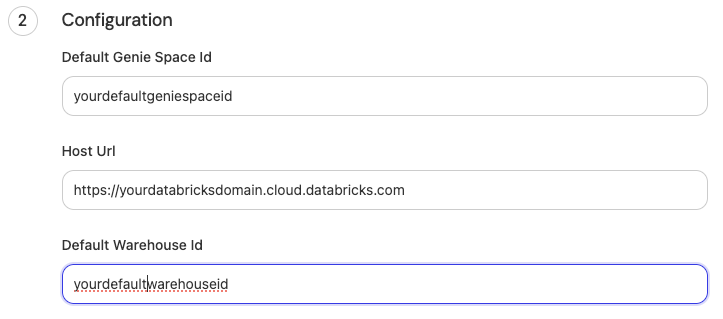
- Populate the Configuration section
- In the Default Genie Space Id text box, add the Databricks Genie space id.
Note: To get the Genie Space Id- when you have the Genie Space open in the Databricks UI, you can get the Genie Space Id from the URL.https://<databricks-instance-id>.cloud.databricks.com/genie?rooms/<genie-space-id>/o=<anothernumber> - In the Default Warehouse Id text box, add the default Databricks Warehouse Id to be used for the action.
- In the Host Url text box, add the full Databricks Genie host url in the following format. Replace the databricks-instance-id with the correct ID for your Databricks instance.
- In the Default Genie Space Id text box, add the Databricks Genie space id.
-
AWS:
https://<databricks-instance-id>.cloud.databricks.com/ -
GCP:
https://<databricks-instance-id>.gcp.databricks.com/ -
Azure:
https://adb-<databricks-instance-id>.<number>.azuredatabricks.net/Final Configuration Section should look like this:
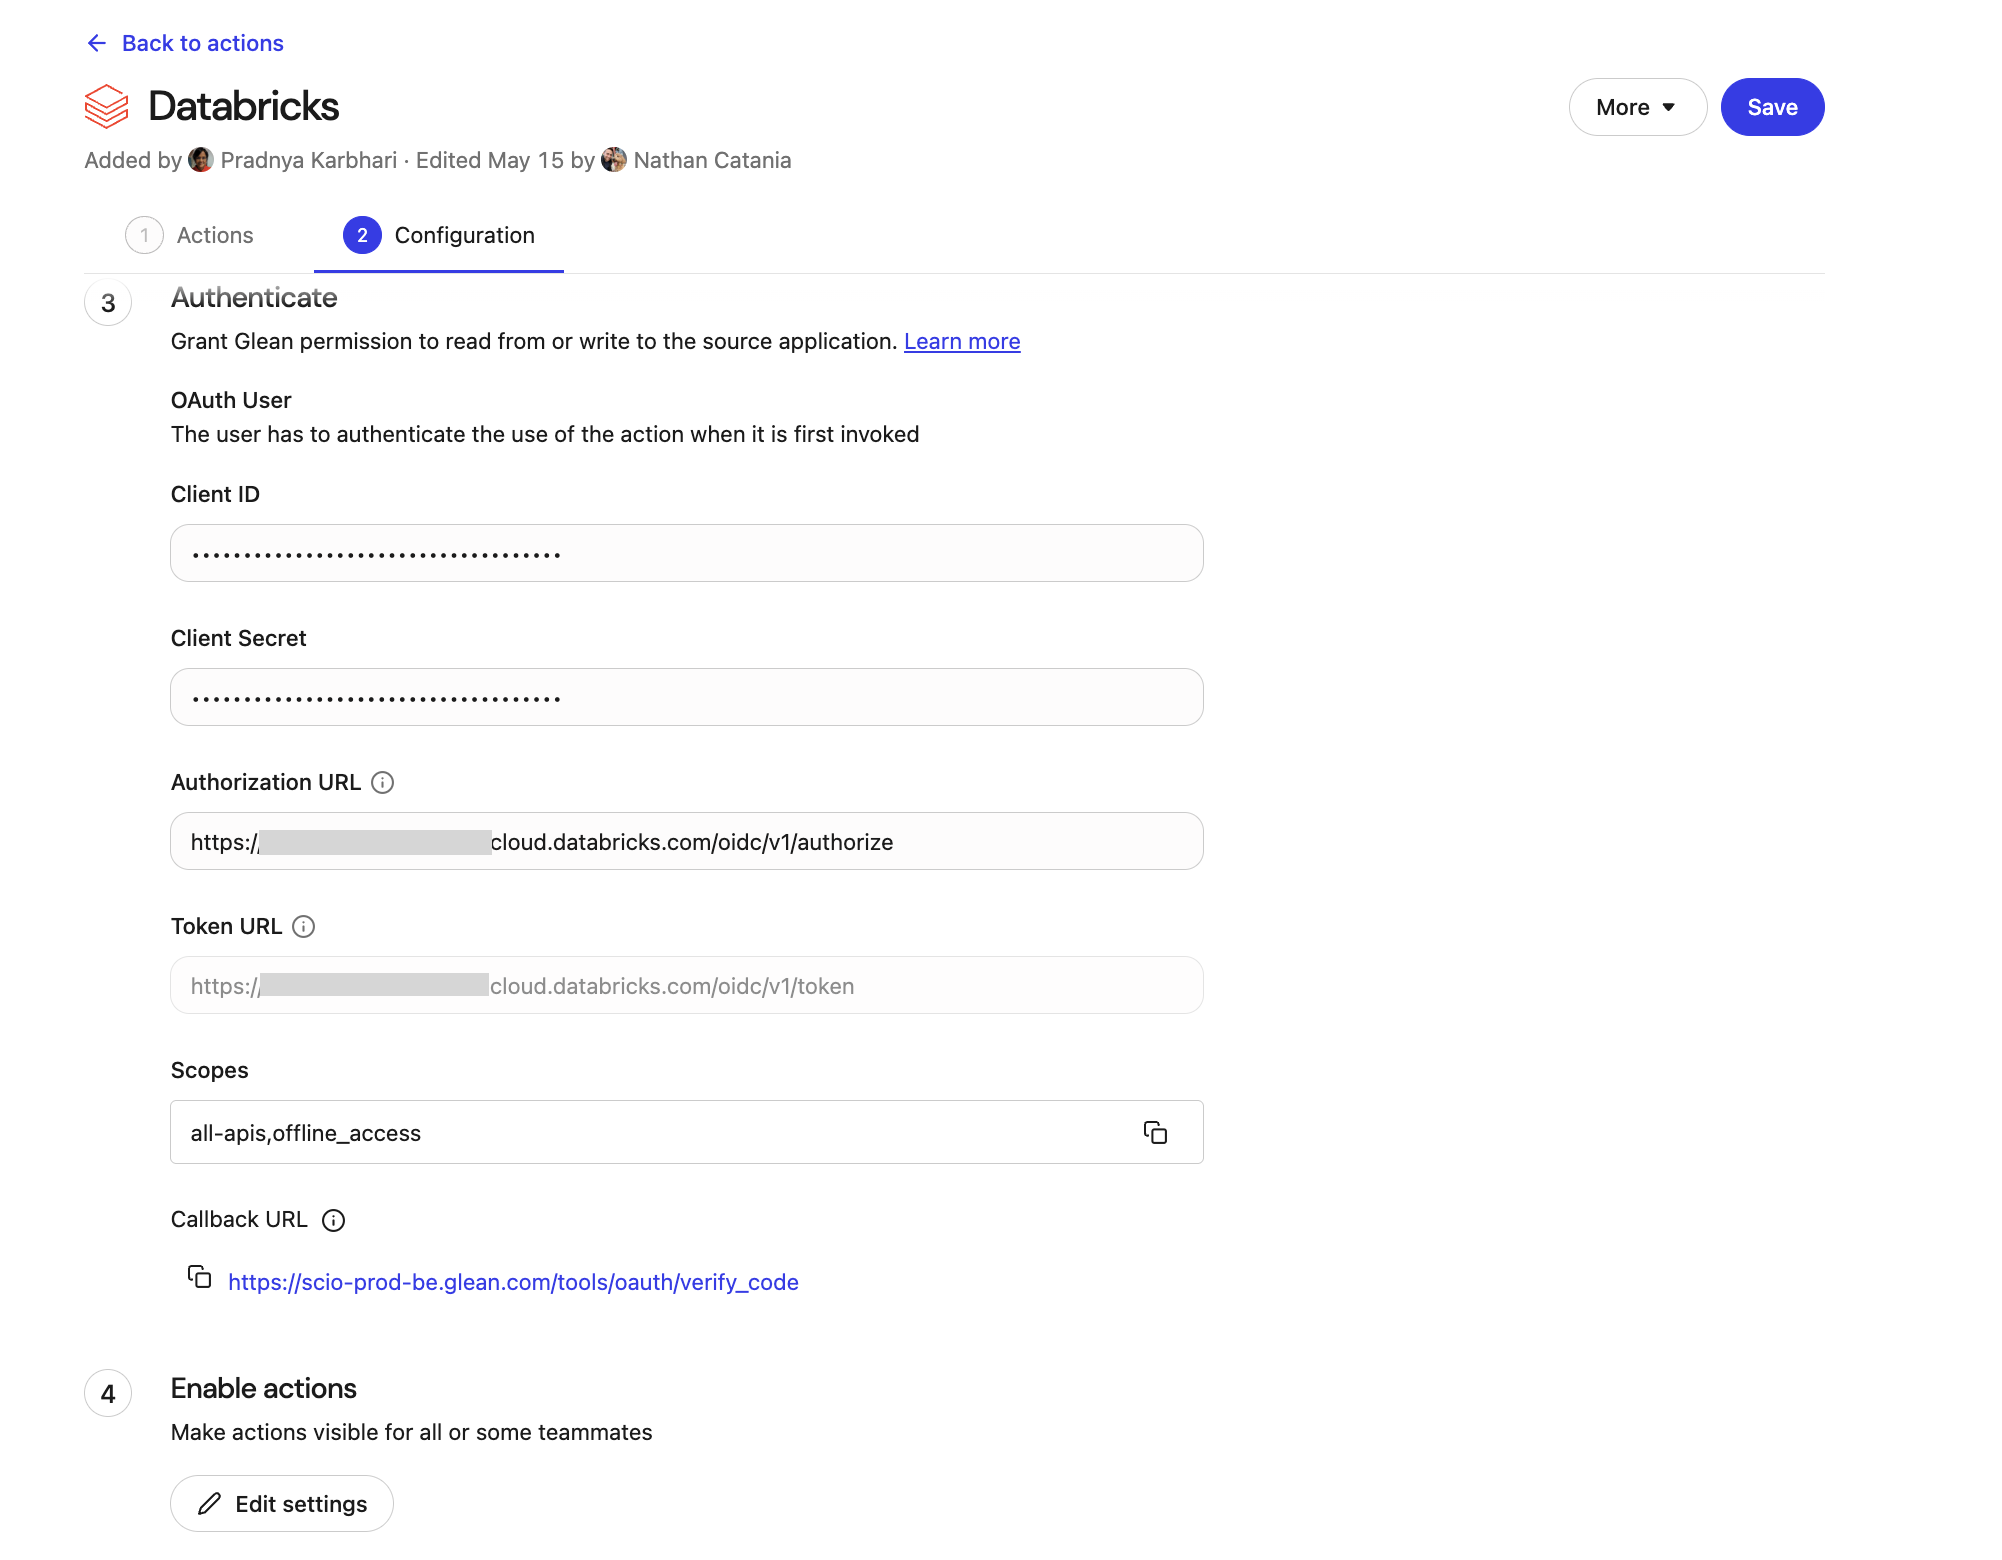
- Populate the Authenticate section
- Create OAuth app on Databricks account as per this section.
- Copy the Client ID and Client Secret from the OAuth app into the Authenticate section of the Action you are setting up.
- Populate Authorization url as
https://<AWS-or-GCP-or-Azure-Host-URL-from-step-5c>/oidc/v1/authorize - Populate Token url as
https://<AWS-or-GCP-or-Azure-Host-URL-from-step-5c>/oidc/v1/token - Add the Scope as all-apis,offline_access
- Final Authenticate section should look like this:\

- Save the Action.
- A callback URL is generated after saving the Action. Copy that over into the Databricks OAuth app on the Databricks account console.
- The Action is now set up, and can be added to any app/prompt.
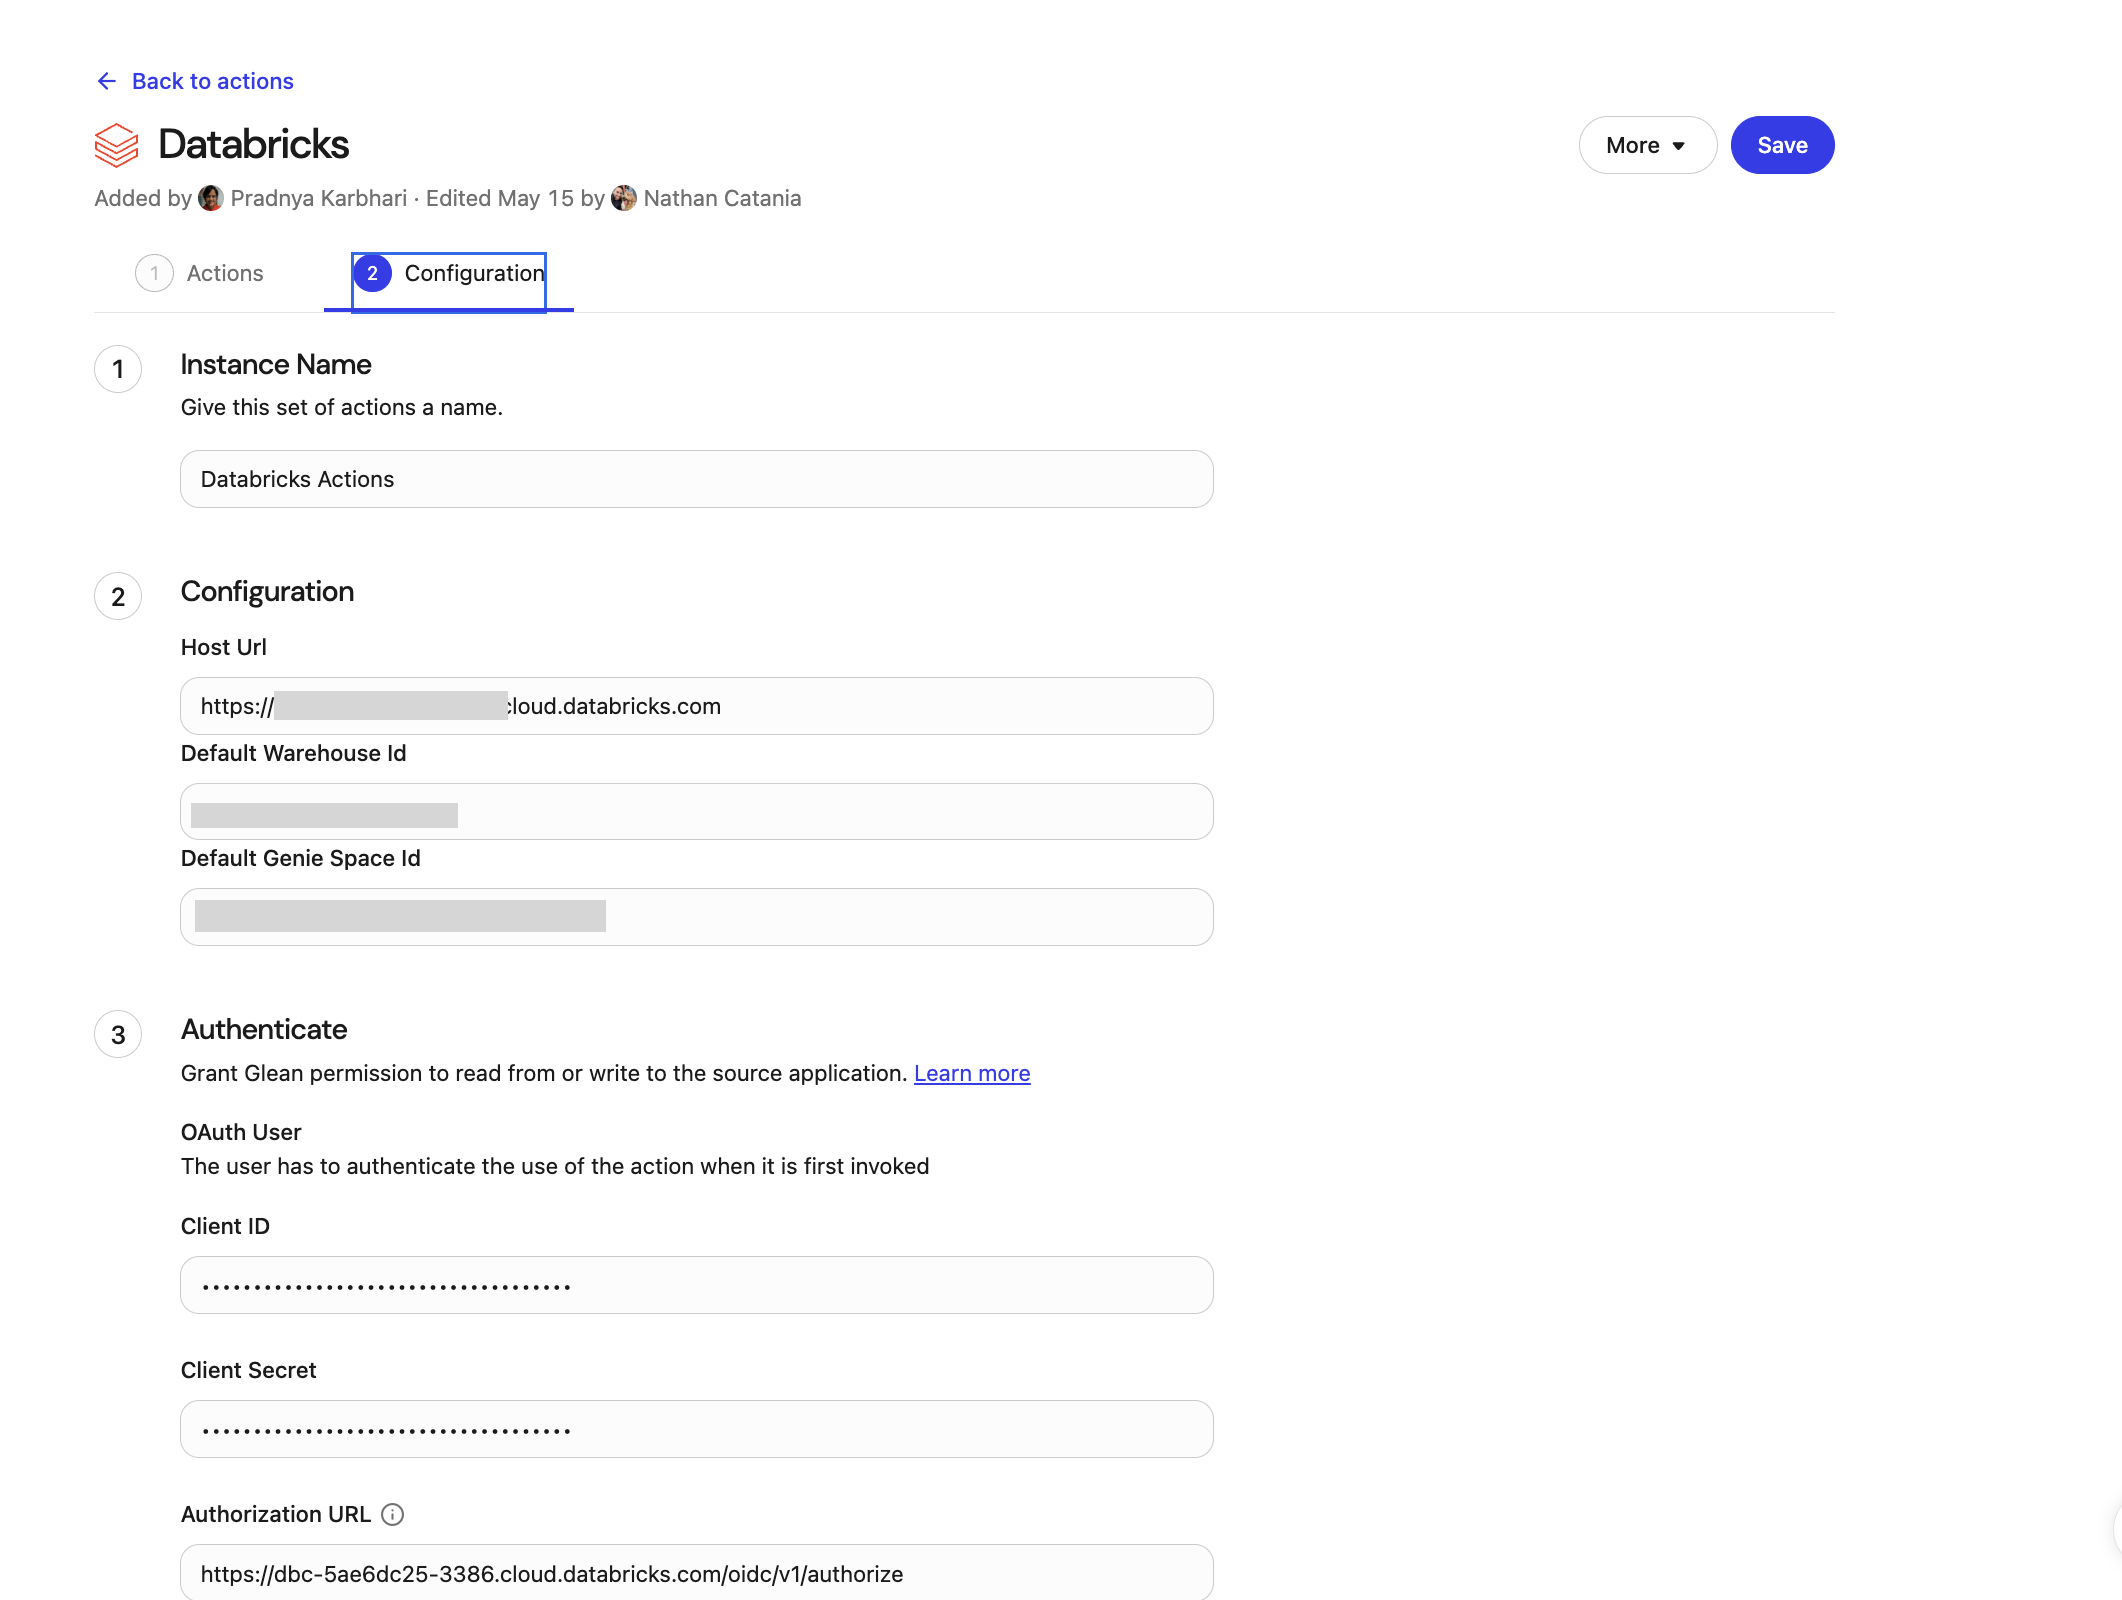
- Final Action Setup should look like this–

User OAuth Setup
AWS Databricks
- Login to Databricks account
- Go to “Manage Account” —> “Settings” —> “App Connections”
- Click “Add Connection”
- Populate an appropriate Application Name like “Glean Databricks Genie OAuth”
- Add a dummy URL in the Redirect URL box.
- Set “Access Scopes” to “All APIs”
- Ensure “Generate a Client Secret” is checked
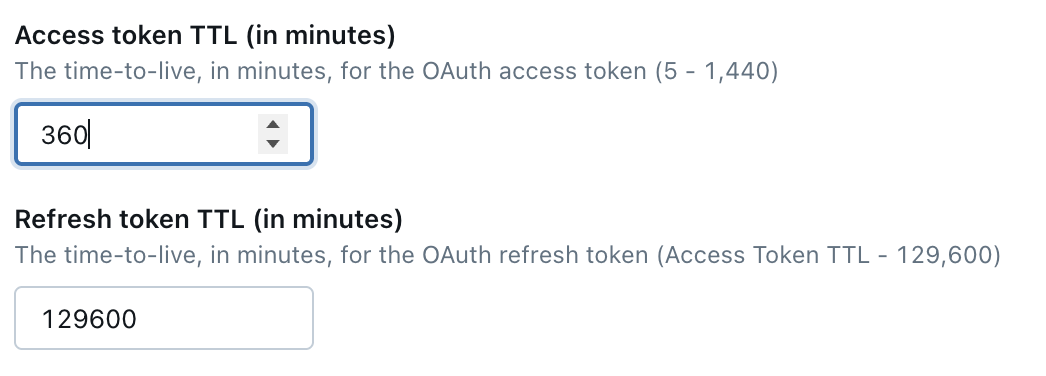
- Adjust the TTLs for access token and refresh token.
- For access tokens we recommend expiry of 6 hours (360 mins) you can go for a custom value too in case of security considerations.
- For refresh tokens we recommend expiry of 3 months (129600 mins) which is an industry standard too. A longer expiry is required here so that your background agents can keep running without having to reauthenticate frequently.

- Save the application.
- Copy the Client Id and Client Secret into the Authentication section of the Action you are setting up in this section.
- After the Action is saved in this section, a Callback URL will be generated in the Authentication section of the Action. Copy that URL.
- Edit the OAuth application on the Databricks account, and update it with the Callback URL from the previous step.
- Final OAuth app setup should look like this

Azure Databricks
- Login to Databricks account
- Go to “Manage Account” —> “Settings” —> “App Connections”
- Click “Add Connection
- Populate an appropriate Application Name like “Glean Databricks Genie OAuth”
- Add a dummy URL in the Redirect URL box.
- Set “Access Scopes” to “All APIs”
- Ensure “Generate a Client Secret” is checked
- Adjust the TTLs if required. Default is fine as well.
- Save the application.
- Copy the Client Id and Client Secret into the Authentication section of the Action you are setting up in this section.
- After the Action is saved in this section, a Callback URL will be generated in the Authentication section of the Action. Copy that URL.
- Edit the OAuth application on the Databricks account, and update it with the Callback URL from the previous step.