Key Features
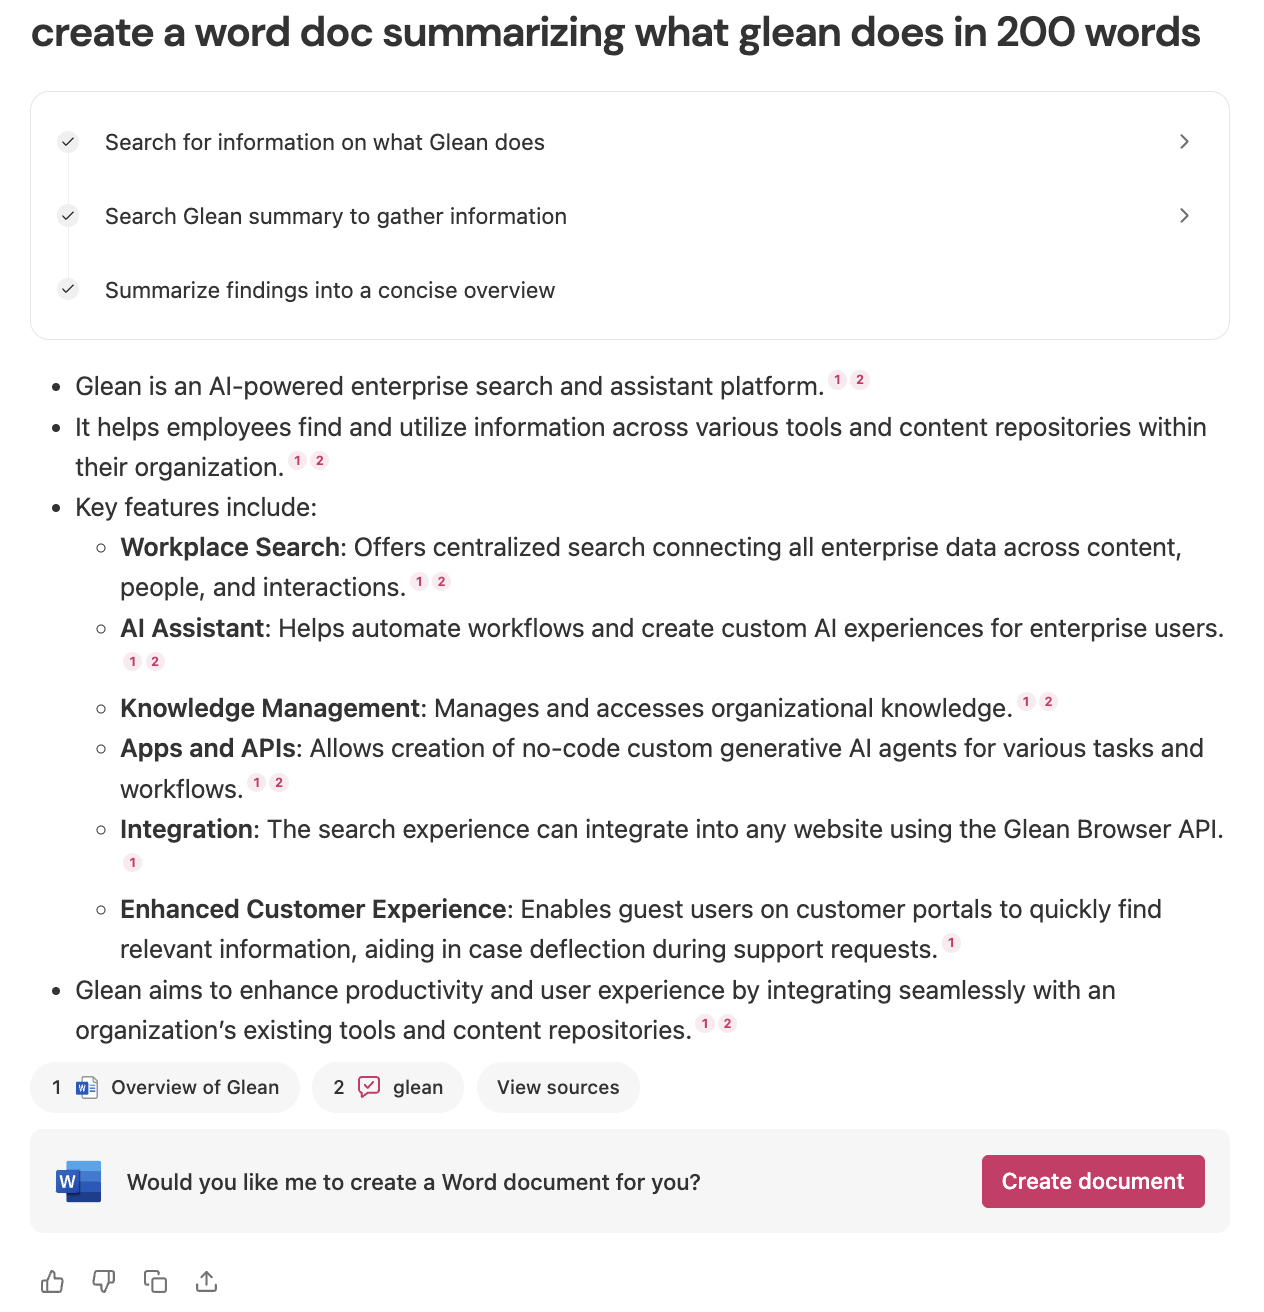
- Export to Word: All assistant responses will have an option to export to word, clicking on which a word doc will be created in OneDrive containing the entire assistant response, with the formatting preserved.
- Export to Excel: All tables generated in Glean Assistant will have an option to Export to Excel, clicking on which an excel sheet will be created in OneDrive containing the table response, with headings preserved.
- Draft as Email: All assistant responses will have an option to export to email, clicking on which users will be taken to Outlook where they can view the assistant response as a draft email, with the formatting preserved.

Setup
Admins can enable this feature by going to Glean and navigating to Admin -> ActionsSelect data source
Select the O365 data source you want to link these actions to, this is the instance where docs/sheets would get created.
Setup Authentication
Choose one of the following authentication options:
- Option 1: Central - this uses the default OAuth App already set up for you. This is the quickest way to start using Microsoft 365 Actions
- Option 2: Custom - this requires you to create a new custom OAuth App. Please follow the steps below to setup a new custom OAuth app
Creating a Custom OAuth App
Creating a Custom OAuth App
Please follow the below instructions to create a custom OAuth app to use for Microsoft 365 actions.Step 1: Register an AppRegister an app using this link: https://learn.microsoft.com/en-us/entra/identity-platform/quickstart-register-app?tabs=certificateMake sure to choose “Single tenant” and click Register.Leave the “Redirect URI” as blank for now, we shall fill this later.Step 2: Copy Important IDsClientId
(Screenshot of ClientId location)TenantId
(Screenshot of TenantId location)ClientSecret
This can be found in Manage -> Certificates & secrets -> Add a client secret -> Copy the value of the secret generated
(Screenshots of ClientSecret generation process)Step 3: Add Permissions
- Go to Manage -> API Permissions (Screenshot of API Permissions page)
- Go to Add Permissions -> Choose Delegated Permissions (Screenshot of Delegated Permissions selection)
- Mail.ReadWrite
- Files.ReadWrite
- Sites.ReadWrite.All
- offline_access
- User.Read
- Openid
- Go to the Glean Microsoft 365 Action setup
- Paste the values of Client ID and Client Secret that were copied earlier into the right fields
- Paste the following values for the other fields (replace <tenant_id> with the Tenant ID that was copied earlier):
- Authorization url:
https://login.microsoftonline.com/\<tenant_id\>/oauth2/v2.0/authorize - Token url:
https://login.microsoftonline.com/\<tenant_id\>/oauth2/v2.0/token
- Authorization url:
- Click on Save!
- You should see a Callback url appear at the bottom of the screen above, copy this callback url
- Go to the Microsoft OAuth app registration again
- Go to Manage -> Authentication -> Configure Web -> Paste the callback url in the Redirect URIs input field
- If you would like admins to allow consent for organization, choose the first option
- If you want users to be able to consent individually the first time they use, choose the third option
- If you want users to be able to consent but only for selected permissions, select the second option and add the above permissions added for the app (otherwise some users might be able to consent for more scopes than configured in the app)
Usage
Once enabled, please go to Glean Assistant and try exporting an Assistant response to Docs. Sheets or Email.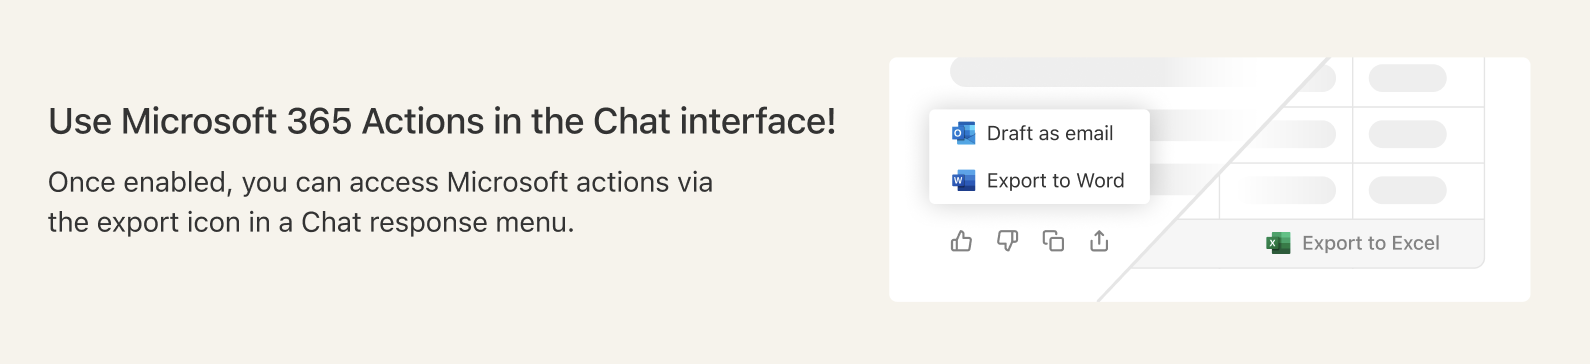
Note
The first time a user uses an action, they are prompted to connect / authorize this action. Depending on your enterprise settings, there might be an approval required by an admin before users can start using these actions (i.e. when a end-user clicks on connect, they might be shown a message that they need to request permission from an admin) To resolve this, the Microsoft admin needs to go to the Enterprise applications page and grant permissions:-
For Central OAuth app:
- In the enterprise applications page -> Search for Glean
- Go to the permissions tab
- Click on “Grant admin consent for Glean Technologies”
-
For Custom OAuth app:
- In the enterprise applications page -> Search for your custom app
- Go to the permissions tab
- Click on “Grant admin consent for your app”
Admins only need to do this once!
Once an admin grants these permissions to the app (either Glean or their custom app) - future users using the action won’t need to request for admin permission. The future users will still see the connect button the first time they use the action, but won’t require admin permission, and can connect by themselves.Further reading
- Once you’ve set up the Microsoft 365 Action, refer to the Microsoft 365 agent article on how to test this action pack in the agent builder.