Zendesk Action Overview
The Zendesk action pack provides:- Add Comment to Zendesk Ticket: Add internal notes or public replies to existing Zendesk tickets
- Quickly adding updates to tickets from Slack or other communication channels
- Documenting troubleshooting steps and internal notes
- Providing customer responses without leaving your current workflow
- Maintaining conversation history and context within tickets
- Supporting both public replies and private internal notes
Enable Zendesk Actions
Admins can enable Zendesk actions by going to the Admin Console and navigating to Admin > Platform > Actions.- Click Actions > Add > Add pre-set actions.
- Select Zendesk Actions from the list of pre-set actions.
- In the Configuration, select Datasource Instance to link this action to your Zendesk instance.
- Set up authentication:
- Option 1: Central - Use the default OAuth App already configured for you. This is the quickest way to start using Zendesk Actions.
- Option 2: Custom - Create a new custom OAuth App. Please follow the Creating a Custom OAuth App to set up a new custom OAuth app.
- Click Save. The Zendesk Action is now ready to use.
Creating a Custom OAuth App
Creating a Custom OAuth App
To set up OAuth for your Zendesk Action, perform the following steps:
Step 1: Create a new OAuth client in Zendesk
- Navigate to your Zendesk Admin Center.
- Go to Apps and integrations > APIs > Zendesk API.
- Click on the OAuth Clients tab.
- Click Add OAuth Client.
- Fill in the following details:
- Client Name: Glean Actions (or another descriptive name)
- Description: OAuth client for Glean Assistant integration
- Company: Your company name
- Logo URL: (optional)
Step 2: Configure OAuth settings
- Set the Redirect URLs - you’ll get this from Glean in Step 4.
Step 3: Save and retrieve credentials
- Click Save to create the OAuth client.
- Copy the Client ID (also called Unique Identifier).
- Copy the Client Secret - make sure to save this securely as it won’t be shown again.
Step 4: Configure in Glean
- Go to the Zendesk Actions setup page in Glean.
- Select Custom for authentication.
- Fill in the following fields:
- Client ID: The identifier from Step 3
- Client Secret: The secret from Step 3
- Save the Action pack.
- At the bottom of the Authentication section, you’ll see a generated Callback URL.
- Copy this Callback URL.
Step 5: Update the callback URL in Zendesk
- Return to your Zendesk OAuth client settings.
- Edit the OAuth client you created.
- Add the Callback URL from Glean to the Redirect URLs field.
- Save the changes.
Action Configuration
Prerequisites
- Authentication: Each user must authenticate with Zendesk when first using this action. The authentication persists for future use.
- Permissions: Users can only add comments to tickets they have permission to view in Zendesk.
Required Parameters
The Add Comment to Zendesk Ticket action requires the following parameters:ticket_id(required): The ID of the ticket to comment oncomment(required): The comment text to addpublic(optional): Whether the comment is public (visible to the requester) or Internal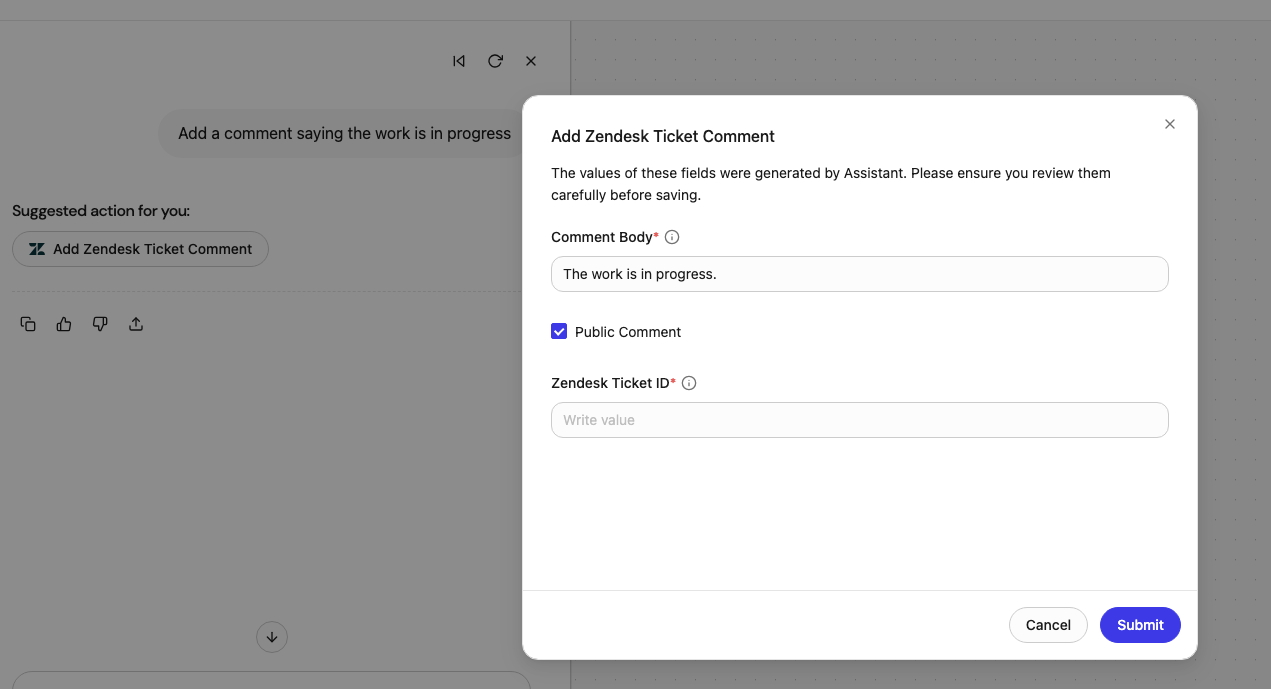
Usage Examples
- Customer Reply: Add a public comment to provide a status update or solution to the customer
- Internal Note: Add a private note documenting troubleshooting steps or internal discussion
- Escalation Note: Add an internal comment when escalating to another team
- Resolution Documentation: Add details about how an issue was resolved for future reference
Testing Your Setup
After completing the setup:- Navigate to the Agent Builder in Glean.
- Create a new agent or modify an existing one.
- Add the Zendesk Add Comment action to your agent.
- Configure the action with:
- How to identify the ticket ID (from user input, previous search, or extracted from context)
- Whether comments should be public or internal by default
- Any standard signatures or formatting
- Test with sample queries like:
- “Add a comment to ticket #12345 saying we’re investigating the issue”
- “Post an internal note on ticket #67890 about the workaround we discussed”
- “Reply to ticket #11111 that the issue has been resolved”
Troubleshooting
Common issues and solutions: Authentication Errors:- Verify the Client ID and Client Secret are correct
- Ensure the callback URL is properly configured in both Glean and Zendesk
- Check that the OAuth client has the necessary scopes enabled
- Verify the user has appropriate permissions in Zendesk to view and comment on tickets
- Check if the Zendesk instance has API access enabled
- Ensure the OAuth app has the correct scopes for reading tickets and writing comments
- Verify the ticket ID is correct and the ticket exists
- Ensure the user has permission to access the specific ticket
- Check if the ticket is in a suspended or deleted state
- Verify the comment text is not empty
- Check if there are any Zendesk triggers blocking the comment
- Ensure the comment doesn’t exceed size limits